D 4.6 2
D_4
.6_0
1_G
B.
fm
2
-38
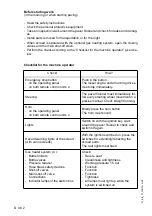
Before starting work
(in the morning or when starting paving)
- Heed the safety instructions.
- Check the personal protective equipment.
- Take an inspection walk around the paver finisher and check for leaks and damag-
es.
- Install parts removed for transportation or for the night.
- When screed is operated with the optional gas heating system, open the closing
valves and the main shut-off valve.
- Perform the check according to the ”Checklist for the machine operator” given be-
low.
Checklist for the machine operator
Check!
How?
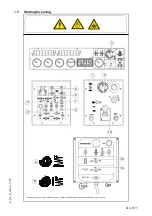
Emergency stop button
- on the operating panel
- on both remote control units
o
Push in the button.
The diesel engine and all running drives
must stop immediately.
Steering
The paver finisher must immediately fol-
low every steering wheel movement in a
precise manner. Check straight running.
Horn
- on the operating panel
- on both remote control units
o
Briefly press the horn button.
The horn must sound.
Lights
Switch on with the ignition key, walk
around the paver finisher to check and
switch off again.
Hazard warning lights of the screed
(with vario screeds)
With the ignition switched on, press the
switches for extending/retracting the
screed parts.
The rear lights must flash.
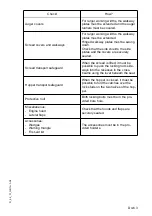
Gas heater system (
o
):
- Bottle holders
- Bottle valves
- Pressure reducer
- Hose break safety devices
- Shut-off valves
- Main shut-off valve
- Connections
- Indicator lamps of the switch box
Check:
- Secure seat
- Cleanliness and tightness
- Working pressure 1.5 bar
- Function
- Function
- Function
- Tightness
- All lamps must light up when the
system is switched on
Summary of Contents for DYNAPAC Svedala Demag DF 115 C
Page 2: ...VALUE QUALITY THE ORIGINAL Your Authorized Dynapac Dealer...
Page 10: ......
Page 18: ......
Page 20: ......
Page 44: ......
Page 58: ......
Page 62: ...D 1 4 4 D_1 4_01_GB fm 4 22 Element2_konv_Kette_635 bmp 9 12 9a 5 8 14 A 6 7 13...
Page 64: ...D 1 4 6 D_1 4_01_GB fm 6 22 Element2_konv_Kette_635 bmp 9 12 9a 5 8 14 A 6 7 13...
Page 96: ......
Page 120: ...D 4 6 24 D_4 6_01_GB fm 24 38 2 2 Error messages...
Page 121: ...D 4 6 25 D_4 6_01_GB fm 25 38...
Page 122: ...D 4 6 26 D_4 6_01_GB fm 26 38...
Page 123: ...D 4 6 27 D_4 6_01_GB fm 27 38...
Page 124: ...D 4 6 28 D_4 6_01_GB fm 28 38...
Page 125: ...D 4 6 29 D_4 6_01_GB fm 29 38 2 3 FMI codes...
Page 134: ......
Page 146: ...E 01 12 E_01_GB fm 12 18 3 Auger extension auger type II Auger_DEM bmp...
Page 152: ......
Page 154: ......
Page 157: ...F 3 0 1 F_3 0_01_GB fm 1 4 F 3 0 Maintenance Conveyor 1 Maintenance Conveyor...
Page 161: ...F 4 1 1 F_4 1_01_GB fm 1 8 F 4 1 Maintenance Auger 1 Maintenance auger sub unit...
Page 168: ......
Page 180: ......
Page 181: ...F 6 0 1 F_6 0_01_GB fm 1 8 F 6 0 Maintenance Hydraulic system 1 Maintenance hydraulic system...
Page 220: ......
Page 221: ...F 10 0 1 F_10 0_01_GB fm 1 6 F 10 0 Checks decommissioning 1 Tests check up cleaning stopping...
Page 226: ......

