


Chapter 3: Installation options
3-2
3.1
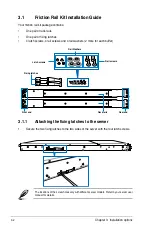
Friction Rail Kit Installation Guide
Your friction rail kit package contains:
•
One pair of rack rails
•
One pair of fixing latches
•
4 latch screws, 4 rail screws and 4 rail washers (2 more for each buffer)
3.1.1
Attaching the fixing latches to the server
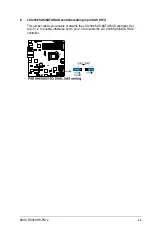
1.
Secure the two fixing latches to the two sides of the server with the four latch screws.
Rack rails
Fixing latches
Front end
Rear end
Latch screws
Rail screws
Rail Washers
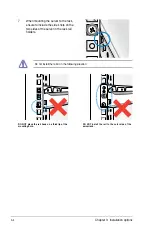
The locations of the screw holes vary with different server models. Refer to your server user
manual for details.
Summary of Contents for RS300-H8-PS12
Page 1: ...1U Rackmount Server RS300 H8 PS12 User Guide ...
Page 12: ...xii ...
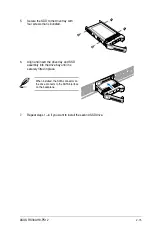
Page 29: ...2 7 ASUS RS300 H8 PS12 4 Secure the airduct cover to the motherboard with a screw ...
Page 72: ...Chapter 4 Motherboard information 4 24 ...
Page 110: ...5 38 Chapter 5 BIOS setup ...
Page 148: ...6 38 Chapter 6 RAID configuration ...
Page 188: ...7 40 Chapter 7 Driver installation 8 When done click Finish ...
Page 192: ...A 4 Appendix ...


