5-4
Chapter 5: BIOS information
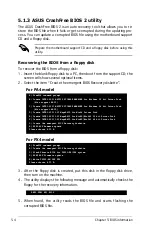
5.1.3 ASUS CrashFree BIOS 2 utility
The ASUS CrashFree BIOS 2 is an auto recovery tool that allows you to re-
store the BIOS file when it fails or gets corrupted during the updating pro-
cess. You can update a corrupted BIOS file using the motherboard support
CD and a floppy disk.
Prepare the motherboard support CD and a floppy disk before using this
utility.
Recovering the BIOS from a floppy disk
To recover the BIOS from a floppy disk:
1. Insert the blank floppy disk to a PC, then boot from the support CD; the
screen will show several optional items.
2. Select the item “ Create the emergent BIOS Recovery diskette”.
A) FreeDOS command prompt
B) Create INTEL 6321 MATRIX STORAGE MANAGER for Windows 32 bit Driver Disk.
(Also support AHCI.)
C) Create INTEL 6321 MATRIX STORAGE MANAGER for Windows 64 bit Driver Disk.
(Also support AHCI.)
D) Create INTEL 6321 LSI MegaRAID for Win2k Driver Disk
E) Create INTEL 6321 LSI MegaRAID for WinXP/Win2k3 32 bit Driver Disk
F) Create INTEL 6321 LSI MegaRAID for WinXP/Win2k3 64 bit Driver Disk
G) Create the emergent BIOS Recovery diskette
H) ESB2 ASF firmware update
Please choose A TO H:
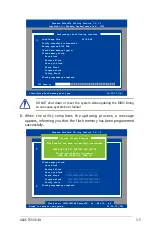
5. When found, the utility reads the BIOS file and starts flashing the
corrupted BIOS file.
RN50 DDR1 A21 BIOS
3. After the floppy disk is created, put this disk in the floppy disk drive,
then turn on the machine.
4. The utility displays the following message and automatically checks the
floppy for the recovery information.
A) FreeDOS command prompt
B) Create the emergent BIOS Recovery diskette
C) Flash Phoenix BIOS for TS500-E4/PX4 system
D) ESB2 ASF Firmware update
E) Write TS500-E4/PX4 FRU
Please choose A TO E:
For PA4 model
For PX4 model
Summary of Contents for Pedestal/5U Rackmount Server TS500-E4 Server
Page 1: ...TS500 E4 Server Pedestal 5U Rackmount Server User s Manual ...
Page 12: ...xii ...
Page 76: ...Chapter 3 Installation option 3 ...
Page 136: ...5 42 Chapter 5 BIOS information ...
Page 176: ...6 40 Chapter 6 RAID configuration ...
Page 191: ...ASUS TS500 E4 7 15 8 Follow the screen instructions to complete installation ...
Page 196: ...7 20 Chapter 7 Driver installation ...
Page 202: ...Appendix Reference information A ...

