


File Transfer Operations
165
NetLinx Studio - Instruction Manual
2.
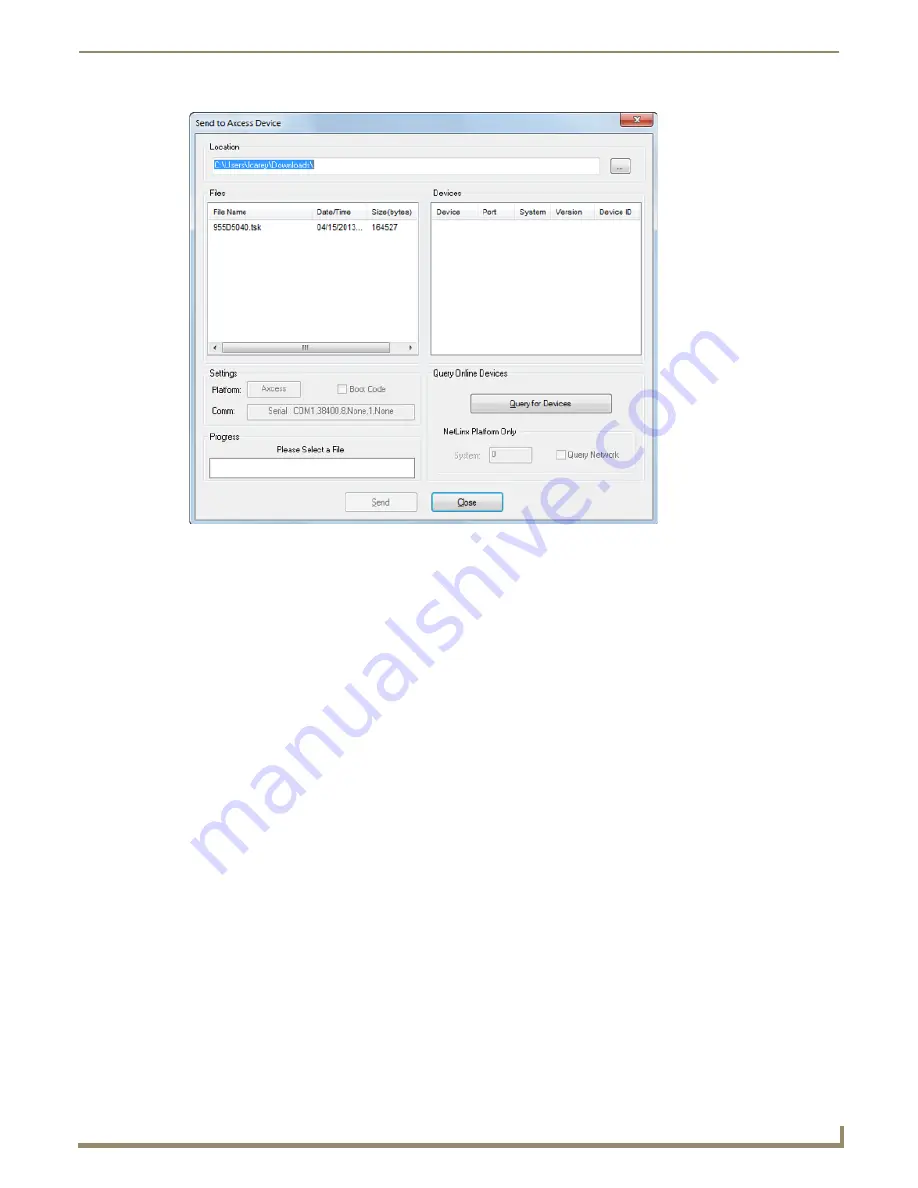
Click the
Browse (...)
button to navigate to the target directory (in the
Browse For Folder
dialog). The selected
directory path is displayed in the Location field. Assuming that the specified target directory contains one or more
TSK files, the TSK files in the selected directory are displayed in the
Files
list box (with the file's last modification
date and time).
3.
Select the desired TSK file from the list.
4.
Click the
Query
command button to populate the
Devices
list with a list of all Axcess devices currently online and
capable of receiving the firmware.
5.
Select the target AxLink device from the list.
6.
Review the
File
, Connection, and
Target Device
information before you send.
Click the
Send
button to send the selected TSK file to the specified device. You can watch the progress of the
transfer in the
Send to Axcess Device
dialog.
Once the TSK file has been transferred, the program prompts you to reboot the Master.
7.
Click
Yes
to reboot, and the program initiates the reboot sequence. When the Master has rebooted, the Status LED
on the front panel of the Master blinks once a second to indicate that it is functioning properly.
8.
Once it has rebooted, click
OK
.
FIG. 244
Send To Axcess Device dialog
Summary of Contents for NetLinx Studio
Page 40: ...Working with Projects 28 NetLinx Studio Instruction Manual...
Page 148: ...Communication Settings 136 NetLinx Studio Instruction Manual...
Page 160: ...Working with Online Devices 148 NetLinx Studio Instruction Manual...
Page 178: ...File Transfer Operations 166 NetLinx Studio Instruction Manual...
Page 208: ...Tools Menu Options 196 NetLinx Studio Instruction Manual...
Page 229: ...Setting Program Preferences 217 NetLinx Studio Instruction Manual...


