


NetLinx Firmware Upgrades
69
Enova DVX-3150HD/3155HD All-in-One Presentation Switcher Operation/Reference Guide
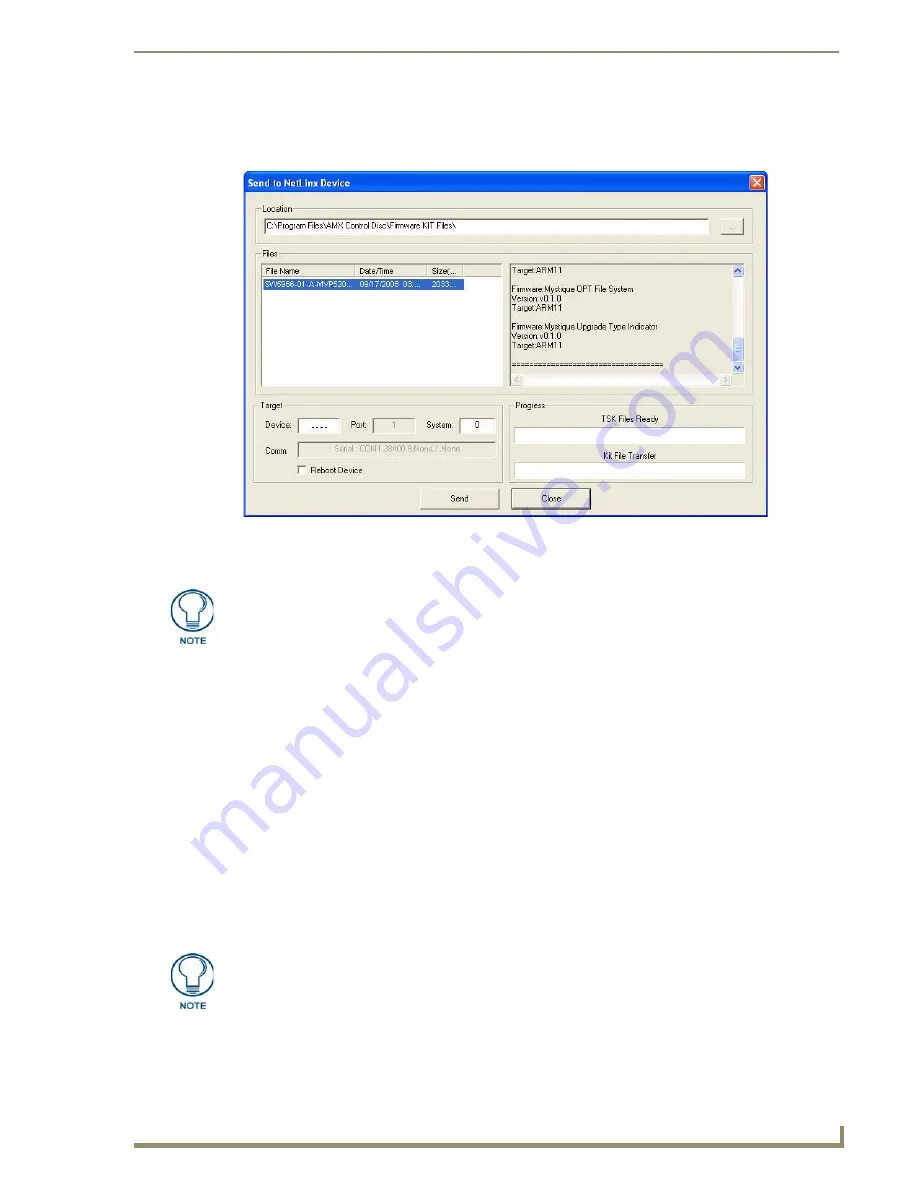
Assuming that the specified target directory contains one or more KIT files, the KIT files in the
selected directory are displayed in the
Files
list box, with the file's last modified date and time
(FIG. 64).
3.
Select the appropriate *.KIT file from the
Files
list.
4.
Enter the Device ID number of the integrated device to be upgraded in the
Device
text box and the
System ID numbers for the DVX in the
System
text box.
The device number of the NetLinx Master is
0
.
By default, the Device number assigned to the integrated control ports is
5001
.
By default, the Device Number assigned to the integrated A/V switcher is
5002
.
Use the Online Device Tree to determine the device's assigned IDs, if it has been changed.
5.
Review the File, Connection, Address, and Target Device information before you send.
6.
Click the
Send
button. You can watch the progress of the transfer in the
Send to NetLinx Device
dialog.
NetLinx Studio transfers the files to the DVX and then tells it to reboot. After it reboots, the DVX
actually goes through the upgrade process.
During the upgrade process, the Status LED blinks, and the DVX stays offline.
Once the upgrade is complete, the LED will stop blinking and the DVX will be online.
Repeat the firmware update process for the next device until all devices are updated.
FIG. 64
Send To NetLinx Device dialog (NetLinx Studio)
5600
Always update DVX devices in the following order:
Device 0 (NetLinx Master)
Device 5001 (Integrated Control Ports)
Device 5002 (A/V Switcher)
Upgrading the Master or device firmware can take several minutes. If you are unsure
of the progress of the upgrade, you can see the status of the upgrade on the LCD
display on the front panel of the All-In-One Presentation Switcher.


