


Audio/Video Configuration
57
Enova DVX-3150HD/3155HD All-in-One Presentation Switcher Operation/Reference Guide
Video Settings
The Video Out tab enables you to set the resolution, aspect ratio, and picture qualities of each individual video
input. Any changes you make reflect instantaneously on your source input and output devices.
Video Out
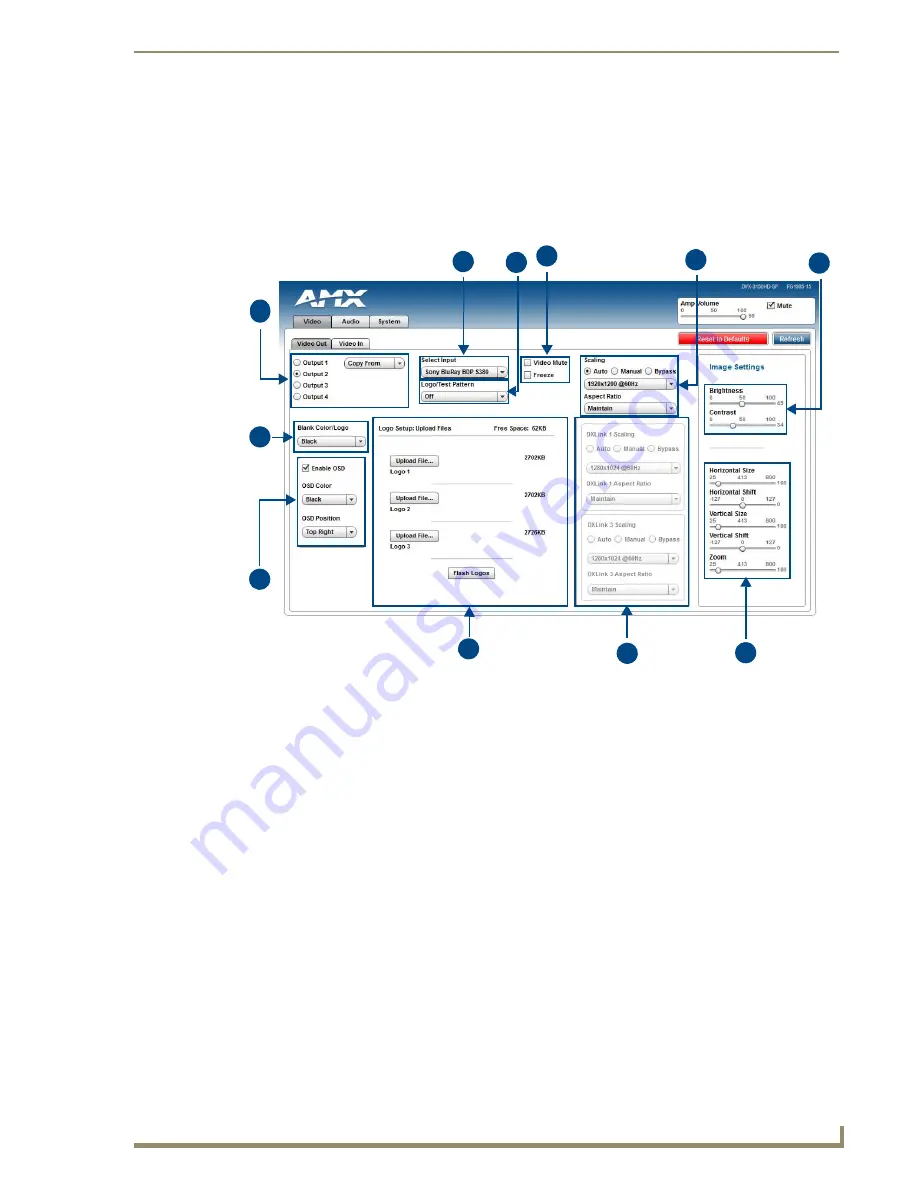
FIG. 57 displays the Video Out page for the DVX.
FIG. 57
WebConsole Configuration page - Video Out tab
1 -
Output Select
: Select the corresponding option button to select the video output to adjust. When you select
an output, the other options on the page change to reflect the output’s current settings. You can copy the
settings from one output to the selected output by using the Copy From menu.
Note:
If you have a Virtual device using the same port (5002) as the DVX, all notifications are routed to virtual
device rather than the DVX. In this case, initial states for the video outputs will not be represented in the Web
Console. When possible, avoid using virtual devices on the same port as the DVX.
2 -
Blank Color/Logo
: Use the drop-down menu to select the color of the blank screen on the output. If you
have uploaded a logo to display on the output, you can also select the logo from this menu.
3 -
OSD
: This area allows you to activate the on-screen display. When enabled, the input name and resolution
displays in a small box in a corner of the screen whenever you select a new input source. From the available
menus in the same area, you can select the color scheme and location of the OSD.
4 -
Select Input
: Use the menu to select a video input to be switched to the selected video output.
5 -
Logo/Test Pattern
: Use the menu to choose an image logo or output test pattern to display on the video
output. Select Off to disable the logo or test pattern and view video from the selected source. You can choose
from Off, Color Bar, Gray Ramp, SMPTE Bar, HiLoTrak, Pluge, and Cross Hatch. If you have uploaded a logo
to display on the output, you can also select the logo from this menu.
6 -
Video Mute
: Click to toggle whether the video is muted (blanked) on the video output.
Freeze
: Click the check box to freeze the current image so that it remains on the screen.
4
1
2
3
7
5
4
6
8
9
10
11


