Chapter 3
63
Basic Operation
Creating and Applying User Flatness Correction
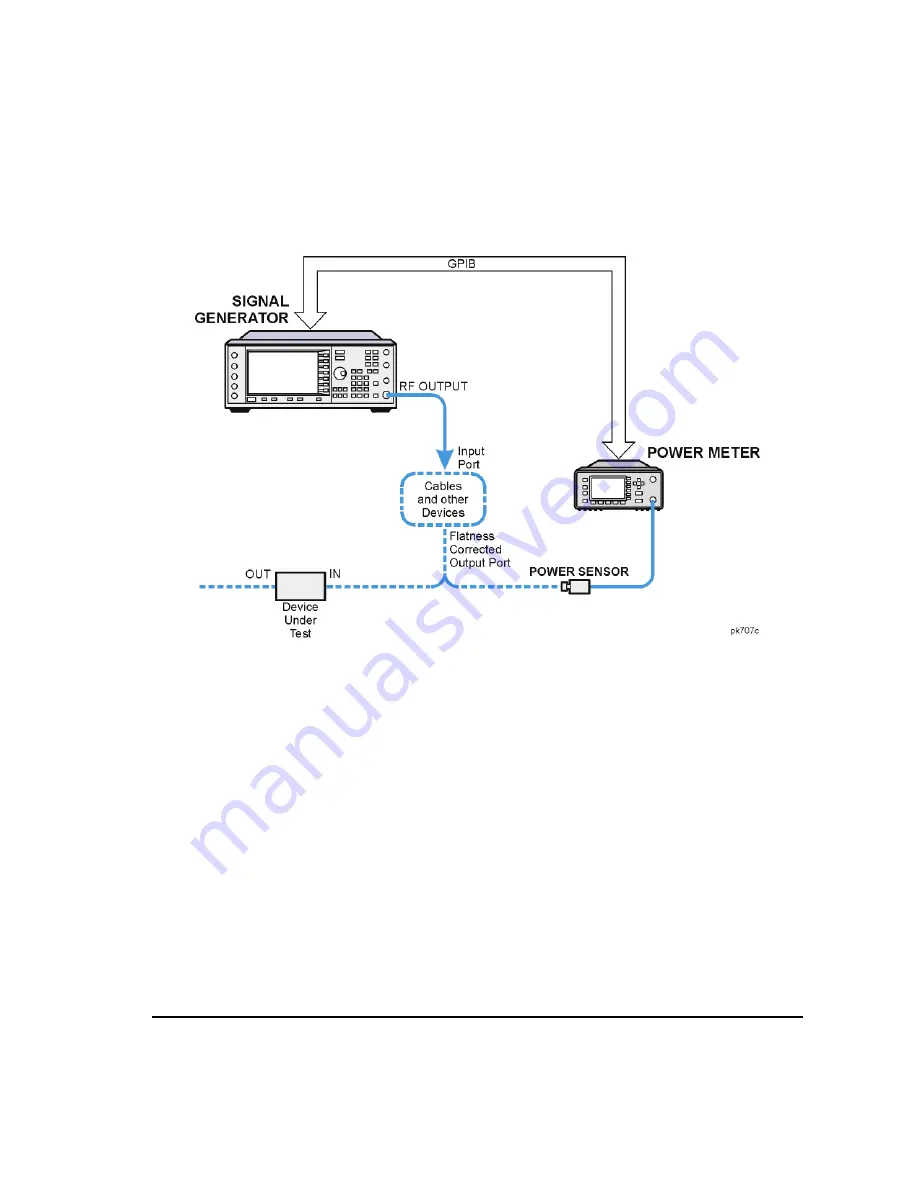
Figure 3-5
User Flatness Correction Equipment Setup
Configure the Signal Generator
1. Press
Preset
.
2. Configure the signal generator to interface with the power meter.
a. Press
Amplitude
>
More (1 of 2)
>
User Flatness
>
More (1 of 2)
>
Power Meter
>
E4416A
,
E4417A
,
E4418B
,
or
E4419B
.
b. Press
Meter Address
> enter the power meter’s GPIB address >
Enter
.
c. For E4417A and E4419B power meters, press
Meter Channel A B
to select the power meter’s active
channel.
d. Press
Meter Timeout
to adjust the length of time before the instrument generates a timeout error if
unsuccessfully attempting to communicate with the power meter.
3. Press
More (2 of 2)
>
Configure Cal Array
>
More (1 of 2)
>
Preset List
>
Confirm Preset
.
This opens the User Flatness table editor and presets the cal array frequency/correction list.
Summary of Contents for E4428C
Page 22: ...Contents xxii ...
Page 224: ...200 Chapter 4 Basic Digital Operation Creating and Using Bit Files ...
Page 228: ...204 Chapter 5 AWGN Waveform Generator Configuring the AWGN Generator ...
Page 229: ...205 6 Analog Modulation ...
Page 276: ...252 Chapter 7 Digital Signal Interface Module Operating the N5102A Module in Input Mode ...
Page 286: ...262 Chapter 8 Bluetooth Signals Turning On a Bluetooth Signal ...
Page 330: ...306 Chapter 9 BERT Verifying BERT Operation ...
Page 366: ...342 Chapter 10 CDMA Digital Modulation IS 95A Modulation ...
Page 394: ...370 Chapter 12 Multitone Waveform Generator Applying Changes to an Active Multitone Signal ...
Page 468: ...444 Chapter 15 W CDMA Digital Modulation for Component Test W CDMA Frame Structures ...
Page 667: ...643 18 Troubleshooting ...
Page 700: ...Index 676 Index ...


