Printing the Display
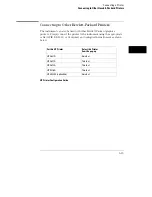
After connecting the printer to the instrument and setting the printer and
instrument configurations, apply power to the printer.
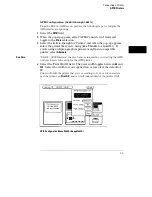
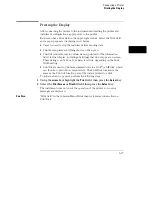
Each menu has a Print field in the upper-right corner. Select the Print field
and a pop-up appears, displaying your choices.
•
Cancel is used to stop the instrument from sending data.
•
Print Screen prints everything shown on the screen.
•
Print All (available only in certain menus) prints all of the information
listed for that display, including any listings that do not appear on screen.
These listings can be 80 or 132 characters wide, depending on the Print
Width setting.
•
Print Disk is used to print measurement data to a DOS
or LIF disk, which
can then be copied into a computer file. The Print Disk function is the
same as the Print All function except the data is printed to a disk.
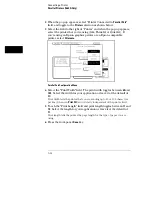
To initiate a hard copy print, perform the following steps:
1
Using the
arrow
keys highlight the
field, then press the
Select
key.
2
Select the
Print Screen
or
Print All
field, then press the
Select
key.
The instrument does not check the operation of the printer, so no error
messages are displayed.
See Also
"Print field" in the Common Menu Fields chapter for more information on
Print Disk.
Connecting a Printer
Printing the Display
5–17
Summary of Contents for 1660A Series
Page 5: ...vi...
Page 14: ...1 Introduction...
Page 24: ...2 Probing...
Page 35: ...Probing Assembling the Probing System 2 12...
Page 36: ...3 Using the Front Panel Interface...
Page 65: ...3 30...
Page 66: ...4 Using the Mouse and the Optional Keyboard...
Page 74: ...5 Connecting a Printer...
Page 91: ...5 18...
Page 92: ...6 Disk Drive Operations...
Page 118: ...7 The RS 232C GPIB and Centronix Interface...
Page 121: ...RS 232 GPIB Menu Map Cont The RS 232C GPIB and Centronix Interface 7 4...
Page 123: ...Printer Controller Menu Map Cont The RS 232C GPIB and Centronix Interface 7 6...
Page 132: ...8 The System Utilities...
Page 137: ...9 The Common Menu Fields...
Page 150: ...9 14...
Page 151: ...10 The Configuration Menu...
Page 159: ...11 The Format Menu...
Page 161: ...Format Menu Map The Format Menu 11 3...
Page 194: ...11 36...
Page 195: ...12 The Trigger Menu...
Page 198: ...Trigger Menu Map The Trigger Menu 12 4...
Page 199: ...Trigger Menu Map Continued The Trigger Menu 12 5...
Page 235: ...13 The Listing Menu...
Page 237: ...Listing Menu Map The Listing Menu 13 3...
Page 260: ...13 26...
Page 261: ...14 The Waveform Menu...
Page 263: ...Waveform Menu Map The Waveform Menu 14 3...
Page 264: ...Waveform Menu Map cont The Waveform Menu 14 4...
Page 300: ...14 40...
Page 301: ...15 The Mixed Display Menu...
Page 306: ...15 6...
Page 307: ...16 The Chart Menu...
Page 310: ...Chart Menu Map The Chart Menu 16 4...
Page 311: ...Chart Menu Map cont The Chart Menu 16 5...
Page 336: ...16 30...
Page 337: ...17 The Compare Menu...
Page 340: ...Compare Menu Map The Compare Menu 17 4...
Page 355: ...18 Error Messages...
Page 363: ...19 Specifications and Characteristics...
Page 377: ...20 Operator s Service...
Page 386: ...Troubleshooting Flowchart 1 Operator s Service To use the flowcharts 20 10...
Page 387: ...Troubleshooting Flowchart 2 Operator s Service To use the flowcharts 20 11...


