


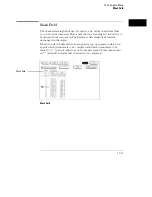

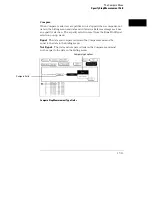


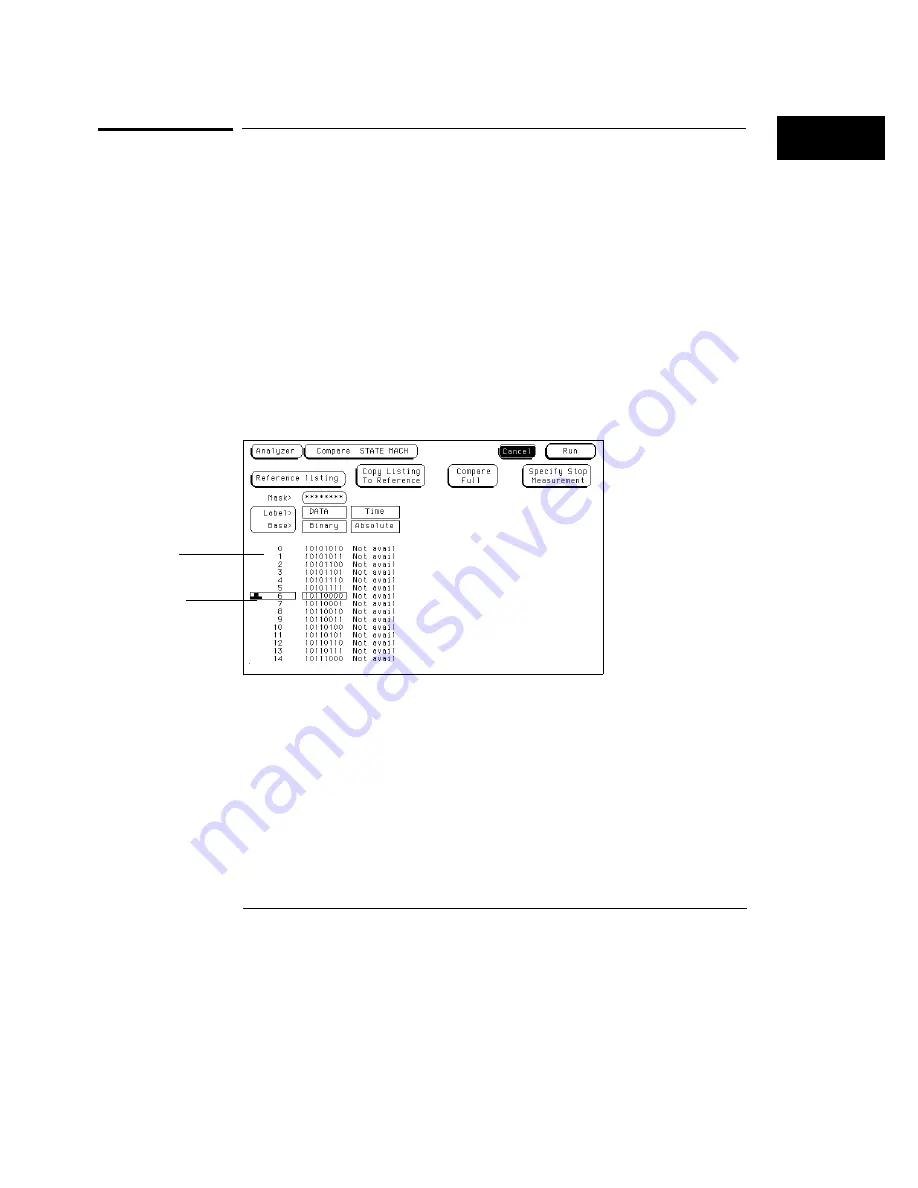
Data Roll Field
The column of numbers at the far left represents the location of the acquired
data in the state analyzer’s memory. The numbered positions are also known
as the state locations.
The column of state locations along with its data can be rolled to display
off-screen data by using the data roll field. The data roll field is the small
rectangular box located in the middle of the state location column.
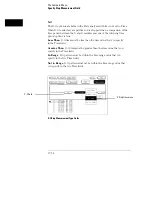
The data roll field is used to either roll the data listing or to select an exact
state for display. When the data roll field has the roll indicator in the field,
the knob is active and can roll data in either direction.
If you want a specific location, highlight the data roll field, then type in a
number from the front-panel keypad. When the keypad is used, the data
listing shifts, leaving the selected state in the data roll box.
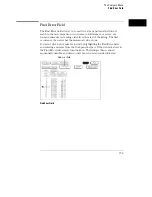
Data Roll Field
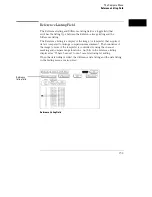
Data roll field
State location
column
The Compare Menu
Data Roll Field
17–15
Summary of Contents for 1660A Series
Page 5: ...vi...
Page 14: ...1 Introduction...
Page 24: ...2 Probing...
Page 35: ...Probing Assembling the Probing System 2 12...
Page 36: ...3 Using the Front Panel Interface...
Page 65: ...3 30...
Page 66: ...4 Using the Mouse and the Optional Keyboard...
Page 74: ...5 Connecting a Printer...
Page 91: ...5 18...
Page 92: ...6 Disk Drive Operations...
Page 118: ...7 The RS 232C GPIB and Centronix Interface...
Page 121: ...RS 232 GPIB Menu Map Cont The RS 232C GPIB and Centronix Interface 7 4...
Page 123: ...Printer Controller Menu Map Cont The RS 232C GPIB and Centronix Interface 7 6...
Page 132: ...8 The System Utilities...
Page 137: ...9 The Common Menu Fields...
Page 150: ...9 14...
Page 151: ...10 The Configuration Menu...
Page 159: ...11 The Format Menu...
Page 161: ...Format Menu Map The Format Menu 11 3...
Page 194: ...11 36...
Page 195: ...12 The Trigger Menu...
Page 198: ...Trigger Menu Map The Trigger Menu 12 4...
Page 199: ...Trigger Menu Map Continued The Trigger Menu 12 5...
Page 235: ...13 The Listing Menu...
Page 237: ...Listing Menu Map The Listing Menu 13 3...
Page 260: ...13 26...
Page 261: ...14 The Waveform Menu...
Page 263: ...Waveform Menu Map The Waveform Menu 14 3...
Page 264: ...Waveform Menu Map cont The Waveform Menu 14 4...
Page 300: ...14 40...
Page 301: ...15 The Mixed Display Menu...
Page 306: ...15 6...
Page 307: ...16 The Chart Menu...
Page 310: ...Chart Menu Map The Chart Menu 16 4...
Page 311: ...Chart Menu Map cont The Chart Menu 16 5...
Page 336: ...16 30...
Page 337: ...17 The Compare Menu...
Page 340: ...Compare Menu Map The Compare Menu 17 4...
Page 355: ...18 Error Messages...
Page 363: ...19 Specifications and Characteristics...
Page 377: ...20 Operator s Service...
Page 386: ...Troubleshooting Flowchart 1 Operator s Service To use the flowcharts 20 10...
Page 387: ...Troubleshooting Flowchart 2 Operator s Service To use the flowcharts 20 11...


