

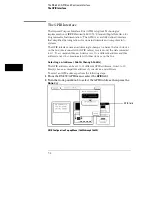


Update FLASH ROM (1660A Through 1663A Only)
For quick and easy updates to the operating system, the logic analyzer uses
flash ROMs. To update the flash ROMs, simply insert the floppy disk
containing the required update files into the disk drive, then select the
Update FLASH ROM field. If you want to continue with the update process,
select Continue. All current setups are lost after the update.
If you are not sure which files are required for the update procedure, a list
will be provided onscreen when you select Continue.
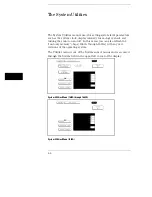
Display Grey Shade Adjustments
The shades of grey that are used to create the display, can be adjusted to
different levels of intensity. The adjustment procedure involves two parts.
First you select the shade number, then you adjust the luminosity of that
shade. Both the shade and the luminosity fields are adjusted by highlighting
the field, then turning the knob.
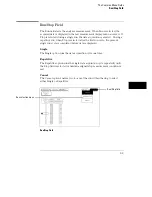
Shade #
The Shade # field is used to select the shade number of which the luminosity
adjustment effects. Shade numbers range from 1 to 7.
Luminosity
The Luminosity field is used to increase or decrease the intensity of the
selected shade number. Luminosity ranges from 0 to 100 percent.
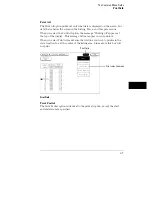
Default Shades
The Default Shades field is used to restore all shade intensity levels to the
default factory settings.
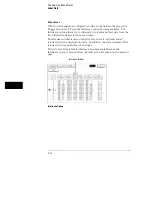
Sound On / Off
Each time the cursor is moved or rolled from one field to another, an audible
"click" is heard. The Sound field toggles the sound On or Off.
The System Utilities
Update FLASH ROM (1660A Through 1663A Only)
8–5
Summary of Contents for 1660A Series
Page 5: ...vi...
Page 14: ...1 Introduction...
Page 24: ...2 Probing...
Page 35: ...Probing Assembling the Probing System 2 12...
Page 36: ...3 Using the Front Panel Interface...
Page 65: ...3 30...
Page 66: ...4 Using the Mouse and the Optional Keyboard...
Page 74: ...5 Connecting a Printer...
Page 91: ...5 18...
Page 92: ...6 Disk Drive Operations...
Page 118: ...7 The RS 232C GPIB and Centronix Interface...
Page 121: ...RS 232 GPIB Menu Map Cont The RS 232C GPIB and Centronix Interface 7 4...
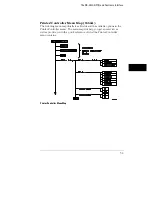
Page 123: ...Printer Controller Menu Map Cont The RS 232C GPIB and Centronix Interface 7 6...
Page 132: ...8 The System Utilities...
Page 137: ...9 The Common Menu Fields...
Page 150: ...9 14...
Page 151: ...10 The Configuration Menu...
Page 159: ...11 The Format Menu...
Page 161: ...Format Menu Map The Format Menu 11 3...
Page 194: ...11 36...
Page 195: ...12 The Trigger Menu...
Page 198: ...Trigger Menu Map The Trigger Menu 12 4...
Page 199: ...Trigger Menu Map Continued The Trigger Menu 12 5...
Page 235: ...13 The Listing Menu...
Page 237: ...Listing Menu Map The Listing Menu 13 3...
Page 260: ...13 26...
Page 261: ...14 The Waveform Menu...
Page 263: ...Waveform Menu Map The Waveform Menu 14 3...
Page 264: ...Waveform Menu Map cont The Waveform Menu 14 4...
Page 300: ...14 40...
Page 301: ...15 The Mixed Display Menu...
Page 306: ...15 6...
Page 307: ...16 The Chart Menu...
Page 310: ...Chart Menu Map The Chart Menu 16 4...
Page 311: ...Chart Menu Map cont The Chart Menu 16 5...
Page 336: ...16 30...
Page 337: ...17 The Compare Menu...
Page 340: ...Compare Menu Map The Compare Menu 17 4...
Page 355: ...18 Error Messages...
Page 363: ...19 Specifications and Characteristics...
Page 377: ...20 Operator s Service...
Page 386: ...Troubleshooting Flowchart 1 Operator s Service To use the flowcharts 20 10...
Page 387: ...Troubleshooting Flowchart 2 Operator s Service To use the flowcharts 20 11...


