
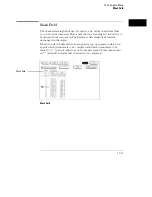


Two pod pairs are needed to use both timers.
If both timers are
being used in a single chip analyzer, and there are no spare chips, this
message is shown when Run is selected. Timer2 references in the
sequencer will not be valid.
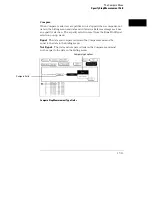
No active analyzer.
This message is displayed if Run is selected with
no analyzers turned on.
Cannot read unrecognized data.
The user is trying to translate a
configuration from a foreign module.
Demultiplexed clocking cannot be translated.
The user is trying to
translate a configuration that has demultiplexed or mixed clocks.
User thresholds have been truncated.
The user is trying to translate
a configuration having thresholds greater than 6 Volts or less than -6
Volts.
Slave clocks may need manual adjustment.
The user is trying to
translate an Agilent Technologies 16540/41A,D configuration which has
slave clocks specified. This message appears when the translation is not
direct.
Clock Qualifiers not fully restored.
The user is trying to translate a
configuration that has more than two qualifiers.
No state machines for this module.
The user is trying to load an
inverse assembler into a module with no state machines.
Error loading Display1.
User is loading a configuration with a corrupt
Display1 section.
Pods have been truncated.
User is loading a configuration with
number of chips greater than the current system’s number of chips.
Clock pod and least significant pods have been preserved.
User is
loading a configuration with number of chips greater than the current
system’s number of chips
< Duration requireds two unused sequisition levels.
For each
sequence level with a "<" assigned, you must leave two sequence levels
free. To free up two levels, simply delete two levels.
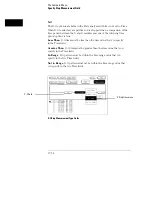
Mixed Mode not available
User is trying to show mixed mode
incorrectly.
Error Messages
Warning Messages
18–6
Summary of Contents for 1660A Series
Page 5: ...vi...
Page 14: ...1 Introduction...
Page 24: ...2 Probing...
Page 35: ...Probing Assembling the Probing System 2 12...
Page 36: ...3 Using the Front Panel Interface...
Page 65: ...3 30...
Page 66: ...4 Using the Mouse and the Optional Keyboard...
Page 74: ...5 Connecting a Printer...
Page 91: ...5 18...
Page 92: ...6 Disk Drive Operations...
Page 118: ...7 The RS 232C GPIB and Centronix Interface...
Page 121: ...RS 232 GPIB Menu Map Cont The RS 232C GPIB and Centronix Interface 7 4...
Page 123: ...Printer Controller Menu Map Cont The RS 232C GPIB and Centronix Interface 7 6...
Page 132: ...8 The System Utilities...
Page 137: ...9 The Common Menu Fields...
Page 150: ...9 14...
Page 151: ...10 The Configuration Menu...
Page 159: ...11 The Format Menu...
Page 161: ...Format Menu Map The Format Menu 11 3...
Page 194: ...11 36...
Page 195: ...12 The Trigger Menu...
Page 198: ...Trigger Menu Map The Trigger Menu 12 4...
Page 199: ...Trigger Menu Map Continued The Trigger Menu 12 5...
Page 235: ...13 The Listing Menu...
Page 237: ...Listing Menu Map The Listing Menu 13 3...
Page 260: ...13 26...
Page 261: ...14 The Waveform Menu...
Page 263: ...Waveform Menu Map The Waveform Menu 14 3...
Page 264: ...Waveform Menu Map cont The Waveform Menu 14 4...
Page 300: ...14 40...
Page 301: ...15 The Mixed Display Menu...
Page 306: ...15 6...
Page 307: ...16 The Chart Menu...
Page 310: ...Chart Menu Map The Chart Menu 16 4...
Page 311: ...Chart Menu Map cont The Chart Menu 16 5...
Page 336: ...16 30...
Page 337: ...17 The Compare Menu...
Page 340: ...Compare Menu Map The Compare Menu 17 4...
Page 355: ...18 Error Messages...
Page 363: ...19 Specifications and Characteristics...
Page 377: ...20 Operator s Service...
Page 386: ...Troubleshooting Flowchart 1 Operator s Service To use the flowcharts 20 10...
Page 387: ...Troubleshooting Flowchart 2 Operator s Service To use the flowcharts 20 11...


