


Mouse Cursor Movement
The mouse pointer (+) is positioned around the screen by moving the mouse
about on top of a desktop or other even surface.
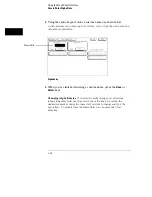
Selecting a Menu Item
To select a menu field, simply move the
pointer on top of the desired field and press the upper-left button.
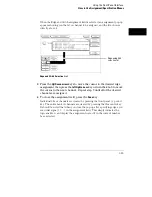
To duplicate the front-panel knob, hold down the upper-right button while
moving the mouse around the desktop. Moving the mouse up or to the right
duplicates turning the knob clockwise. Moving the mouse down or to the left
duplicates turning the knob counterclockwise.
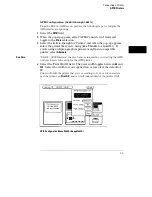
Entering Data into a Menu
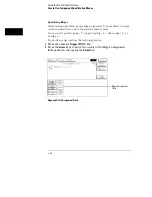
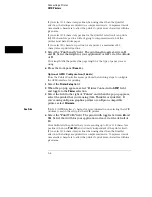
Keyboard Data Entry
When an assignment field is selected, the cursor is displayed under the
leftmost digit in the particular field. When you type in a number or letter, it is
displayed in the cursor position, and the cursor is advanced. Cursor keys
move the cursor within the assignment field. Pressing either the Return key
or the Enter key will terminate data entry for that item.
If you want to erase the data entry, press the Clear Line key, the Clear
Display key, or the Delete Line key.
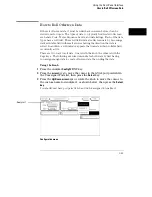
Mouse Data Entry
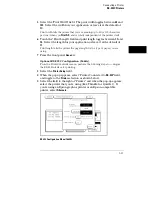
When an assignment field is selected, a pop-up keypad or assignment menu
appears. Use the pop-up menus to assign letters, numbers, symbols, or unit
of measure. When the Done field is selected, the pop-up closes and the
selected values are entered into the assignment field.
Using the Mouse and the Optional Keyboard
Entering Data into a Menu
4–4
Summary of Contents for 1660A Series
Page 5: ...vi...
Page 14: ...1 Introduction...
Page 24: ...2 Probing...
Page 35: ...Probing Assembling the Probing System 2 12...
Page 36: ...3 Using the Front Panel Interface...
Page 65: ...3 30...
Page 66: ...4 Using the Mouse and the Optional Keyboard...
Page 74: ...5 Connecting a Printer...
Page 91: ...5 18...
Page 92: ...6 Disk Drive Operations...
Page 118: ...7 The RS 232C GPIB and Centronix Interface...
Page 121: ...RS 232 GPIB Menu Map Cont The RS 232C GPIB and Centronix Interface 7 4...
Page 123: ...Printer Controller Menu Map Cont The RS 232C GPIB and Centronix Interface 7 6...
Page 132: ...8 The System Utilities...
Page 137: ...9 The Common Menu Fields...
Page 150: ...9 14...
Page 151: ...10 The Configuration Menu...
Page 159: ...11 The Format Menu...
Page 161: ...Format Menu Map The Format Menu 11 3...
Page 194: ...11 36...
Page 195: ...12 The Trigger Menu...
Page 198: ...Trigger Menu Map The Trigger Menu 12 4...
Page 199: ...Trigger Menu Map Continued The Trigger Menu 12 5...
Page 235: ...13 The Listing Menu...
Page 237: ...Listing Menu Map The Listing Menu 13 3...
Page 260: ...13 26...
Page 261: ...14 The Waveform Menu...
Page 263: ...Waveform Menu Map The Waveform Menu 14 3...
Page 264: ...Waveform Menu Map cont The Waveform Menu 14 4...
Page 300: ...14 40...
Page 301: ...15 The Mixed Display Menu...
Page 306: ...15 6...
Page 307: ...16 The Chart Menu...
Page 310: ...Chart Menu Map The Chart Menu 16 4...
Page 311: ...Chart Menu Map cont The Chart Menu 16 5...
Page 336: ...16 30...
Page 337: ...17 The Compare Menu...
Page 340: ...Compare Menu Map The Compare Menu 17 4...
Page 355: ...18 Error Messages...
Page 363: ...19 Specifications and Characteristics...
Page 377: ...20 Operator s Service...
Page 386: ...Troubleshooting Flowchart 1 Operator s Service To use the flowcharts 20 10...
Page 387: ...Troubleshooting Flowchart 2 Operator s Service To use the flowcharts 20 11...


