


$FHU$OWRV6HULHV8VHU¶V*XLGH
%
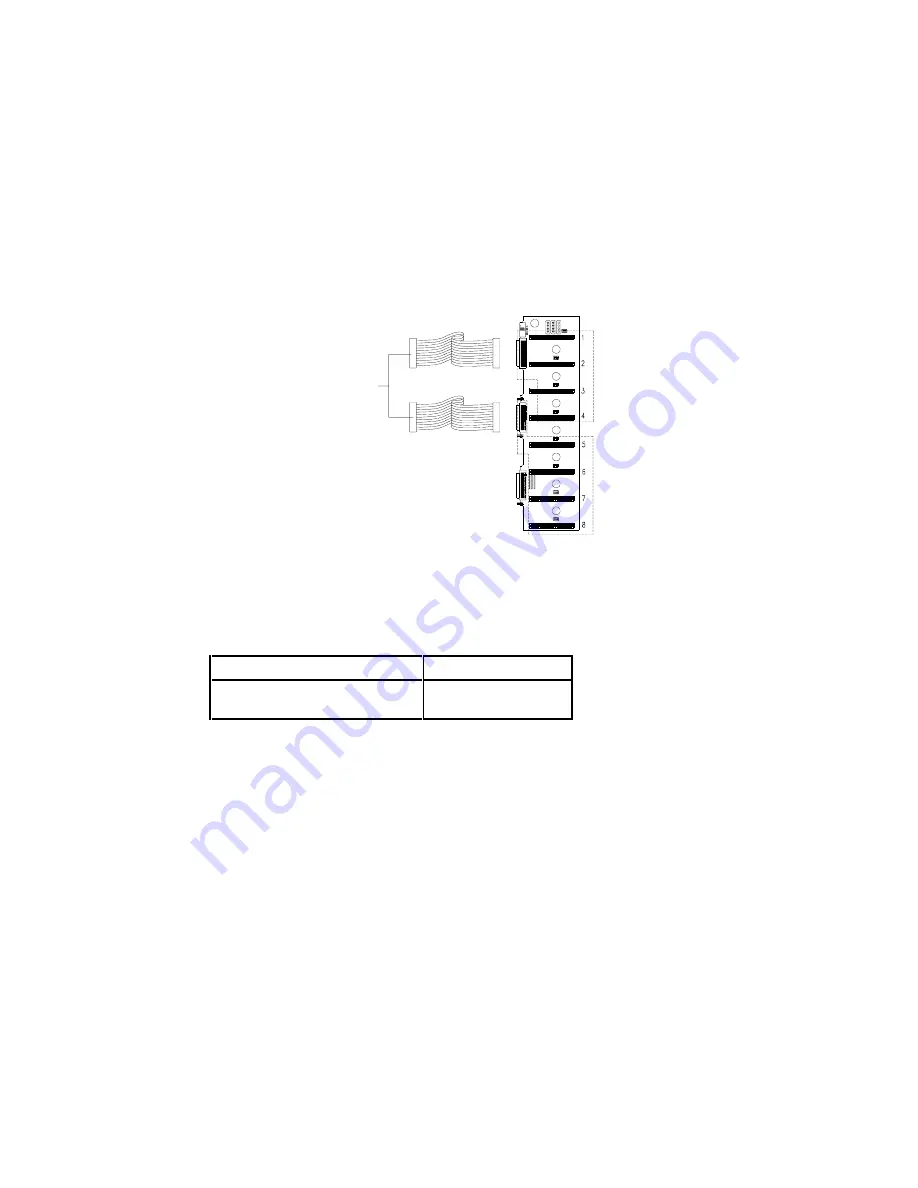
% 'XDO&KDQQHO&RQILJXUDWLRQ
In a dual-channel configuration, channel 1 supports the devices in slots 1 to 4, and
channel 2 supports the devices in slots 5 to 8. Set the channel configuration
switches to “Split” and set the terminators accordingly (Table B-2) to achieve a
dual-channel configuration. See Figure B-1 for the locations of the switches and
terminators.
)LJXUH%
'XDO&KDQQHO&RQILJXUDWLRQ
Table B-2 lists the terminator settings for the dual-channel configuration.
7DEOH% 7HUPLQDWRU6HWWLQJVIRU'XDO&KDQQHO&RQILJXUDWLRQ
7HUPLQDWRU
6HWWLQJ
5$5$5$
5$5$5$
,QVWDOOHG
,QVWDOOHG
&RQQHFWWRWKH
:LGH6&6,
FRQQHFWRUV
&RQQHFW6&6,
FKDQQHOWR
VORWVWR
&RQQHFW6&6,
FKDQQHOWR
VORWVWR
Summary of Contents for Altos 9100 Series
Page 1: ...AcerAltos 9100 Series User s Guide ...
Page 115: ...Chapter 5 System Housing 5 15 5 Connect the signal and power cables to the drive ...
Page 125: ...Chapter 5 System Housing 5 25 5 9 2 Connecting a Keyboard ...
Page 126: ...AcerAltos 9100 Series User s Guide 5 26 5 9 3 Connecting a Mouse Mouse ...
Page 127: ...Chapter 5 System Housing 5 27 5 9 4 Connecting a Printer ...
Page 128: ...AcerAltos 9100 Series User s Guide 5 28 5 10 Complete System Connections ...


