ZScan User Guide
29
It is possible to see your factory calibration date as well as last optimization date. Please
note that for you to see your factory calibration date, your scanner must have been
calibrated after the ZScan 1.3 release date (July 1
st
, 2007).
Press the Default button to reset the sensor calibration to its
factory settings. Use this functionality only if, for some reason, the
optimization process fails to give valid results. It is also possible to
restore the scanner to the factory settings via the Sensor
Manager.
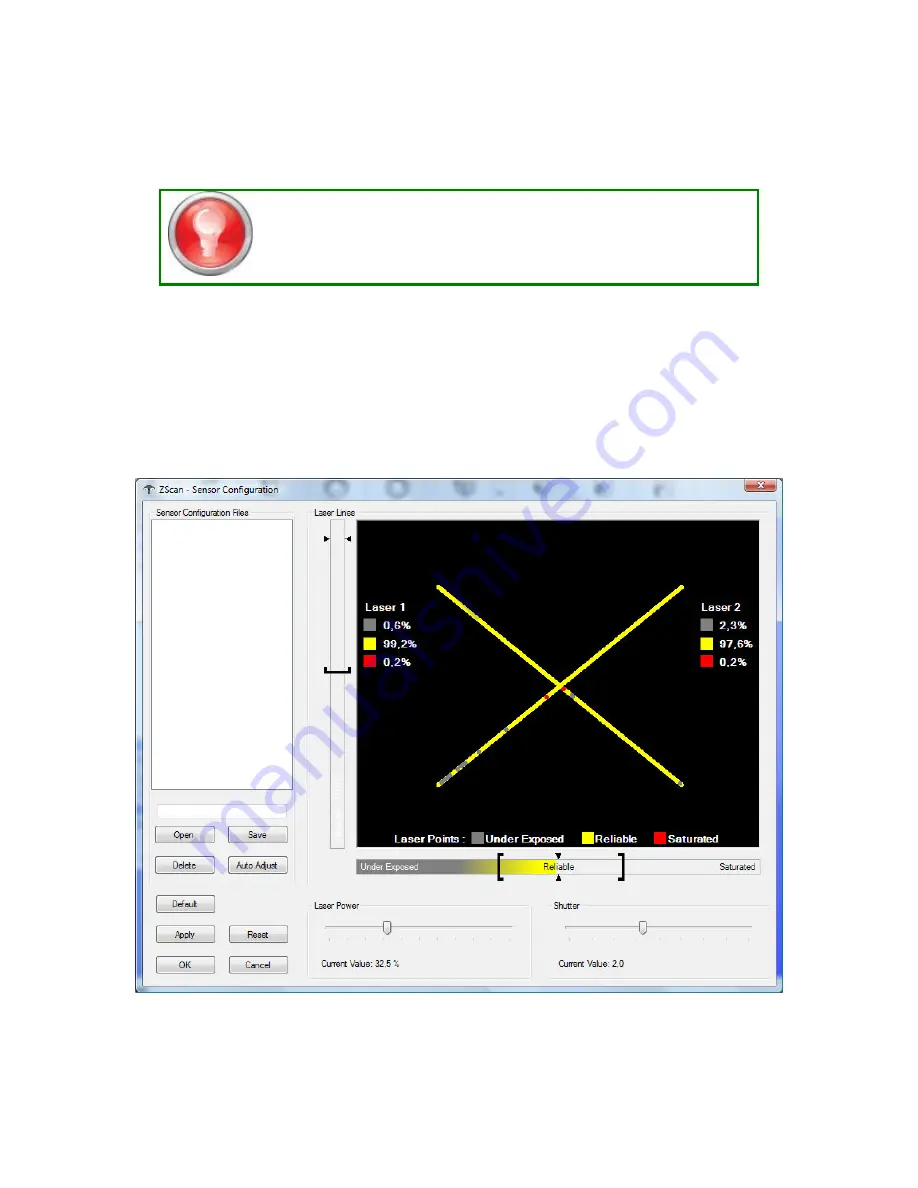
Sensor Configuration
This tool is used to configure the sensor’s laser power and the cameras shutter time
according to the type of surface you wish to scan. Since each surface has different
reflection properties, it is important to adjust the sensor's parameters to get an optimal
detection of the laser lines. The figure below shows the sensor configuration dialog.
To configure the sensor correctly, hold the scanner at the nominal distance from the
object (~30 centimeters) and press the trigger. The laser lines will be displayed in grey,
yellow or red, depending if they are exposed correctly. The parameters should be set so


