ZScan Manual
28
•
3 Positioning
Targets
Create a reference by specifying the position of three
targets.
•
3 References
Create a reference with 3 other pre-defined references
In each case, the process is identical: the user has to click on the required features in the
3D Viewer and define their properties. For example, when using the 3 Planes method, the
user first selects a plane and must then determine if that plane is the X, Y or Z plane. In
the case of 3 Positioning Targets, the user must input the position of the target currently
selected.
In the last step, the user has the option to rotate or to translate the generated reference.
The result is updated in real time in the 3D Viewer.
The units used in the Add Reference Wizard are the units defined
in ZScan. It defaults to millimeters and can be changed in
Configure | Options.
Sensor Calibration
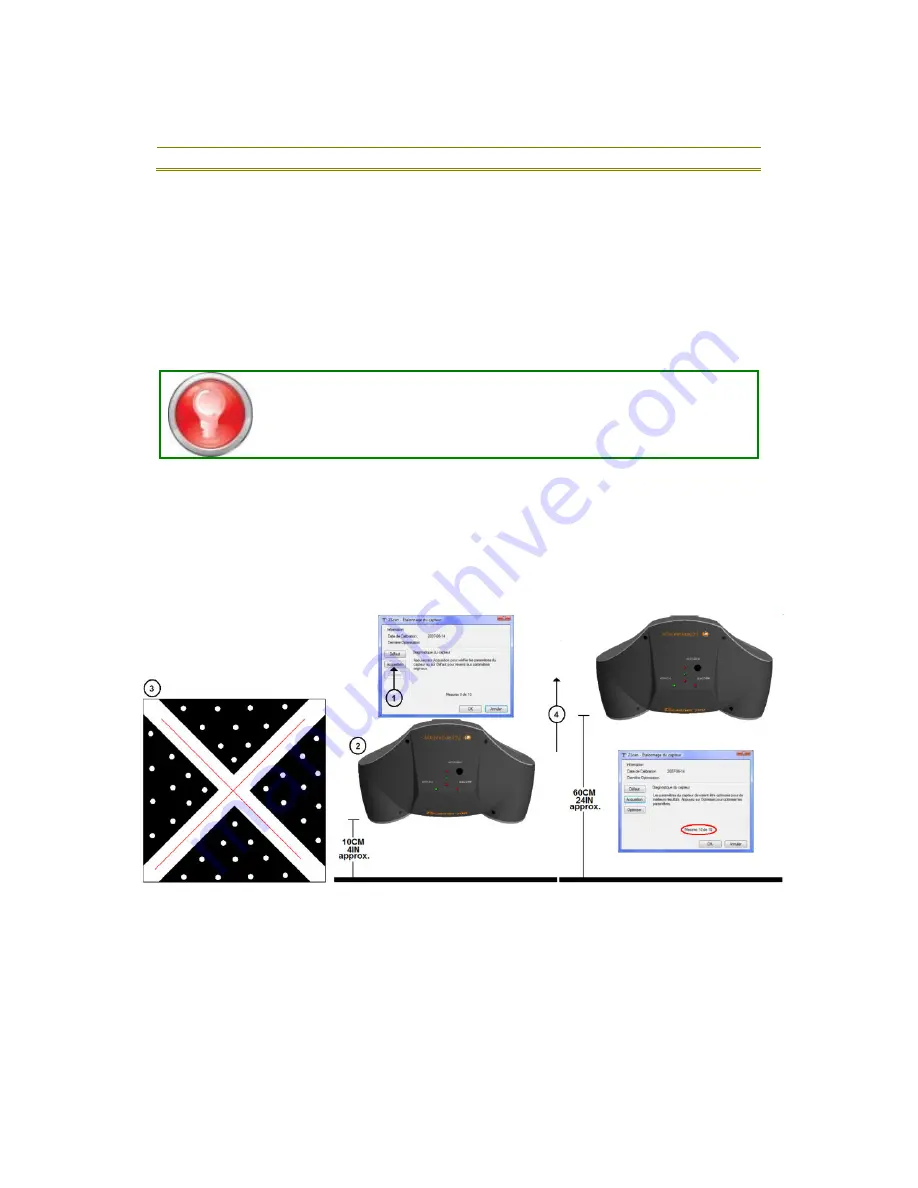
Even under normal use, the ZScanner 800 may need to have its calibration optimized. This
tool is used to verify and optimize sensor calibration. To complete the optimization
process, follow the procedure depicted in the following figure.
1.
Press the Acquire button to activate the sensor.
2.
Lay the calibration plate on a stable plane surface. Position the scanner at
approximately 10 cm (4 in) from the calibration plate.
3.
Use the Preview button on the ZScanner 800 to position the laser cross in the white
cross of the calibration plate.
4.
Press the trigger and slowly move the scanner away from the plate, to an
approximate distance of 60 cm (24 in) or until the 10 measurements are taken.
Make sure that the laser cross stays in the white cross of the calibration plate.
5.
Follow recommendations displayed in the Sensor Diagnostic area.


