


6.3 Communication with Touch Panel
6.3.1 When MP2300S Acts as Slave
6-72
8.
Click the setup button of the connected PLC1 for each device setting to display the setting screen for
each device.
9.
Set up the setting screen for each device.
In the setting screen for each device, set up a connected device (in this case, the MP2300S).
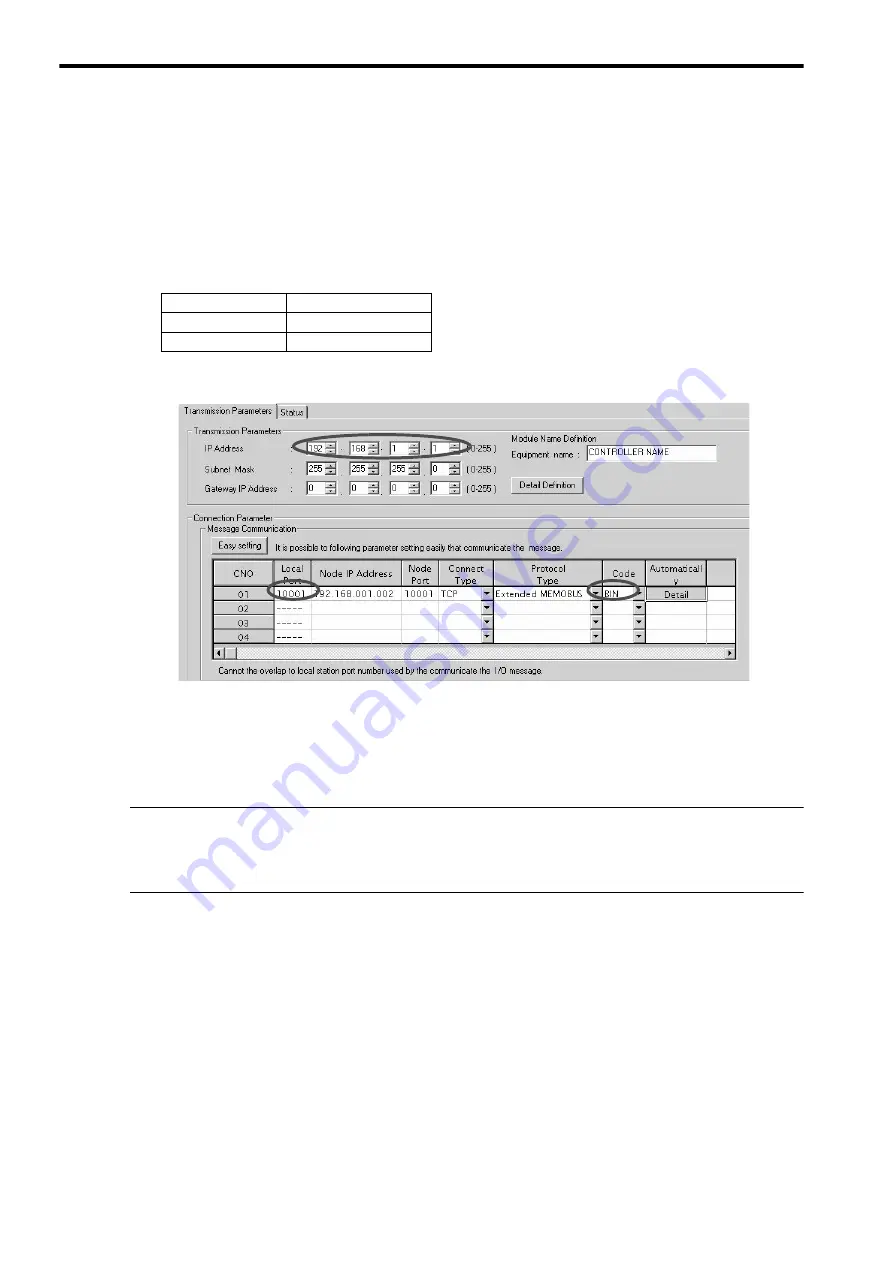
Set the IP address, port number and data code in the same manner as the 218IFA screen of the MP2300S.
• 218IFA screen (reference)
The setting is finished for now.
Create a screen and transfer the project to an indicator as required.
Caution
• Set up a unique IP address in the network.
The MP2300S side IP address is set to “192.168.1.1” in self-configuration.
For the IP address, check with your network administrator.
Note: Set the GP3000 series IP address in the off-line mode of the indicator.
Contact Digital Electronics Corp. for more information.
Table 6.20 Each Device Setting
IP Address
192.168.001.001
Port Number
10001
Data Code
binary
Содержание JEPMC-MP2300S-E
Страница 14: ...MEMO ...
Страница 24: ...MEMO ...
Страница 114: ...MEMO ...
Страница 132: ...MEMO ...
Страница 154: ...5 2 User Programs 5 2 2 Motion Programs 5 22 2 Example using a ladder program ...
Страница 156: ...5 2 User Programs 5 2 2 Motion Programs 5 24 2 Example using a ladder program ...
Страница 190: ...MEMO ...
Страница 280: ...MEMO ...
Страница 300: ...7 3 Operation 7 3 5 How to Determine Input Error 7 20 Continued from the previous page ...
Страница 302: ...7 3 Operation 7 3 5 How to Determine Input Error 7 22 Application Example Continued on the next page ...
Страница 306: ...7 3 Operation 7 3 6 Management to Resume Slave CPU Synchronization 7 26 Application Example Continued on the next page ...
Страница 310: ...MEMO ...


