


4 - 24
ENG
CAMSHAFTS
REMOVAL POINTS
Camshaft
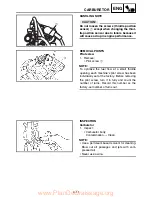
1. Remove:
• Timing mark accessing screw
1
• Crankshaft end accessing screw
2
2. Align:
• T.D.C. mark
With align mark.
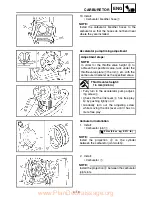
Checking steps:
• Turn the crankshaft counterclockwise with
a wrench.
• Align the T.D.C. mark
a
on the rotor with
the align mark
b
on the crankcase cover
when piston is at T.D.C. on compression
stroke.
NOTE:
In order to be sure that the piston is at Top
Dead Center, the punch mark
c
on the
exhaust camshaft and the punch mark
d
on
the intake camshaft must align with the cyl-
inder head surface, as shown in the illustra-
tion.
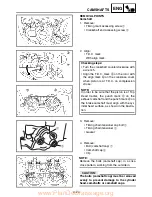
3. Remove:
• Timing chain tensioner cap bolt
1
• Timing chain tensioner
2
• Gasket
4. Remove:
• Bolt (camshaft cap)
1
• Camshaft cap
2
• Clip
NOTE:
Remove the bolts (camshaft cap) in a criss-
cross pattern, working from the outside in.
CAUTION:
The bolts (camshaft cap) must be removed
evenly to prevent damage to the cylinder
head, camshafts or camshaft caps.
1
2
www.PlanDeGraissage.org
Содержание WR250FR 2002
Страница 1: ...LIT 11626 16 48 WR250FR 5UM 28199 10 OWNER S SERVICE MANUAL www PlanDeGraissage org...
Страница 2: ...www PlanDeGraissage org...
Страница 5: ...www PlanDeGraissage org...
Страница 12: ...MEMO www PlanDeGraissage org...
Страница 118: ...3 53 INSP ADJ BATTERY INSPECTION AND CHARGING Charging method using a variable voltage charger www PlanDeGraissage org...
Страница 119: ...3 54 INSP ADJ BATTERY INSPECTION AND CHARGING Charging method using a constant voltage charger www PlanDeGraissage org...
Страница 143: ...4 21 ENG 9 Install Clamp 1 Refer to CABLE ROUTING DIAGRAM section in the CHAPTER 2 1 CARBURETOR www PlanDeGraissage org...