1128600
SmartPAC 2 with WPC 2000 Integration User Manual
3-8
Keyboard, Displays, Etc.
The two cursors define the endpoints of a highlighted arc that indicates graphically the
duration of the On signal. The four cursor keys function in the following manner:
•
Right (
) cursor key increases the On setting, moving the On cursor clockwise.
•
Left (
) cursor key decreases the On setting, moving the On cursor counterclockwise.
•
Up (
) cursor key increases the Off setting, moving the Off cursor clockwise.
•
Down (
) cursor key decreases the Off setting, moving the Off cursor counterclockwise.
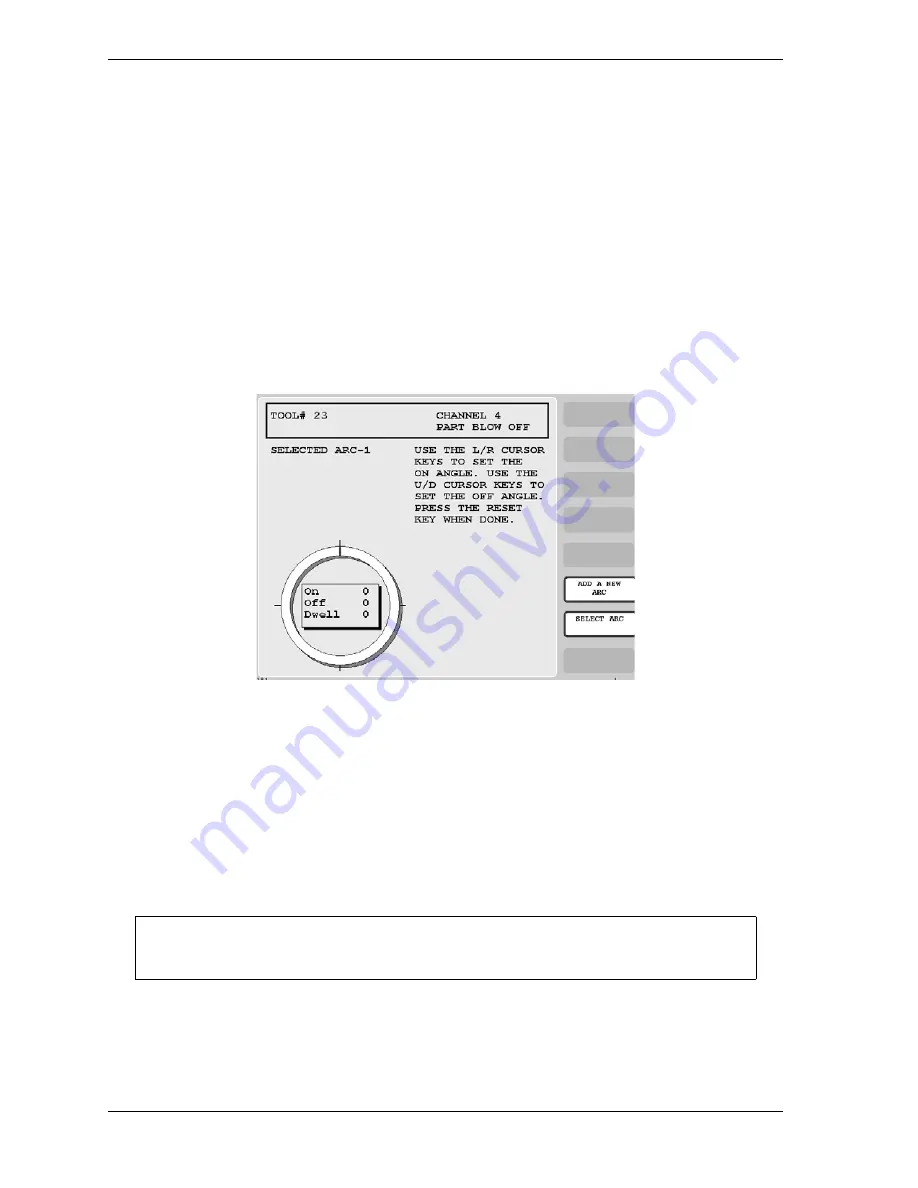
The following steps illustrate how the cursor keys are used to set timing for a cam channel in
Program mode.
1.
Before On/Off settings have been made for a cam channel, On and Off crankshaft angles
are both 0
°
, as shown in Figure 3-11. The “dwell” (i.e., the number of degrees during
which the channel is On) is 0
°
.
2.
To set the On angle, you use the Left (
) and Right (
) cursor keys. Press and hold
down the Right (
) cursor key to move the On cursor clockwise around the crank angle
diagram until you reach 239
°
. The On angle is shown in the window in the center of the
crank angle clock. Your display should look like the one shown in Figure 3-12, page 3-9.
If you overshoot the On angle you want, simply press the Left (
) cursor key to move the
On cursor counterclockwise. Notice that the dwell has changed to 121
°
(i.e., 360
°
-239
°
),
indicating that the cam channel is on for 121
°
. The dwell angle is shown graphically by
the highlighted arc on the crank angle clock.
Figure 3-11. Cam Channel Timing: On=0
°
, Off=0
°
Zero degrees (0
°
) and 360
°
are located at the same point in the crankshaft rotation.
NOTICE
Содержание SmartPAC 2
Страница 2: ......
Страница 4: ......
Страница 6: ......
Страница 28: ...1128600 SmartPAC 2 with WPC 2000 Integration User Manual xxii Table of Contents ...
Страница 44: ...1128600 SmartPAC 2 with WPC 2000 Integration User Manual 1 16 Introduction ...
Страница 186: ...1128600 SmartPAC 2 with WPC 2000 Integration User Manual 3 26 Keyboard Displays Etc ...
Страница 440: ...1128600 SmartPAC 2 with WPC 2000 Integration User Manual D 12 Updating SmartPAC 2 Firmware ...
Страница 478: ...1128600 SmartPAC 2 with WPC 2000 Integration User Manual G 6 Replacing SmartPAC 2 PC Board ...
Страница 548: ...1128600 SmartPAC 2 with WPC 2000 Integration User Manual GL 8 Glossary ...
Страница 558: ...1128600 SmartPAC 2 with WPC 2000 Integration User Manual IN 10 Index ...
Страница 560: ......
Страница 562: ......
Страница 564: ......
Страница 566: ......
Страница 568: ......
Страница 570: ......
Страница 572: ......
Страница 574: ......
Страница 576: ......
Страница 577: ......
Страница 578: ...APPROVALS SCALE C SIZE TITLE SHEET OF DRAWING NUMBER REV ...
Страница 579: ...APPROVALS SCALE C SIZE TITLE SHEET OF DRAWING NUMBER REV ...
Страница 580: ...APPROVALS SCALE C SIZE TITLE SHEET OF DRAWING NUMBER REV ...
Страница 581: ...APPROVALS SCALE C SIZE TITLE SHEET OF DRAWING NUMBER REV ...
Страница 582: ......
Страница 583: ......
Страница 584: ......
Страница 585: ......
Страница 586: ......
Страница 587: ......
Страница 588: ......
Страница 589: ......
Страница 590: ......
Страница 591: ......
Страница 592: ......
Страница 593: ......
Страница 594: ......
Страница 595: ......
Страница 596: ......
Страница 597: ......
Страница 598: ......
Страница 599: ......
Страница 600: ......
Страница 601: ......
Страница 602: ......
Страница 603: ......
Страница 604: ......


