21
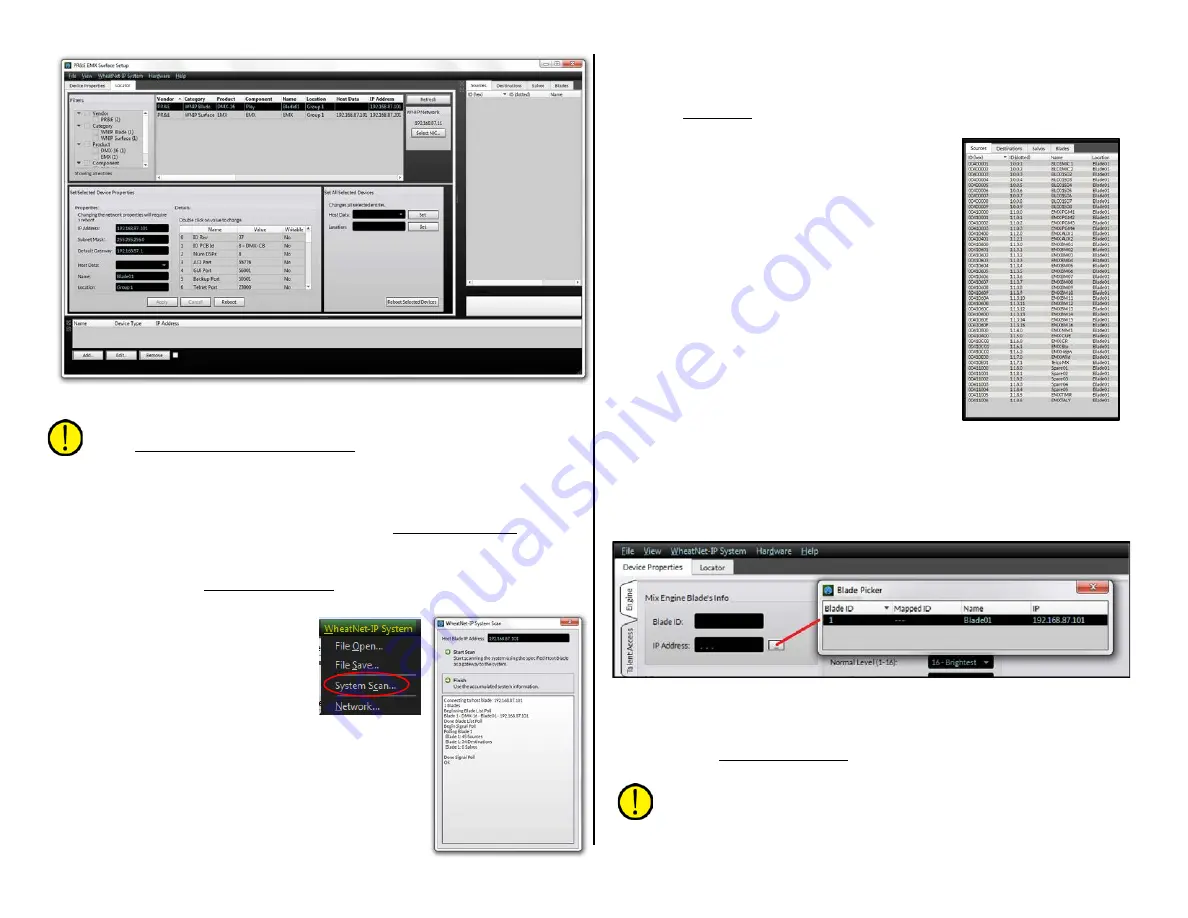
Figure 3-2 EMX Surface Setup app, Locator Tab view
Note: When multiple EMX consoles are networked together, use
the PR&E System Configuration Tool rather than manually editing
the entries as described above. The Tool automatically edits the IP
address, device name, Blade ID, default signal names, and other
parameters for a new EMX console or Razor I/O Interface to
ensure no system conflicts occur when networking a new device.
See page 44 for information on using the Configuration Tool.
System Scanning—Selecting Mix Engine & Surface
Up to this point the EMX Surface Setup app is simply showing a list of
the devices it’s detected on the network. To add the signal names and
other information from the
detected Blades, the system must
be scanned. To do this, click the
menu item: WheatNet-IP System
and select System Scan to open
the System Scan window. The
Host Blade IP Address entry box
should show the IP address of the
Mix Engine (on a new EMX console this is
192.168.87.101). If no address is shown, manually
enter that IP address. Click Start Scan. The app now
queries that Blade (the generic network identity for
a PR&E Mix Engine) showing various messages in
the logger window. Once Finish appears, click it.
A “save system info?” dialog pops up. Click Yes to save the system
information. A Save File dialog box opens on the default save location.
Click Save then Yes to save the sysinfo.wnsi3 data file so that the next
time the Setup app is used it opens up showing your system information.
The empty System Info pane, at the right
side of the app window in Figure 3-2, will now
be populated with the Source and Destination
names, as shown at right. There will be no
Salvos listed at this point, but the Blades tab
will show the PR&E Mix Engine as Blade ID 1
with the default name of Blade01.
Click the Device Properties tab to view that
tab. It has seven page tabs (Engine, Talent
Access, Aux, VDips, Monitor Config, Buttons,
and Visibilities) along the left side of the tab
(shown in Figure 3-1 on page 20). Each Page
Tab is separated into sections, each listing
similar parameter settings. Click on each page
tab to view the different parameters on each
then reselect the Engine page tab.
Figure 3-3 shows the Mix Engine Blade’s Info
section. Clicking the Picker icon (the small rectangular icon) opens the
Blade Picker which lists all detected Blades. Double-click on the Blade01
row to select it. The Blade ID and its IP address are transferred to the two
Mix Engine Blade’s Info entry boxes. This action assigns that PR&E Mix
Engine as the host device for the EMX Surface that we’re now going to
configure.
Figure 3-3 Assigning the PR&E Mix Engine
The next step is to “marry” an EMX Surface to this Mix Engine and to
then configure the EMX Surface. This is done using the Devices pane at the
bottom of the EMX Surface Setup app’s window. When first using the app,
this pane will be blank, as shown in Figure 3-2.
Note: If this pane is not shown, select the menu item View then
checkmark Devices to display the Devices pane.


