4.13 Configuration Examples
Extending a Wired Network
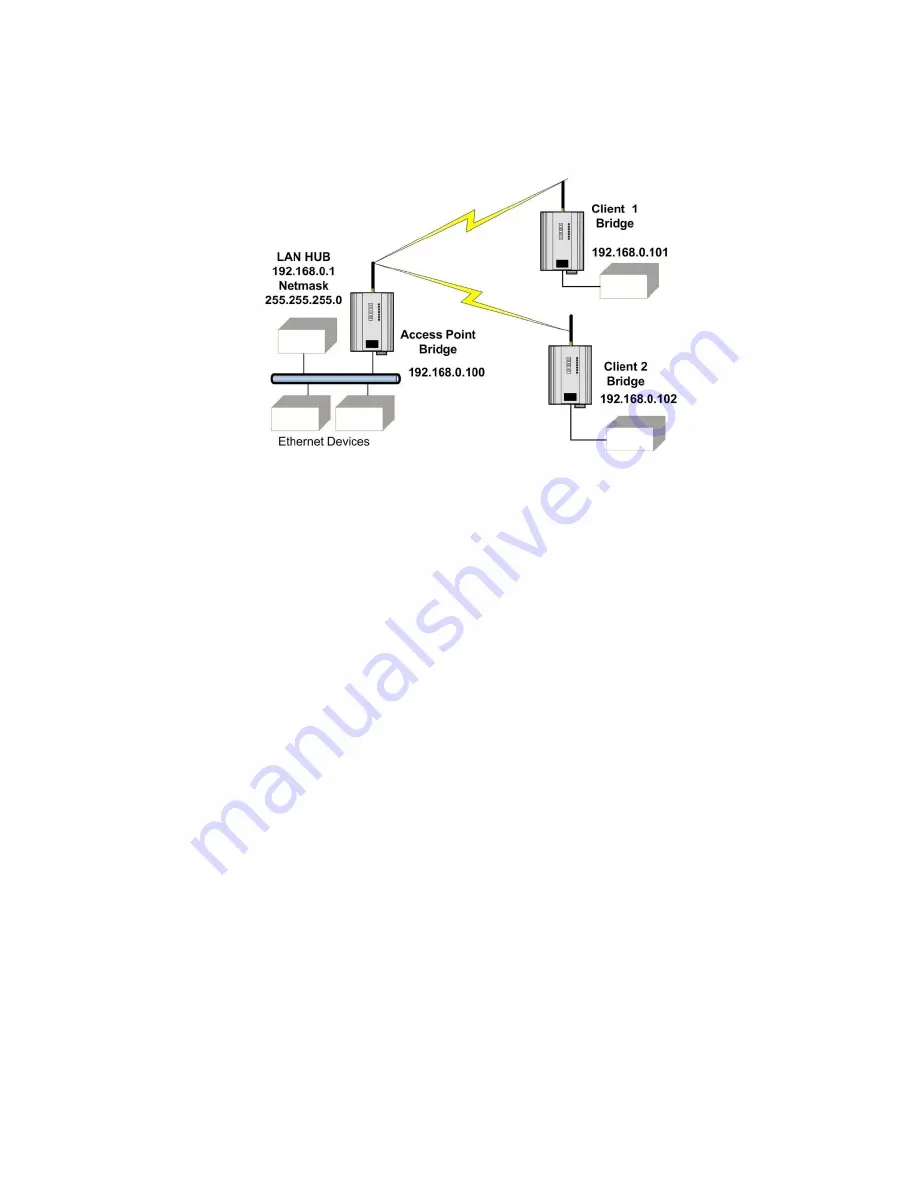
This example describes how to configure a bridged network.
Figure 71 Example of Bridged Network
Access Point Configuration
1. Connect a straight-through Ethernet cable between the PC and the WI-MOD-xxx-E-5W module.
2. Ensure that the PC and WI-MOD-xxx-E-5W are set up to communicate on the same network.
3. Set the DIP switch on the WI-MOD-xxx-E-5W to SETUP.
4. Power on the module and wait for the OK LED to stop flashing.
5. Configure the network setting on the PC with an IP address of 192.168.0.1 and a netmask of 255.255.255.0.
6. Using Internet Explorer, open the
module’s Web Server at the address 192.168.0.1XX/ where “XX” is the last
two digits of the
module’s serial number.
7. When prompted, enter default username
“user” and password “user”.
8. On the home page menu, click Quick Start.
9. On the Quick Start page, configure the following:
a. Configure the Transmit Power Level, Transmit Data Rate, Frequency Step Size, and Transmit and Receive
Frequency settings. Record these settings, as they will need to be the same for all radios in the example.
b. Select the Operating Mode as
“Access Point.”
c. Enter a System Address (ESSID) string. Record this string, as it will need to be exactly the same for all
radios in the example.
d. The encryption is automatically set to WPA2 on the Quick Start page. You need to configure an
encryption key (passphrase). Record the key, as it also needs to be the same on all radios in the example.
e. Change the IP addresses to 192.168.0.100.
f. Leave the Subnet masks at the default of 255.255.255.0.
g. Leave the Gateway IP Address at the default 192.168.0.1, as it is not used in this example.
10. Set the DIP switch on the module to RUN.


