tube pins, gently and in small amounts rotate and rock the tube with your
fingers to loosen it from its socket until its pins are completely disengaged
from the socket. Take the tube out of the unit.
1. Plugging in a new tube:
Hold onto the upper portion of the tube
towards its tip. Lower the tube onto the socket,
making sure that the pins from the tube match the
holes in the socket. There are either two pins on the
tube which are spaced at a wider distance from each
other than the rest of the pins. Make sure that these
locators go into the side of the socket that matches.
Press the tube firmly into its socket, using a gentle
force and a slight “rocking” motion. When the tube
is properly and completely inserted into the socket it
should be firmly seated and does not give in to any
movement at all when you try to rock it gently. If
the socket appears loose and not making contact
with any or all of the tube pins, the socket should be
re-tensioned.
2. Replacing the protective cover:
Lower the
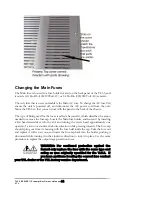
TL5.5’s cover chassis slowly back onto the opened TL5.5 box, making
sure that the cover is put on in the correct front and back position. Locate
the screws that were removed from the cover and put them back in the
correct holes. Replace the sides and tighten all screws to make sure that the
cover is securely fastened to the unit.
3
. Note that the slots on the top cover should match the slots on the
transformer box inside the TL5.5. You should be able to see the parts
inside the transformer box through the TL5.5’s top cover when it is
properly installed. If the parts are not visible through the slots, turn the
cover around and install it in the other direction. See photo below for a
properly installed top cover.
TL5.5 SERIES II Preamplifier Owner’s Manual
VTL
43
Содержание TL5.5 Series II Signature
Страница 1: ...VTL TL5 5 Series II Signature Preamplifier Owner sManual...
Страница 3: ......


