12
HDR-5000 User and Technical Manual
3.2.3 Viewing and Modifying System Settings
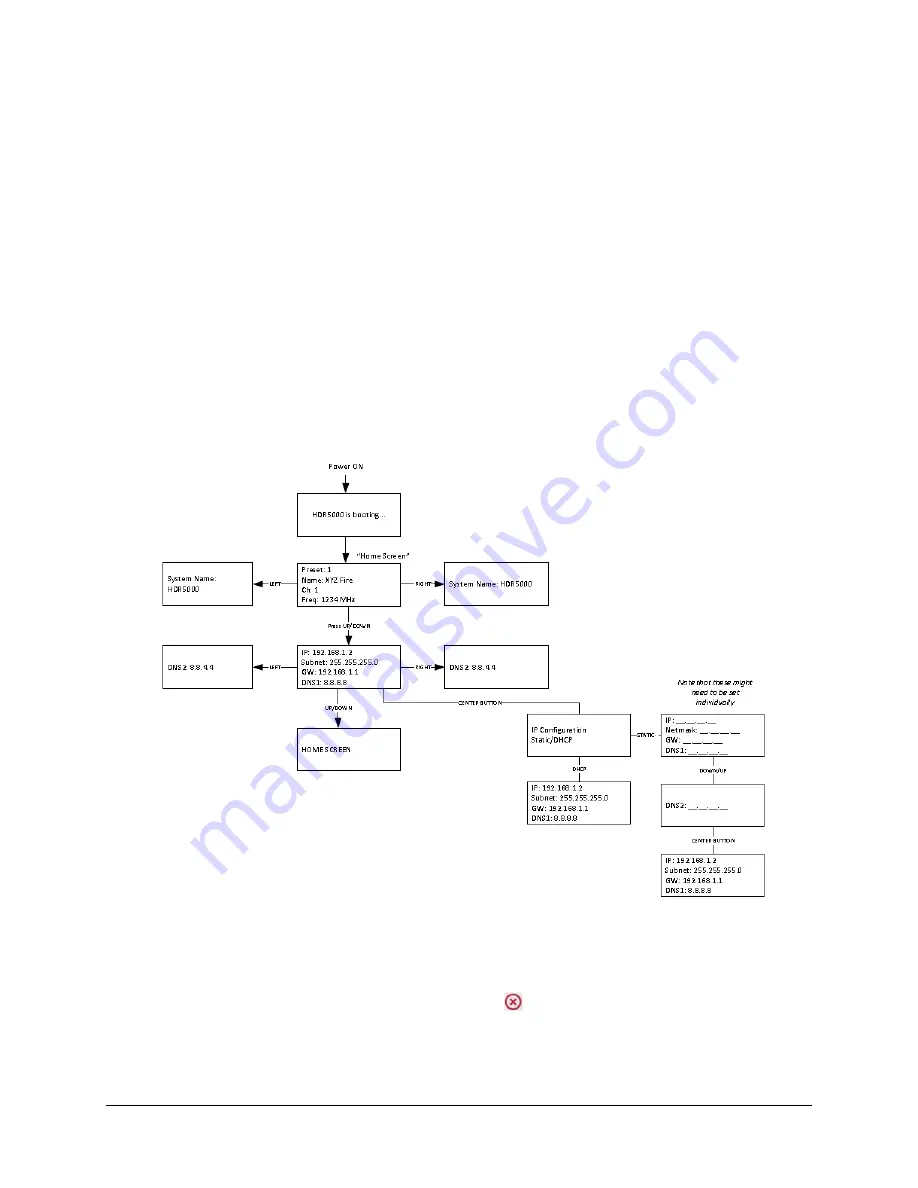
The primary purpose of the front panel display is to view or change the HDR-5000 System Settings,
especially the IP address that has been set in the factory. Use the front panel Up Arrow button
↑
to
display these settings. You can choose to use DHCP to connect to the Internet when you connect a
laptop or PC to your local area network or use the default IP address and subnet mask:
http://
192.168.1.10
/
, and
255.255.255.0
.
1.
I P
: This line displays the HDR-5000 receiver’s current IP address.
2 .
S N
: This line shows the HDR-5000 receiver’s current subnet mask.
3 .
G W
: This line displays the HDR-5000 receiver’s current gateway address.
4 .
D 1
: This line displays the HDR-5000 receiver’s current primary Domain Name Server (DNS)
address. To view or edit the secondary DNS address (D2), use the Right Arrow button
→
.
5.
D 2
: This line displays the HDR-5000 receiver’s current secondary Domain Name Server
address.
Figure 3-1. Front Panel Control Screen Operation
3.2.4 Factory Restore
Since the user has the ability to edit username and passwords for Web login, the
Restore Factory
Defaults
option resets the HDR-5000 in the instance where the admin users forget their credentials. This
restoration is accomplished by holding down the check and
buttons on the front panel for 5 seconds.
A confirmation window appears prompting you to confirm that you are sure that you want to restore to
factory default. If you confirm the action, the HDR-5000 firmware removes all preset and custom settings
and return to the factory defaults.
Содержание HDR-5000
Страница 6: ......


