


3. Configuring Your Server
41
2.
Enter
m
for more options.
3.
Enter
A
for Advanced Options.
4.
Enter
K
for Pre-shared Key Maintenance.
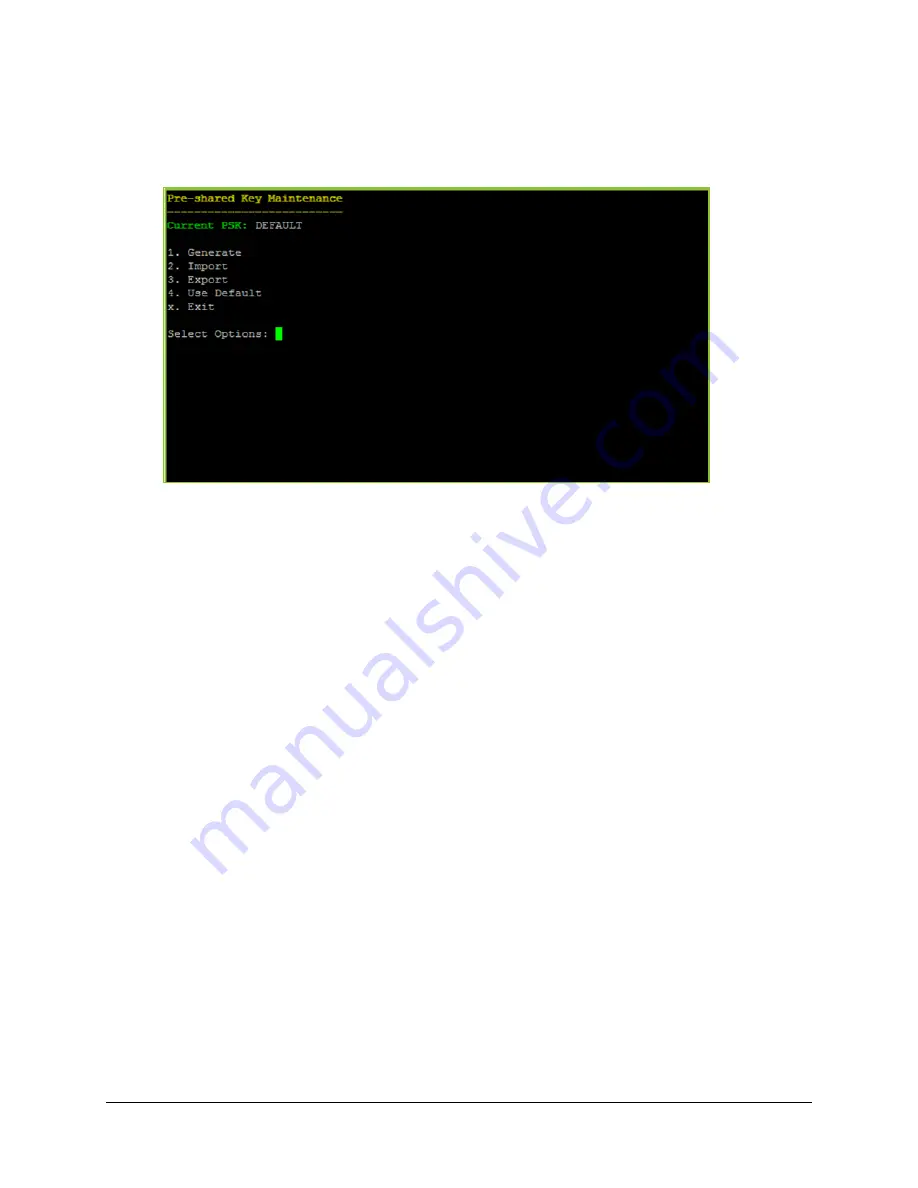
The Pre-shared Key Maintenance menu displays. Under the menu title, the Current PSK
field indicates the pre-shared key currently being used on your server.
5.
Enter
4
to export your pre-shared key.
Instructions display telling you to paste the encrypted pre-shared key and then enter the
passphrase that was used to encrypt the pre-shared key.
6.
In the
Enter New Key
prompt, paste the key you wish to import.
7.
In the
Passphrase
prompt, enter the passphrase.
8.
Select
X
to exit.
9.
Select
x
to exit Advanced Options.
Logging in to the Admin Portal
Now that you have connected your VidyoGateway server to the network, you must log in to its
Admin portal using the System Console account and configure your VidyoGateway so it can
function within your VidyoConferencing system.
To log in to the Admin Portal:
1.
Enter the URL or IP address for the VidyoGateway in the address bar of a web browser:
The URL of your VidyoGateway is typically a domain name:
[
examplegateway.com
]


