A-7
Appendix
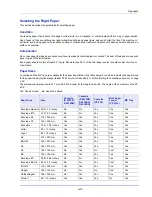
3
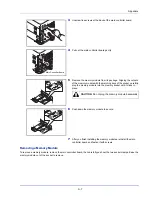
Unscrew five screws at the back of the main controller board.
4
Pull out the main controller board gently.
5
Remove the memory module from its package. Aligning the cutouts
of the memory module with the matching keys of the socket, carefully
plug the memory module into the memory socket until it clicks in
place.
6
Push down the memory module to secure.
7
After you finish installing the memory modules, reinstall the main
controller board and fasten it with screws.
Removing a Memory Module
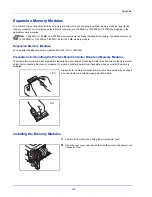
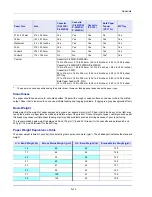
To remove a memory module, remove the main controller board, then carefully push out the two socket clamps. Ease the
memory module out of the socket to remove.
Main Controller Board
CAUTION
Do not plug the memory module backwards.
Содержание P-4030D
Страница 1: ...User manual P 4030D 4030DN 4530DN P 5030DN 6030DN Print A4 Laser Printer b w ...
Страница 22: ...Machine Parts 1 6 ...
Страница 60: ...Printing 3 8 ...
Страница 71: ...4 11 Operation Panel Menu Map Sample Menu Map Printer Firmware version ...
Страница 163: ...4 103 Operation Panel 5 Press or to select whether Thin Print is enabled ...
Страница 194: ...Operation Panel 4 134 ...
Страница 232: ...Document Box 5 38 ...
Страница 238: ...Status Menu 6 6 ...
Страница 272: ...Troubleshooting 8 24 ...
Страница 310: ...Index 4 W Waste Toner Box 1 2 Replacing 7 6 Wide A4 4 51 Wireless Network Interface Kit A 10 X XPS Fit to Page 4 52 ...
Страница 311: ......

