5
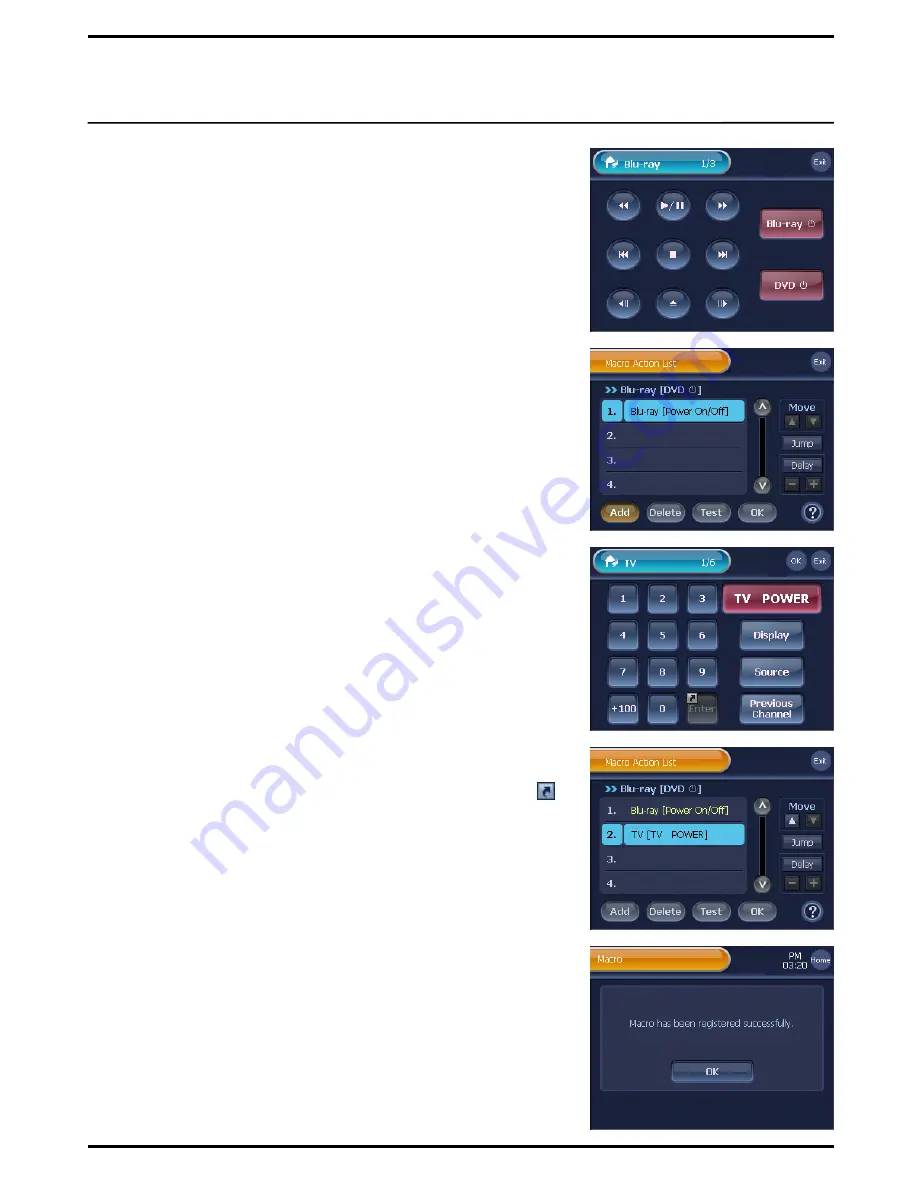
Select and press a Remote Control button to set the Macro Action.
You will be directed to “Macro action List” screen.
Note
. You can select the hard key as a macro button also.
6
You will view the properties of selected remote control button in
“Macro Action List”.
Note
. This new Macro will be named same as the selected remote control
button.
7
Press
[Add]
button on the “Macro Action List” screen. You will be
directed to the “Device Home” screen.
8
Select and press a Device button having Remote Control button that
will be used as Macro Action. You will be directed to the selected
device‟s 1
st
Remote Control page.
.
9
Select a Remote Control button that will be used for a Macro Action,
and then press
[OK]
button.
You will be directed to the “Macro Action List” screen, and the
selected Remote Control button will be displayed on the list in the
order that they have been registered as a Macro Action.
10
To finish Macro Action Setup, press
[OK]
on “Macro Action List”.
The Macro Action will be registered on the Remote Control button.
Note
1. The
[Test]
option allows you to test macro actions before the button
registration. Make sure that
BX7000
is placed and facing toward the
target device before pressing the
[Test]
.
2. When pressing the
[Exit]
button, you will be automatically sent back to
Step 3 as the configuration process is canceled.
3. Make a distinction from normal remote control button, this icon( )
will be displayed at the Remote Control button which contains Macro
Action in setup mode.
You can also use the following options on the
“Macro Action List”
.
①
Press
[Add]
to continue setting up macro actions.
②
Press
[Delete]
to delete macro actions that are not needed.
③
Press
[Move]
to switch the order of macro actions registered on
the Macro Action List.
④
Press
[Delay]
to delay executing the macro actions.
⑤
Press
[Jump]
to move to a desired page while a macro action is in
progress or upon its completion.
※
For more details, refer to the
page 39
, “Edit Macro Action”.
11
Press the
[OK]
button on the Macro registration Confirmation
screen. You will be redirected to the “Device Setup” menu screen.
38
☞
☞


