AudioTron
Reference Manual
Page 19
Configuring AudioTron’s Network Settings
Ü
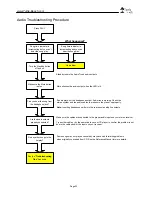
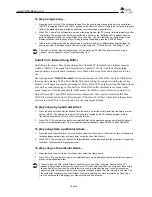
If you experience any problems setting up AudioTron with your configured network, please see if the
issue is addressed in the “Network Troubleshooting Procedure”, “Troubleshooting Tips” or “Network
Basics” sections in this manual or in the FAQ section of the Turtle Beach web site.
Before you begin…
ü
File sharing…
Your digital music files must be in directories called
\Music, \Audio
\My
Music
or
\My Documents \My Music
. These subdirectories must be located under a shared
directory for AudioTron. For more information on how AudioTron uses “shared” directories,
refer to the Appendix called “
Shared Directories”
.
ü
TCP/IP…
Regardless of whether you’re using HPNA or Ethernet, AudioTron requires a
network that is running the TCP/IP protocol. Your network may be running fine, but it may not
be using TCP/IP. If you aren’t sure if your network is running TCP/IP, see the Appendix called
“
Network Basics
”.
ü
IP Address…
Every device in a TCP/IP network, whether it’s a PC or AudioTron, needs an
“IP address” in order to send and receive data on the network. This section will tell you how to
set this up for AudioTron. If you want to know the details about IP Addresses, see the
Appendix called “
Network Basics
”.
ü
If you’re using a DSL or Cable modem with a Router/Hub…
Many Router/Hubs (e.g. the
Etherfast Cable/DSL Router from Linksys), also act as DHCP servers. Check with the
manufacturer of the device to see if this is the case for your Router/Hub device. You should
also check with the manufacturer to see if there’s an update for the device’s firmware. See the
“
Troubleshooting Tips
” Appendix for details on firmware issues.
ü
If your network has a DHCP (“Dynamic Host Control Protocol”) Server…
An IP address
can either be assigned automatically by one of the devices in the network (called a “DHCP
Server”), or you can “hard code” an address into AudioTron (called “Static IP” addressing.) If
your network has a DCHP server, AudioTron will automatically be assigned an IP address
when it’s connected to the network. Since you can’t hurt AudioTron or your network by
attempting to automatically assign an IP address from a DHCP server, let’s give it a try to see
if it works.
To assign an IP address with a DHCP Server (on HPNA or Ethernet)…
1.
Plug AudioTron into the network connection (either HPNA or Ethernet, depending upon your network) and
make sure the PCs and network hub are all turned on.
2.
Turn on AudioTron from the rear panel power switch, wait a few seconds, then press the front panel
Standby button. When powering on, AudioTron will detect if it is connected to the network through an HPNA
or Ethernet interface and choose the appropriate interface.
3.
When the display indicates the type of network connection detected (Ethernet or HPNA), make sure it
corresponds to the type of network you’re using. For instance, if you connected an Ethernet cable and
AudioTron’s display indicates it has detected HPNA, the cable is either not connected properly or the
Ethernet network may not be operating properly.
4.
Once AudioTron detects the network connection, it will begin searching the network for a DHCP server.
(This could take up to 120 seconds, so wait until it’s done.)
5.
If AudioTron finds the DHCP server and is assigned an IP address, it will display “Searching for Hosts” and
will search for all the host PCs that have music files in shared directories (as explained in the Appendix
called “Shared Directories”.)
6.
If AudioTron finds music files, it will display “Found xx Hosts” (where xx is the number of PCs it found) and
then begin to search for music files. After it’s done finding songs, the main menu will appear and AudioTron
is ready to play music. From this point on, you should turn AudioTron on and off with the Standby button.
Turning off the rear panel power switch will erase the internal database of song titles and the network scan
procedure will be repeated the next time AudioTron is powered on.

