Chapter 3. Product Configuration and Operation
EK–MOL80–SV. B01
3–19
1.
With
READY
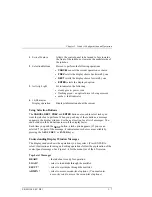
displayed, insert a cartridge into the mailslot. The shutter end
of the cartridge goes in first. Side A should be facing up. Push the cartridge
in gently until it is fully inserted into the mailslot.
LOAD
and
SLOT##
("##"
is the number of the first available storage slot in the jukebox) alternately
display.
2.
If you want to select the storage slot number in the display, press
ENTER
. If
you want to choose a different storage slot, press
NEXT
until the desired slot
number is displayed and then press
ENTER
.
3.
Initially, flashes in the jukebox display. After the disk has been loaded
into the selected storage slot,
LOADED
displays briefly, and then
LOAD*
is
again displayed. (See the note below.) You many now load additional disks.
Press
ENTER
and then repeat steps 1 and 2 until you have loaded all the
disks you want to into the jukebox.
4.
Press
CANCEL
to return to the
READY
state.
NOTES
If you get a LOAD ERROR message, one of
the following conditions may exist:
The disk may not be pushed far enough into
the mailslot. Try pushing the disk into the
mailslot a little farther.
The disk was inserted incorrectly into the
mailslot. The shutter end of the cartridge goes
in first.
If you get a MAILSLOT EMPTY message, a
disk needs to be inserted into the mailslot.
If you get a RESERVED message, a security
option has been set that prevents disks from
being loaded into or removed from the
jukebox. See "Setting a Security Code" in this
chapter.
If you get a TRANSPORT FULL message,
the disk transport mechanism already
contains a disk.
If you get a SENSOR message, verify that
the disk has been correctly inserted into the
mailslot. If the error cannot be corrected by
removing and then re-inserting the disk, the
mailslot sensors may have failed.
Содержание RW551
Страница 27: ...Medium Optical Disk RW551 RW552 Library 3 2 EK MOL80 SV B01 Figure 3 2 Rear Panel SCSI Connect...
Страница 34: ...Chapter 3 Product Configuration and Operation EK MOL80 SV B01 3 9 Figure 3 4 Control Panel Menu Tree...
Страница 92: ...end...
Страница 139: ...Chapter 5 Removal and Replacement EK MOL80 SV B01 5 47 Figure 5 49 Jukebox Exploded View 1 of 2...
Страница 140: ...Medium Optical Disk RW551 RW552 Library 5 48 EK MOL80 SV B01 Figure 5 49 Jukebox Exploded View 2 of 2...
Страница 141: ...Chapter 5 Removal and Replacement EK MOL80 SV B01 5 49 Figure 5 50 Jukebox Power Harness...
Страница 142: ...Medium Optical Disk RW551 RW552 Library 5 50 EK MOL80 SV B01 Figure 5 51 Jukebox Pulley and Rope Diagram...
Страница 166: ...Chapter 6 Theory of Operation EK MOL80 SV B01 6 23 Figure 6 10 User Zone Layout for 1 3 Gbyte Media g 1...
Страница 167: ...Medium Optical Disk RW551 RW552 Library 6 24 EK MOL80 SV B01 Figure 6 11 User Zone Layout for 1 3 Gbyte g 16...
Страница 168: ...Chapter 6 Theory of Operation EK MOL80 SV B01 6 25 Figure 6 12 User Zone Layout for 2 6 Gbyte Media 1 024 bytes sector...


