


Page 106
GPS Chart Plotters
R
Time
: To start the simulator you can insert the time.
Cursor Control
: Enables (On)/disables (Off) the cursor control.
Demo Mode
: In Demo mode the GPS Chart Plotter automatically places a Destination point on the Chart
page and simulates navigation to the point. Also, the active page changes automatically
every 10 seconds. The pages are shown in the following order: Start-up screen, GPS Status
page, Chart/Compass tape page, Chart/Fish Finder page, Fish Finder Full page, Radar
page, Navigation page, Highway Page, Celestial page, NMEA Display page. Once the
Demo mode is enabled, pressing any key it is possible to temporally exit and returns to GPS
Chart Plotter normal operation, but if you do not touch any key for 30 seconds Demo mode
re-starts.
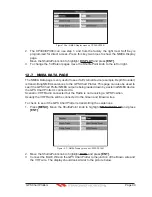
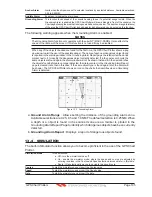
13.4.0 Navigating a Route in Simulation mode
This selection allows you to navigate to a saved Route to see how data windows on the Chart
page and how the Navigation and Highway pages operate.
1. Create a Route. Refer to Par. 9.0 Route.
2. Press
[MENU]
, move the ShuttlePoint knob to highlight
SETUP MENU
and press
[ENT]
.
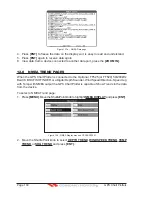
3. Move the ShuttlePoint knob down to highlight
ADVANCED SETUP
, then press
[ENT]
.
4. Move the ShuttlePoint knob to highlight
SIMULATION
and press
[ENT]
.
5. Move the ShuttlePoint knob to highlight
SIMULATION MODE
and press
[ENT]
to show
a popup window.
6. Move the ShuttlePoint knob to highlight
ROUTE
and press
[ENT]
which will show a
popup window with the Route(s) that are stored in the GPS Chart Plotter’s memory.
7. Highlight the desired Route and press
[ENT]
.
8. Move the ShuttlePoint knob to highlight
SPEED
and press
[ENT]
.
9. Enter in the speed you want to vessel to travel at in simulation mode, by moving the
ShuttlePoint knob left or right to select a number and up or down to change a number.
10. When the speed is adjusted, press
[ENT]
.
11. Press
[CLR]
multiple times until the Chart page is shown.
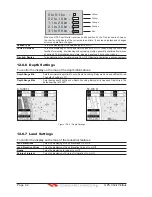
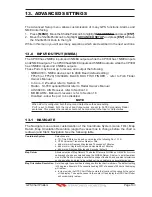
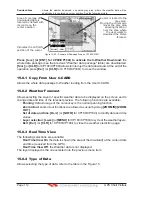
13.5 DSC POLLING
This menu is used to enable or disable features related to the DSC function.
Auto Position
: Selects between Manual or Auto. See also the Par. 12.8.1. When Auto Position item is set to
Manual
and receiving the Position Request, the Position Request popup window is not displayed
and the cursor does not move to the position of the received Position Request data point.
Otherwise when Auto Position item is set to
Auto
, the GPS chart plotter works as follows:
1 : when receiving the Position Request, the Position Request popup window is displayed;
2 : when selecting
VIEW ON CHART
, the position is indicated on the chart marked with “P”.
The cursor is moved to the point “P” and shows the point in the center of the screen;
3 : when moving the cursor from “P”, the location can be confirmed. At this time, the same
MMSI Position Request data that were received before are remaining and displayed.
Auto Info
: Enables or disables the Auto Info. This selection is available only when Auto Position is set to
Manual. If Auto Info is set to On, when receiving the Position Request it is possible to center the
cursor over the top of the Position Request icon and show the Position Request popup window
Содержание CP180
Страница 1: ...CP180 CP180i CP300 CP300i Owner s Manual Color GPS Chart Plotters R ...
Страница 4: ...Page 6 GPS Chart Plotters R ...
Страница 12: ...Page 14 GPS Chart Plotters R ...
Страница 38: ...Page 40 GPS Chart Plotters R ...
Страница 48: ...Page 50 GPS Chart Plotters R ...
Страница 60: ...Page 62 GPS Chart Plotters R ...
Страница 68: ...Page 70 GPS Chart Plotters R ...
Страница 76: ...Page 78 GPS Chart Plotters R ...
Страница 80: ...Page 82 GPS Chart Plotters R ...
Страница 108: ...Page 110 GPS Chart Plotters R ...
Страница 118: ...Page 120 GPS Chart Plotters R ...
Страница 120: ...Page 122 GPS Chart Plotters R ...
Страница 126: ...Page 128 GPS Chart Plotters R ...
Страница 130: ...Page 132 GPS Chart Plotters R ...


