EyeLink II Scene Camera User Manual
©
2004-2007 SR Research Ltd.
34
Display Area” dialog box. If you are using a Dell C- or D-series laptop as the
host PC on a docking station, make sure you have computer signal sent to both
the monitor and overlay box (As mentioned earlier, Dell D-series laptop users
should have an extra computer monitor connected to the docking station). If
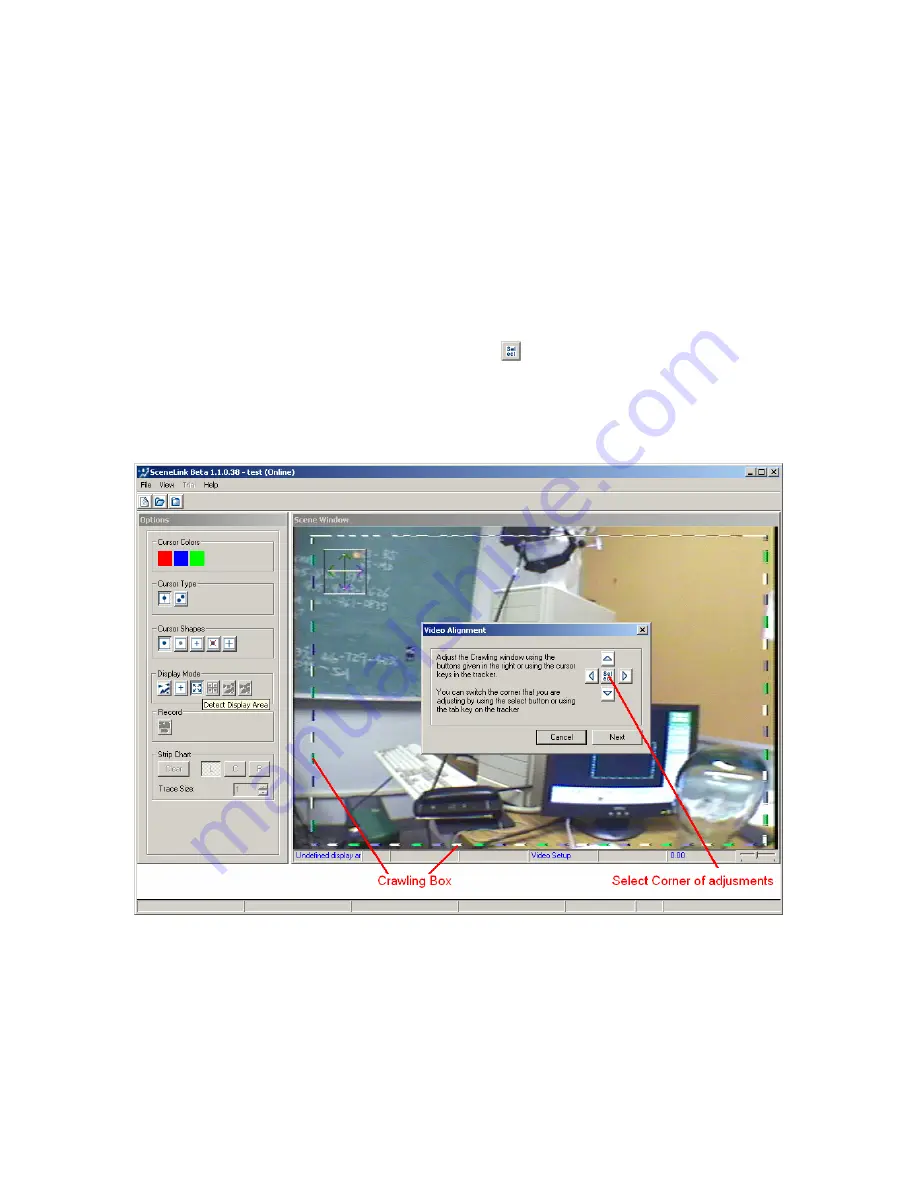
you do not see a box consisting of a highly visible moving pattern (“crawling
box”) on the SceneLink video screen, you should press “Fn” + F8 (CRT/LCD)
shortcut keys on the laptop keyboard.
In the Video Alignment screen, the user should first adjust the size of the
overlay display, which is indicated by the crawling box. Note also the drawing
of a square with arrows, located just inside the top-left or bottom-right corner of
the crawling box. Click the “select” button ( ) on the dialog box to select the
corner of adjustment. Use the four arrows buttons to adjust the size of the
crawling box to maximum while keeping the outside edge of the moving pattern
still fully visible. Click the “select” button to switch to adjusting the other
corner. Press the “Next” button to continue.
Figure
4-3. Adjusting the Size of Overlay Display
Following this, the overlay graphics and scene camera video can be aligned. A
“Detect Display Area” dialog box will appear on the background of gray box with
a white box in it (see Figure 4-4). If the gray box does not appear, please check
the “Video Setup” screen of the host PC to make sure the “Video Ref Pattern”


