


EyeLink II Scene Camera User Manual
©
2004-2007 SR Research Ltd.
32
4. Performing Recording with the SceneLink Application
In addition to the usual steps for EyeLink recordings, using the scene camera
option requires extra steps to perform scene camera alignment and depth
correction. In a recording session, the user should perform the experiment
setup in the following order:
-
Check the display area setting (i.e., calibrate the size of overlay graphics
display and to align it with the scene camera video).
-
Perform (or check) scene camera and head camera alignment
-
Do eye/head cameras setup
-
Calibration and validation
-
Perform depth correction
-
Recording and, if necessary, drift correction
The current chapter explains how to perform each of the above steps with the
SceneLink application. The SceneLink application allows for greater flexibility
in scene camera data recording and playback. With this application, the user
has a real-time gaze overlay preview during recording and can change the gaze
cursor and shape on the fly. More importantly, this application allows for scene
camera video saved as digital video (in .AVI file format) without any gaze overlay
graphics. Overlay graphics are generated during data playback.
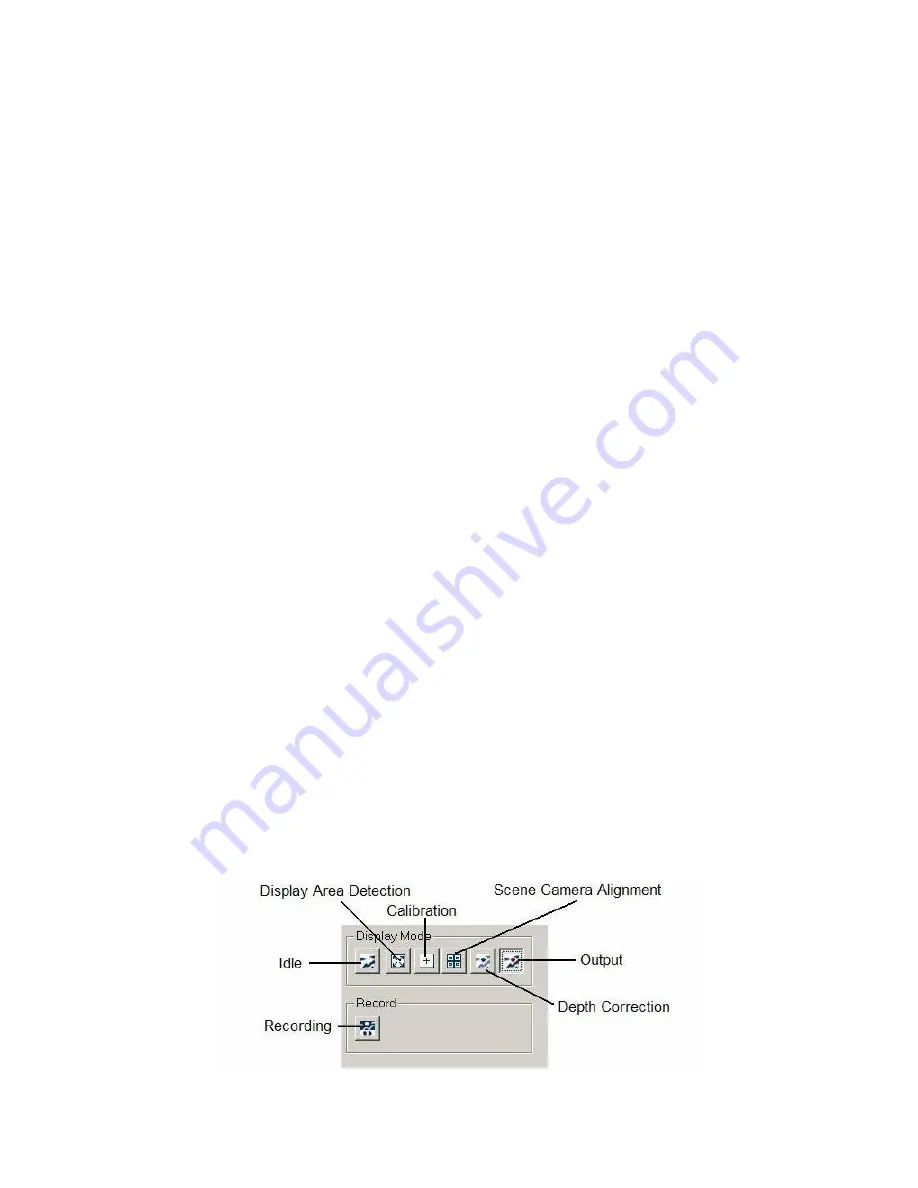
4.1 Modes of Operation
Recording eye movement data and scene camera video with the SceneLink
application should be controlled from the display PC. Although recordings can be
started and stopped from the host PC, doing this may cause difficulties in data
playback later on.
To perform a recording with the SceneLink application, the
user will have to go through several modes, in the order of display area
checkup, camera setup and calibration, scene camera alignment, depth
correction, output and recording. Each of the above modes is entered by
clicking on the corresponding display mode button (see Figure 4-1).


