75
This document is written and published by ShockWatch, Inc. All rights reserved.
USER MANUAL
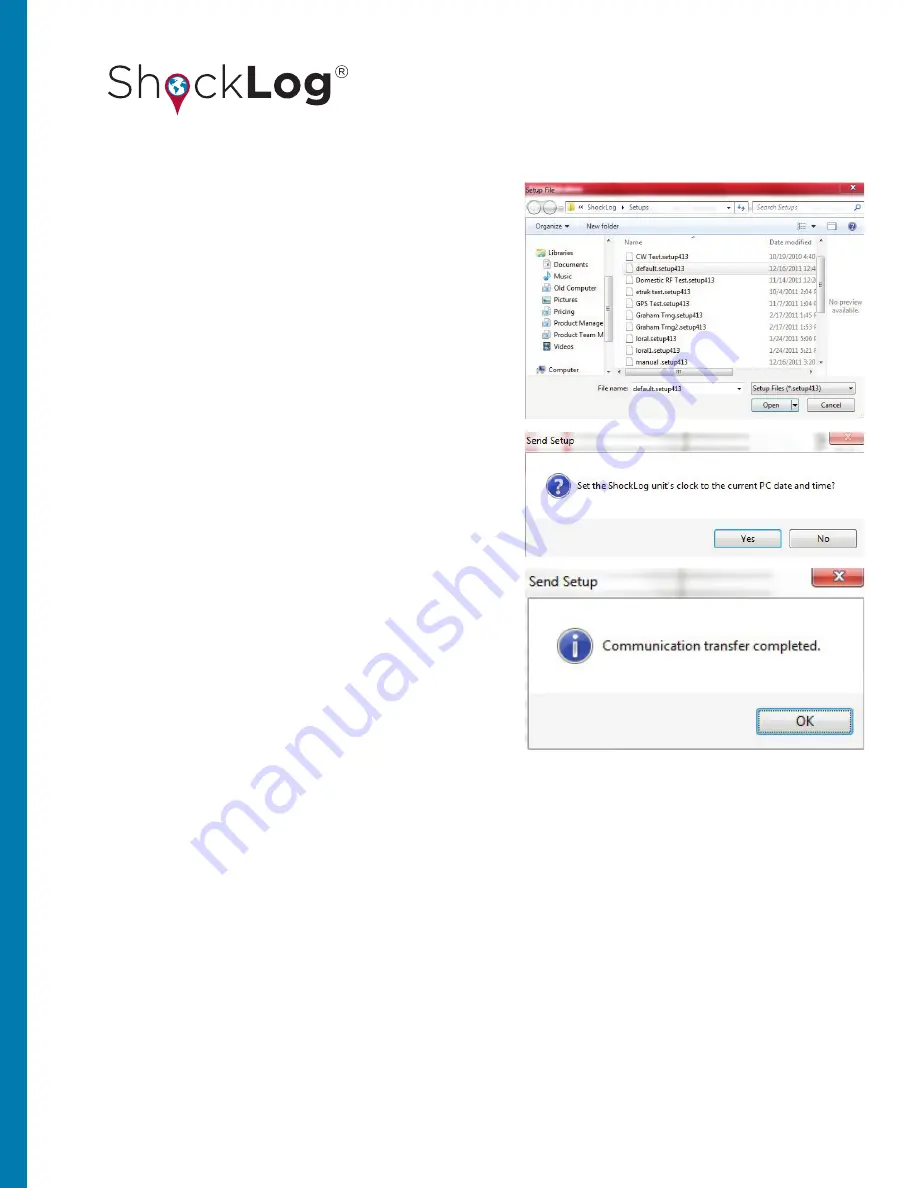
Select the default.setup413 file and click “Open.”
Select “Yes” when prompted with the question “Set the
ShockLog unit’s clock to the current PC date and time?”
The information bar at the bottom of the screen will show
a connecting status and change to “OK.” A confirmation
window will appear after the setup has been successfully
sent to the ShockLog unit.
After selecting “OK,” the Communications window will
gray out for a few seconds and then will come back
with several of the boxes completed. At this point, the
ShockLog memory is being cleared and the unit is being
reset for a new recording period. This process may take
several minutes depending on the amount of data being
cleared. Once completed, the status field will display
“Running,” and the ShockLog can be disconnected from
the PC.
DROP TEST
The ShockLog is now recording. The green Slot Alarm LED will flash every 5 seconds indicating that the ShockLog
is recording.
Create a few events by dropping the unit on a desk. Ideally, drop the ShockLog onto a mouse pad or notepad. It
should only be necessary to drop the ShockLog from approximately 25mm (1” inch) to create an 8 to 10 g impact event.
Repeat this process a number of times and have the unit land on different faces to create impacts in all three axes.


