7
Before you begin / Avant de commencer
2
7
8
9
!º
!¡
!™
3
4
5
6
1
!£
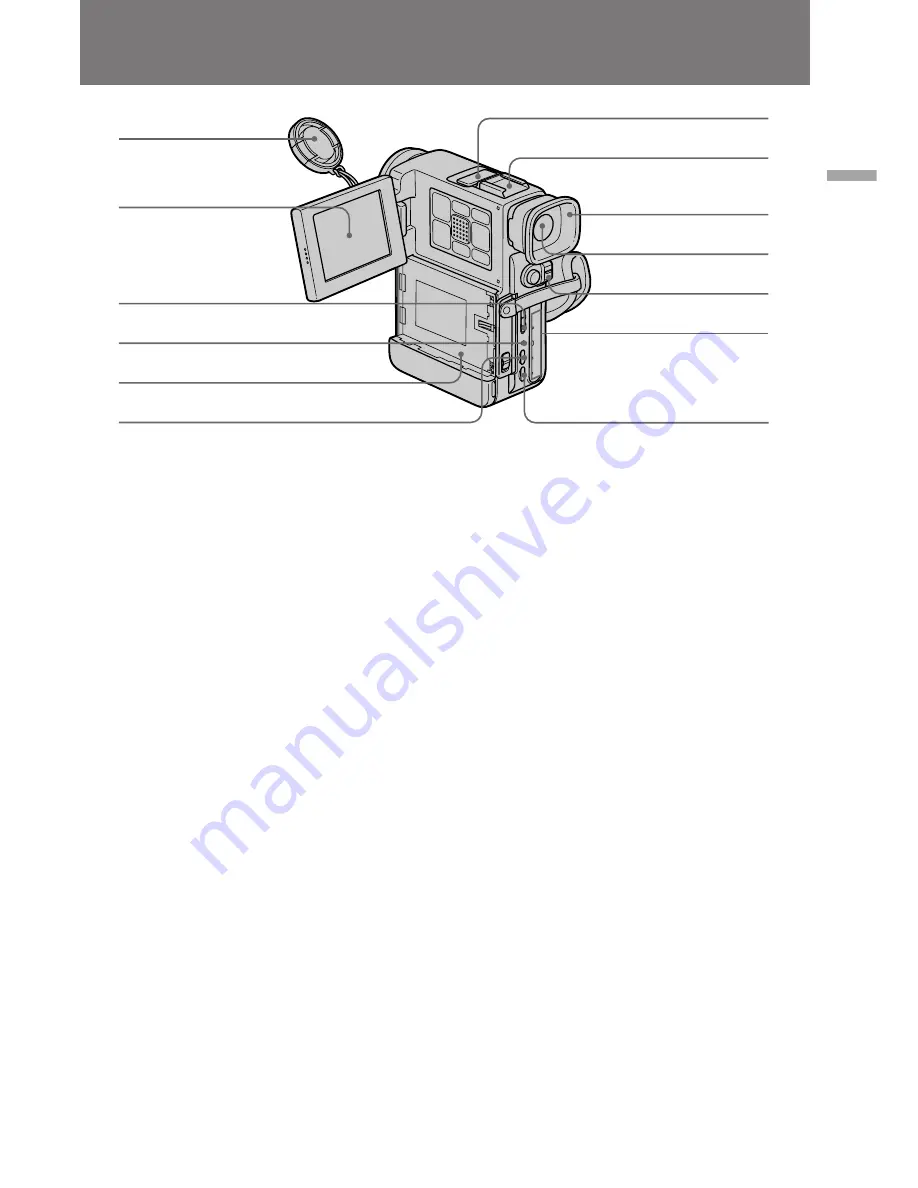
Identifying the parts
Nomenclature
1
Lens cap
(p. 22)
2
LCD screen
(p. 27)
3
START/STOP MODE switch
(p. 26)
Set to select the mode of the START/STOP
button.
4
CHARGE lamp
(p. 17, 37)
Lights while charging the battery pack
installed in the camcorder.
5
Battery mounting surface
(p. 20)
6
AE LOCK button
(p. 43)
7
Built-in microphone
8
Accessory shoe
9
Eyecup
(p. 31)
0
Viewfinder
(p. 15)
!¡
POWER switch
(p. 22, 32)
!™
Video controls buttons
(p. 32)
p
STOP (stop)
0
REW (rewind)
·
PLAY (playback)
)
FF (fastforward)
P
PAUSE (pause)
!£
FADER button
(p. 42)
1
Capuchon d’objectif
(p. 22)
2
Ecran LCD
(p. 27)
3
Commutateur de mode marche/arrêt
(START/STOP MODE)
(p. 26)
Sert à sélectionner la fonction de la touche
START/STOP.
4
Témoin de charge (CHARGE)
(p. 17, 37)
Il s’allume pendant la charge de la batterie
installée dans le camescope.
5
Surface de montage de la batterie
(p .20)
6
Touche de verrouillage d’exposition
automatique (AE LOCK)
(p. 43)
7
Microphone intégré
8
Griffe porte-accessoire
9
Oculaire du viseur
(p. 31)
!º
Viseur
(p. 15)
!¡
Commutateur d’alimentation (POWER)
(p. 22, 32)
!™
Touches de commande vidéo
(p. 32)
p
STOP (arrêt)
0
REW (rembobinage)
·
PLAY (lecture)
)
FF (avance rapide)
P
PAUSE (pause)
!£
Touche de fondu (FADER)
(p. 42)


