

12’ Garden Master (3.5mm) Page 15
Banding 1
Banding 2
Banding 3
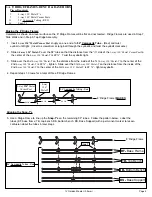
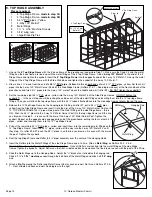
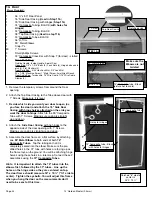
FIG 10A
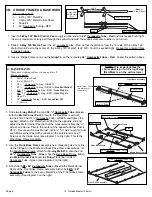
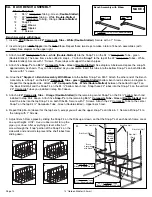
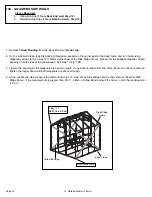
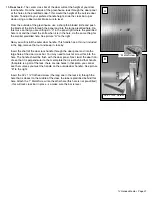
1. On the front end wall, loop
Banding 1
through an
eyebolt on the Metal Corner Post on the base frame.
Loop the other end of the banding through an eyebolt
on the opposite 3-Way 120° Metal Corner Post on the
Side Ridge Frame.
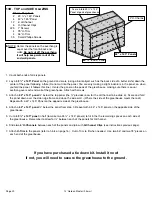
2. Thread banding through the metal buckle as
shown/explained in Fig 10B.
3. Thread
Banding 2
to the opposite diagonals.
4. Tighten Banding 1 & 2 so the diagonals are equal in
length. If they are not equal in length. Lossen the
shorter one and then tighten the longer band until the
two diagonal measurements are the same.
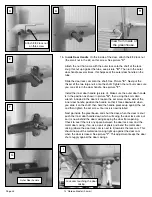
5. Loop
Banding 3
through an eyebolt of the 3-way
120° Metal Corner Post of one Side Ridge Frame to
the eyebolt of the 3-way 120° Metal Corner Post on
the opposite Side Ridge Frame. Tighten the banding
so the measurement from the “in” side of one 3-way
120° Metal Corner Post to the center of the opposite
3-way 120° Metal Corner Post is equal to 95 ½”.
Keep banding in place until Front End wall paneling has
been applied.
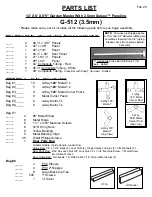
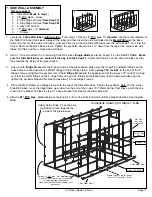
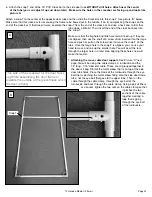
10 A. SQUARING FRAME
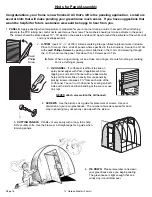
Pieces Required:
3 Yellow Banding
3
Metal Banding Clips
2 76” Side Door Casing
(1 with hinges)
1 38” Top Door Casing
1 1” Screw
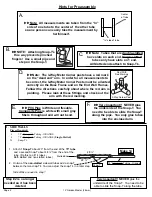
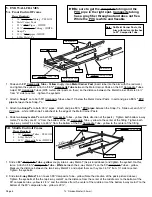
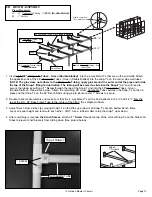
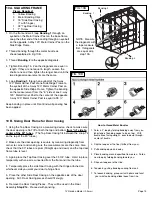
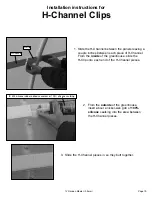
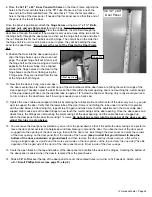
How to thread Metal Buckles
1. Form a 3” loop by folding banding away from you,
(short end of banding needs to be on top). With
buckle tines facing upright, pass loop up through
center of buckle.
2. Slip the loop over the tine (farthest from you).
3. Pull banding down and away.
4. Place banding around specified frame area. Fold a
new loop by folding banding toward you.
5. Slip new loop over other tine.
6. Tension by pulling banding coming from coil.
7. To loosen banding, grasp coil with pliers and twist
your wrist so banding slides loose from tine.
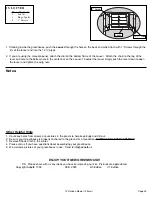
NOTE: Measure
the diagonals with
a tape measure
first. If diagonals
are equal, skip
step 10A.
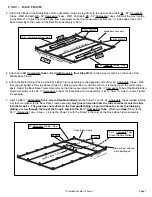
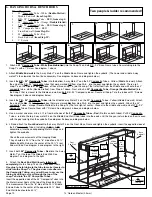
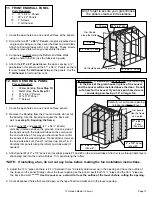
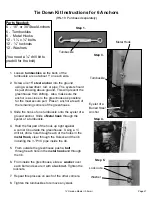
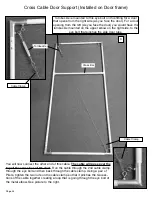
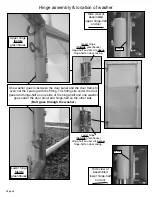
10 B. Sizing Door Frame for Door Casing
1. Using the Top Door Casing as a measuring device, check to make sure
the door opening is 36 7/8” at both the top and bottom
from “in” side to
center of the 90” tubes.
(The Top Door Casing fits between the snap-T’s
on the top of the 90” tubes.)
2. Make sure the door opening is square by measuring diagonally from
corner to corner and making sure the measurements are the same. Also
check that the 90” tubes are plum (Straight up and down) and the top door
frame tube is level.
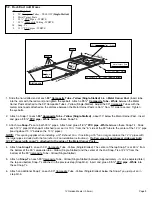
3. Again place the Top Door Casing over the 35 3/4” tube. Hold in place
temporarily with one screw inserted from the front and into the tube.
4. Temporarily place the side Door Casing with the Hinge attached on
whichever side you want your door to hinge from.
5. Place the other Side Door Casing on the opposite side of the door
opening. All 3 Door Casing pieces should fit snugly.
6. Remove the Door Casing Pieces. They will be used in the Door
Assembly
Step #14.
Proceed with paneling.
FIG 10B


