


4-51
Specifying the original scan size (by numerical values)
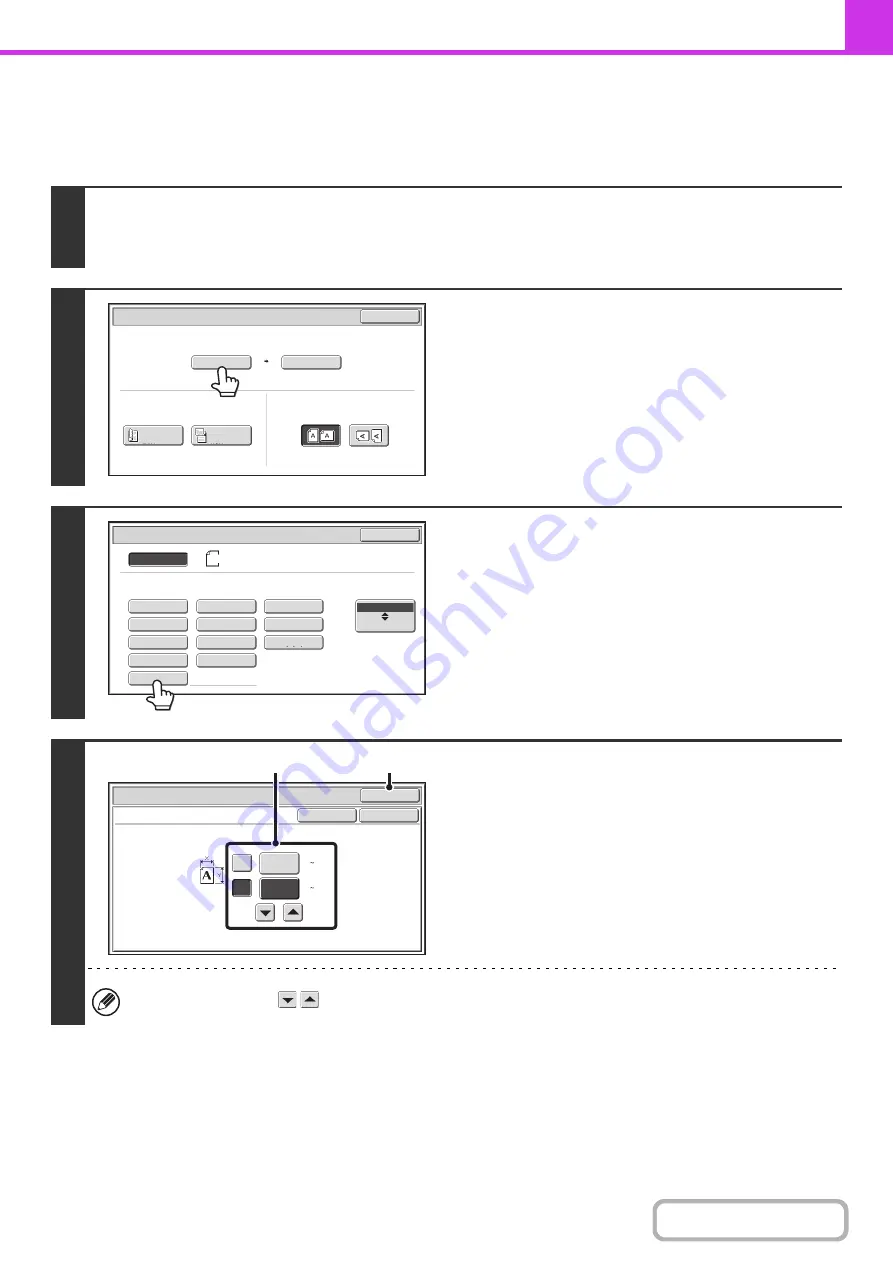
When scanning a non-standard size original such as a postcard or card, follow these steps to specify the original size.
The width can be from 25 mm to 432 mm (1" to 17"), and the height can be from 25 mm to 297 mm (1" to 11-5/8").
1
Touch the [Original] key.
The automatically detected original size appears to the right of the [Original] key.
☞
2
Touch the [Scan Size] key.
3
Touch the [Size Input] key.
4
Enter the scan size.
(1) Touch the X (width) numeric value display
key and enter the width.
(2) Touch the Y (height) numeric value display
key and enter the height.
(3) Touch the [OK] key.
To complete the setting and return to the screen of step 3,
touch the [OK] key next to the [Cancel] key.
You can also touch the
keys to change the number.
Auto
Auto
A4
Scan
Size
Send
Size
100
%
Fax/Original
OK
2
-
Sided
Booklet
2
-
Sided
Tablet
Image
Orientation
Auto
Fax/Original
Manual
OK
Size
Input
A4
B5R
B4
A3
A4
A5R
B5
216x343
216x340
A4R
A5
Long
Size
AB
Inch
Size Input
Fax/Original
OK
OK
Cancel
420
X
Y
297
(25 297)
mm
(25 432)
mm
(1), (2)
(3)
Содержание MX-M503N
Страница 11: ...Conserve Print on both sides of the paper Print multiple pages on one side of the paper ...
Страница 34: ...Search for a file abc Search for a file using a keyword Search by checking the contents of files ...
Страница 35: ...Organize my files Delete a file Delete all files Periodically delete files Change the folder ...
Страница 277: ...3 18 PRINTER Contents 4 Click the Print button Printing begins ...
Страница 283: ...3 24 PRINTER Contents 1 Select Printer Features 2 Select Advanced 3 Select the Print Mode Macintosh 1 2 3 ...
Страница 806: ...MXM503N EX Z1 Operation Guide MODEL MX M283N MX M363N MX M453N MX M503N ...