2-68
3
Example: Touch insert A at page 4
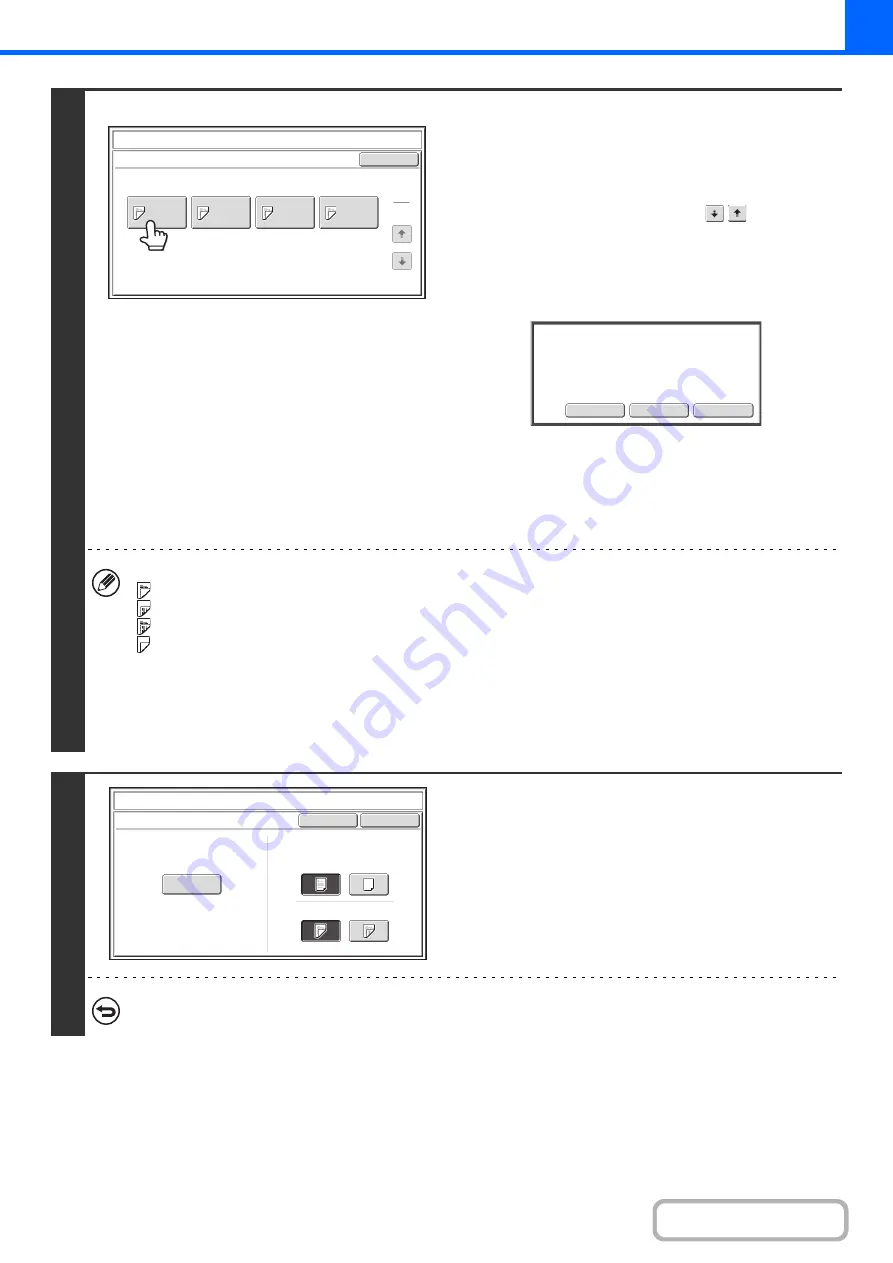
Touch the key of the page that you wish
to delete or change.
If you do not need to change the setting, touch the [OK] key
and go to step 6.
• Each key shows a print image icon and the insertion page.
• If there are multiple screens, touch the
keys to move
through the screens.
To edit a cover, touch the [Front Cover] key or the [Back Cover]
key and go to step 4.
Touch the key of the insertion page that you want to edit or
clear. The following screen will appear.
• To delete the page, touch the [Delete] key. After deleting the
key, touch the [OK] key and go to step 6.
• To edit the page, touch the [Modify] key.
To edit an insert, touch the [Insertion Type A] key or the
[Insertion Type B] key and go to step 5.
• To cancel, touch the [Cancel] key.
Icons
: Copy on front side only
: Copy on reverse side only
: 2-sided copy
: Do not copy
For inserts, the insertion page also appears.
* represents a page number.
*/-: Copy only on front side at page *
*/*: 2-sided copy at page */*
<*: Insert without copying at page *
4
Change the front/back cover settings.
The settings are changed in the same way as they are initially
configured. See step 4 of "
" (page 2-60) to change the cover settings.
After changing the settings, touch the [OK] key and return to
step 3.
To cancel cover settings...
Touch the [Cancel] key.
Covers/Inserts
Page
Layout
OK
1
1
Insertion
Type
A
4/
-
Insertion
Type
B
7/
-
Insertion
Type
B
9/
-
Insertion
Type
A
12/
-
Modify
the
insertion
?
Modify
Delete
Cancel
Covers/Inserts
Cancel
Front
Cover
Setting
OK
Paper
Tray
on
Front
Cover
Yes
8
½
x11
Plain
No
2
-
Sided
1
-
Sided
Bypass
Tray
Содержание MX-2600N
Страница 11: ...Conserve Print on both sides of the paper Print multiple pages on one side of the paper ...
Страница 34: ...Search for a file abc Search for a file using a keyword Search by checking the contents of files ...
Страница 35: ...Organize my files Delete a file Delete all files Periodically delete files Change the folder ...
Страница 282: ...3 18 PRINTER Contents 4 Click the Print button Printing begins ...


