2-59
USING A DIFFERENT PAPER TYPE FOR
COVERS (Covers/Inserts)
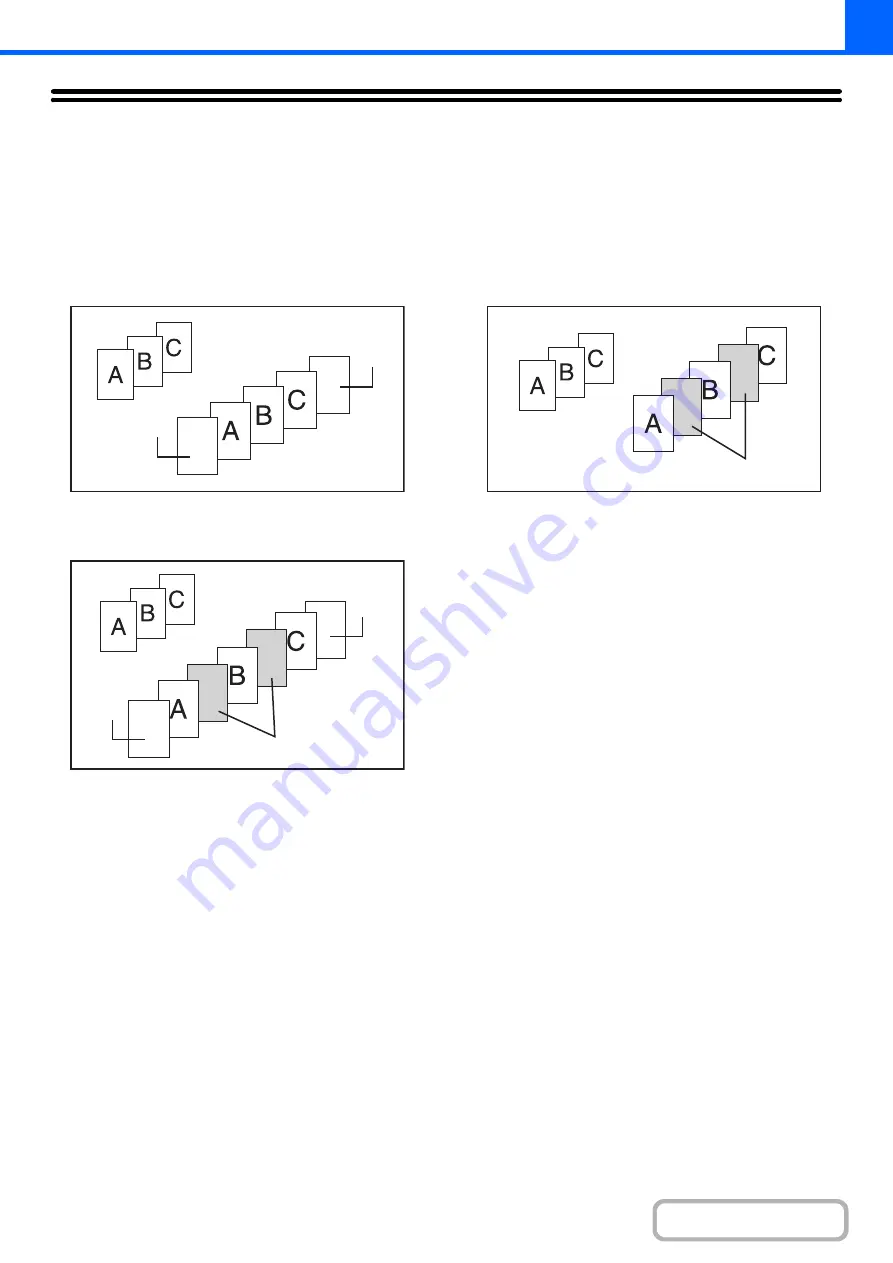
A different type of paper can be inserted in positions corresponding to front and back covers of a copy job when the
automatic document feeder is used. A different type of paper can also be automatically added as an insert at specified
pages.
Example of adding covers
Example of adding covers/inserts
Example of adding inserts
About the explanations of covers and
inserts
There are various ways of using covers and inserts. To
keep the explanations simple, covers and inserts are
explained separately. For specific examples, see
"
Examples of covers and inserts
" (page 2-145).
Preparations for using covers and inserts
• Load the cover/insert paper in the tray before using the cover/insert function.
• Before selecting the cover/insert function, place the originals in the document feeder tray, select 1-sided or 2-sided
copying, and select the number of copies and any other desired copy settings. When these settings have been
completed, perform the procedure to select covers/inserts.
• The originals must be scanned using the automatic document feeder. The document glass cannot be used.
• For covers, only one sheet can be inserted for the front cover and only one sheet can be inserted for the back cover.
For inserts, up to 100 sheets can be inserted. Note that two insert sheets cannot be inserted between the same two
pages.
• When performing 2-sided copying of 2-sided originals, an insert cannot be inserted between the front and reverse
sides of an original.
Back
cover
Front cover
Originals
Inserts
Back
cover
Originals
Front
cover
Originals
Inserts
Содержание MX-2600N
Страница 11: ...Conserve Print on both sides of the paper Print multiple pages on one side of the paper ...
Страница 34: ...Search for a file abc Search for a file using a keyword Search by checking the contents of files ...
Страница 35: ...Organize my files Delete a file Delete all files Periodically delete files Change the folder ...
Страница 282: ...3 18 PRINTER Contents 4 Click the Print button Printing begins ...


