Manual revision 001
Section 4: Deploying and Operating SBE 39
plus
-IM
SBE 39
plus
-IM
71
Uploading Data via USB and Viewing in Plot39
1.
Connect to internal USB connector:
A.
Wipe the outside of the titanium end cap and housing dry, being
careful to remove any water at the seam between them.
B.
Using a wrench on the end cap’s wrench flats, unscrew the end cap.
C.
Pull the end cap and attached electronics out of the housing.
D.
Remove any water from the end cap O-rings and mating surfaces
inside the housing with a lint-free cloth or tissue.
E.
Connect the USB cable to the USB connector below the battery pack.
F.
Connect the USB cable to your computer’s USB port.
2.
Double click on
SeatermV2.exe
. The main screen appears.
3.
In the Instruments menu, select
SBE 39plus IM USB
.
SeatermUSB – SBE39plus-IM
opens.
4.
If there is only one USB device connected, SeatermUSB – SBE39plus-IM
should automatically connect to the device (you may need to click
Refresh). If there are multiple USB devices, click on the desired device
and click Refresh. When SeatermUSB – SBE39plus-IM connects to the
device, it automatically sends the
Stop
command to stop autonomous
sampling.
5.
Click the
Upload
button.
A.
The Save As dialog box appears; navigate to the desired folder.
SeatermUSB – SBE39plus-IM suggests a file name with a format
SBE39plus
Serialnumber_Date.
xml (
Serialnumber
is last five digits
of 39
plus
-IM serial number,
Date
is upload date). You can enter a
different file name if desired; the file name has an .xml extension.
Click Save.
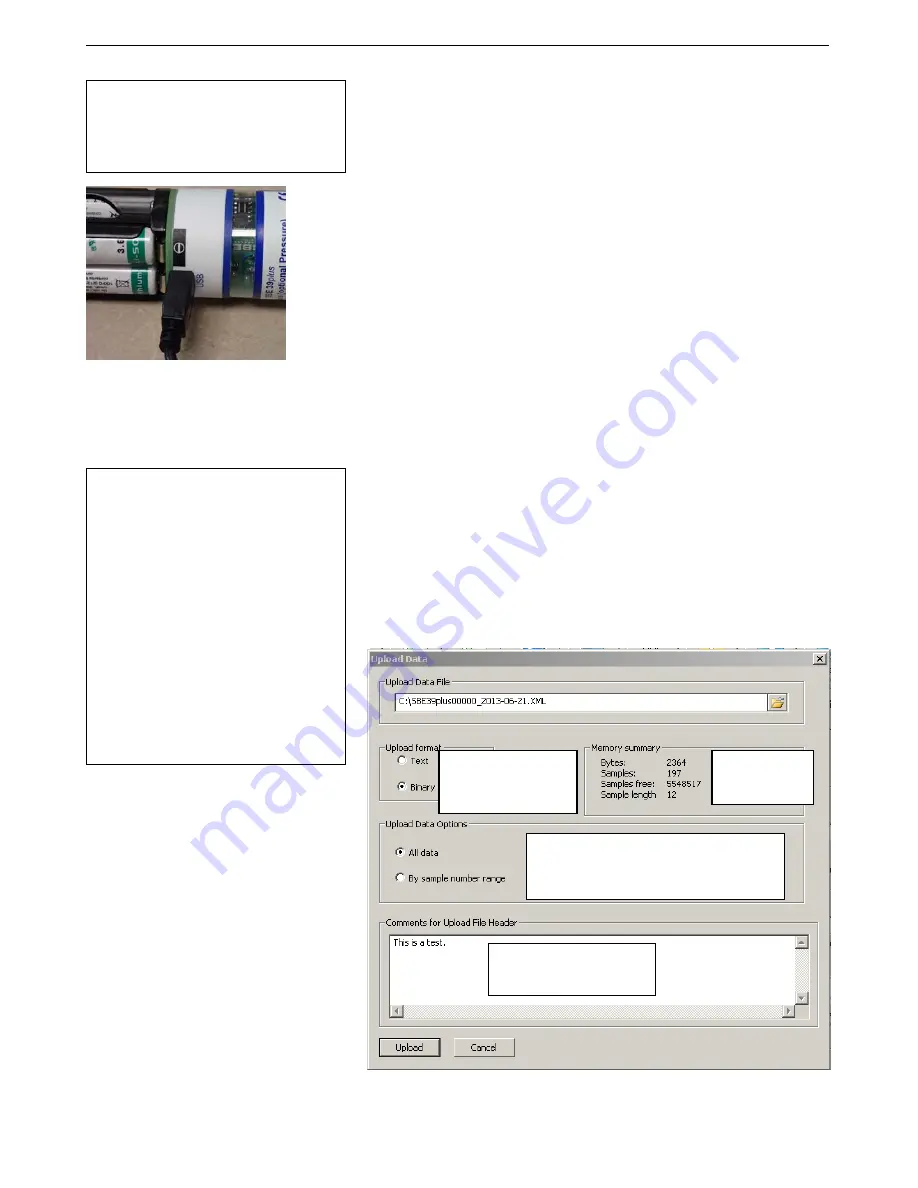
6.
The Upload Data dialog box appears, showing the selected file name and
location.
Make the desired selections/entries.
Note:
If the 39
plus
-IM internal battery pack
voltage is low, the computer supplies
sufficient power through the USB cable
for the data upload.
Note:
If there are multiple 39
plus
-IM cabled
to USB ports, you can upload from all
of them by clicking the
Upload All
button. Note the following limitations of
Upload All
compared to
Upload
:
•
Does not allow you to select file
names (uploads data from each
instrument to a separate file which
includes the serial number; you can
rename the files later).
•
Does not allow you to select the
sample range (uploads
all
samples
in each 39
plus
-IM).
•
Does not allow you to add header
information (you can add it later
manually by opening the files in a
text editor).
USB cable
Select desired upload option. If you select
By sample number range
, boxes appear for
entering starting sample number and total
number of samples to upload.
Provide additional
information to be included in
upload file header.
Select to enable ASCII
text or binary upload.
Binary is approximately
twice as fast.
Shows number
of samples in
memory, etc.


