Chapter 3
Exporting documents
63
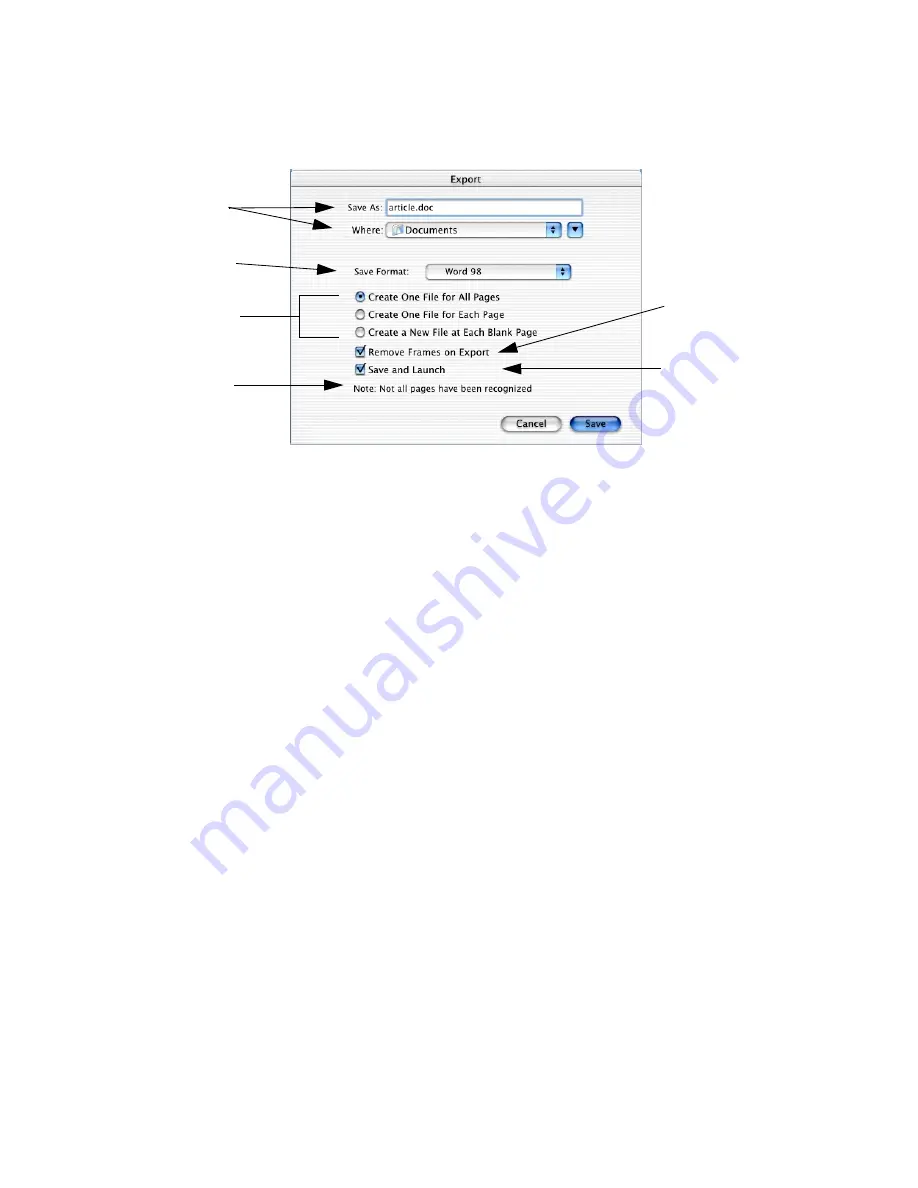
3. Type in a file name for your document, using not more than 28
characters.
4. Select the appropriate file format for your document in the Save
Format pop-up menu.
Formats able to accept True Page output are listed with a Tp icon.
If your target application cannot handle frames, or you do not
want frames to be used, click the check box Remove Frames on
Export.
5. Select other save options if you are saving the document in a file
format other than OmniPage Document.
6. Click Save.
The document is saved to disk as specified. If Retain Graphics was
selected in the OCR panel of the Preferences dialog box,
embedded graphics are saved with the file, providing the selected
format supports them. The graphics are saved at 75 or 150 dpi, as
specified in the Preferences dialog box.
7. If you chose Save and Launch, the target application linked to your
saving format is activated and the recognition results are loaded. If
you chose to save each page to a separate file, only the first file is
loaded. OmniPage Pro remains running with the document still
available.
Type in a name and
define a location for
your file.
Select save options
when saving to formats
other than
OmniPage
Document
.
This is available when
True Page is set, for
some saving formats.
Select it to maintain
page layout without
frames, so text can
flow between
columns.
Choose this to see
your recognition
results in their target
application
immediately after
export.
This appears if there
are unrecognized
pages. They will be
skipped during export.
Select a save format.
Содержание OMNIPAGE PRO X
Страница 1: ......


