background image

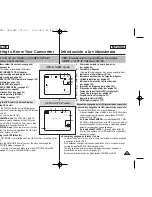
Características

Idioma Multi OSD 

Puede seleccionar como idioma OSD alguno de los siguientes: inglés,
francés, español, portugués, alemán e italiano.

Función de transferencia digital de datos mediante IEEE1394

Con la incorporación del puerto de transferencia de datos a alta velocidad
IEEE 1394 (i.LINK™: el i.LINK es un sistema de protocolo de transferencia
de datos en serie e intercomunicación empleado para transmitir datos DV),
se pueden transferir imágenes de vídeo o fijas al ordenador. De este modo,
es posible producir o editar imágenes.  

Interfaz USB para la transferencia de datos de imagen digital

Es posible transferir imágenes fijas y películas al ordenador por medio de la
interfaz USB sin necesidad de una tarjeta adicional.

Zoom digital 900x

Permite ampliar la imagen hasta 900 veces su tamaño original.

LCD TFT en color

El sistema de color de alta resolución TFT de la pantalla LCD proporciona
imágenes limpias y nítidas a la vez que permite ver las grabaciones
inmediatamente.

EIS (Estabilizador electrónico de la imagen)

El EIS compensa los movimientos de la mano reduciendo la inestabilidad de
las imágenes, especialmente cuando estas últimas se graban con una gran
ampliación.

Efectos digitales diversos

Gracias al sistema DSE (efectos especiales digitales) se puede dar a la
grabación un aire especial al permitir añadir diversos efectos especiales.

Compensación de la luz de fondo (BLC)

La función BLC compensa el brillo que puede aparecer detrás del objeto
que se graba.

Programa AE

El programa AE permite modificar la velocidad y la apertura del obturador
para que se ajuste a la escena que se vaya a filmar.

Función de cámara fotográfica digital

Mediante el Memory Stick puede grabar y reproducir imágenes fijas
estándar fácilmente.

Puede transferir imágenes fijas estándar del Memory Stick al PC
mediante la interfaz USB. 

Direct Print

Se pueden imprimir imágenes fijas con la función PictBridge y una
impresora conectada.

Grabación de MJPEG (imágenes en movimiento)

Permite grabar imágenes de vídeo en el Memory Stick.

CCD mega píxel

La videocámara incorpora un CCD de 2,11 mega píxeles En el Memory
Stick se pueden grabar imágenes fijas de alta resolución.

Flash incorporado

Puede realizar fotografías que tengan un aspecto natural con el flash 
incorporado y la iluminación adecuada.

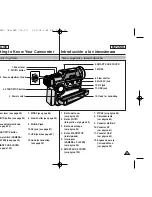
Introducción a la videocámara

Features

MULTI OSD LANGUAGE

You can select the desired OSD Language among English, French,
Spanish, Portuguese, German and Italian.

Digital data transfer function with IEEE1394

By incorporating the IEEE 1394 (i.LINK™: i.LINK is a serial data transfer
protocol and inter-connectivity system, used to transmit DV data) high
speed data transport port, both moving and still images can be transferred
to a PC, making it possible to produce or edit various images.  

USB interface for digital image data transfer

You can transfer still images/movies to a PC using the USB interface
without an add-on card.

900x Digital zoom

Allows you to magnify an image up to 900 times its original size.

Color TFT LCD monitor

A high-resolution color TFT LCD monitor gives you clean, sharp images as
well as the ability to review your recordings immediately.

Electronic Image Stabilizer (EIS) 

The EIS compensates for any handshake, reducing unstable images,
particularly at high magnification.

Various digital effects

The DSE (Digital Special Effects) allows you to give your films a special
look by adding various special effects.

Back Light Compensation (BLC)

The BLC function compensates for the bright background behind a subject
you're recording.

Program AE

The Program AE enables you to alter the shutter speed and aperture to
suit the type of scene/action to be filmed.

Digital Still Camera function

Using Memory Stick, you can easily record and playback standard still
images.

You can transfer standard still images on the Memory Stick to your PC
using the USB interface.

Direct Print

You can print still images by connecting to a printer with PictBridge function.

MJPEG (Moving picture) Recording

MJPEG recording makes it possible to record video onto a Memory Stick.

Mega-pixel CCD

Your camcorder incorporates a 2.11 mega-pixel CCD. High-resolution still
images can be recorded to a Memory Stick.

Built-in Flash

You can take natural-looking flash pictures with appropriate illumination
using the built-in Flash.

Getting to Know Your Camcorder

11

11

ENGLISH

ESPAÑOL

00811D SCD907 USA+ESP (01~27)  3/16/05 9:43 AM  Page 11

Содержание SC-D907

Страница 1: ...quido Videocámara digital SCD907 GLISH ESPAÑOL ESPAÑOL Digital Video Camcorder Owner s Instruction Book e operating the unit please read this ction book thoroughly and retain it for future nce Auto Focus D Charge Coupled Device D Liquid Crystal Display SCD907 START STOP SELF TIMER A DUB ZERO MEMORY PHOTO DISPLAY X2 SLOW F ADV PHOTO SEARCH DATE TIME ELECTRONICS AD68 00811D D907 USA ESP 01 27 3 16 0...

Страница 2: ...ndo el visor 32 Ajuste de la pantalla LCD 33 Utilización del VISOR 34 Ajuste del foco 34 Reproducción en la pantalla LCD de una cinta grabada 35 Control de sonido desde el altavoz 36 Índice Grabación básica 28 Preparación 20 Notas e instrucciones de seguridad 6 Introducción a la videocámara 11 GLISH ntents GLISH ESPAÑOL es 11 ories Supplied with camcorder 12 Left View 13 e View 14 Top View 15 Bott...

Страница 3: ... automático Enfoque manual AF MF 66 Enfoque automático 66 Enfoque manual 66 Utilización del flash incorporado 67 Selección de flash FLASH SELECT 67 Compensación de la luz de fondo BLC 68 Aparición y desaparición gradual de la imagen fundido 69 Comienzo de la grabación 69 Detención de la grabación utilizando FADE IN FADE OUT 69 Mezcla de audio Audio dubbing 70 Grabación de sonido adicional 70 Repro...

Страница 4: ...eleccionar la calidad de fotográfica 89 Número de imágenes del Memory Stick 89 Selección del tamaño de la imagen de la grabación 90 Selección del tamaño de la imagen de vídeo 91 Reproducción 74 Interfaz USB 83 Modalidad de cámara fotográfica digital 86 Índice ESPAÑOL GLISH O Image Recording 72 arching for a PHOTO picture 72 Recording Techniques 73 layback 74 ayback on the LCD monitor 74 ayback on ...

Страница 5: ...3 Fuentes de potencia 113 Sistemas de color 113 Problemas y soluciones 114 Pantalla de autodiagnósticos 114 Condensación de humedad 114 Pantalla de autodiagnósticos en las modalidades M REC y M PLAY 115 Especificaciones técnicas 117 ÍNDICE ALFABÉTICO 118 Mantenimiento 111 Problemas y soluciones 114 Índice ESPAÑOL GLISH ng images continuously 92 ect the CONTINUOUS SHOT 92 ng Still images to a Memor...

Страница 6: ...o al monitor de LCD desde la izquierda Notas e instrucciones de seguridad e rotate the LCD monitor carefully as illustrated rotation may cause damage to the inside of the hinge that cts the LCD monitor to the Camcorder CD monitor closed andard recording using the LCD onitor A LCD Monitor is opened applying a finger to LCD open knob ecording when looking at the LCD onitor from the top ecording when...

Страница 7: ...lgunas ocasiones los daños causados por líquidos no pueden repararse Notas referentes a la VIDEOCÁMARA Notas referentes a los DERECHOS DE REPRODUCCIÓN Notas referentes a la condensación de humedad Notas e instrucciones de seguridad sion programs video tapes DVD titles films and other program als may be copyrighted horized copying of copyrighted material may be against the law sudden rise in atmosp...

Страница 8: ...No utilice un casete de limpieza de tipo húmedo pues los cabezales se podrían estropear Notas referentes a la limpieza de los cabezales de vídeo Notas e instrucciones de seguridad ake sure that the battery pack is fully charged fore starting to record preserve battery power keep your camcorder rned off when you are not operating it your camcorder is in CAMERA mode and it is left STBY mode without ...

Страница 9: ...arse Nota referente al OBJETIVO Notas referentes al visor electrónico Notas referentes a la grabación o a la reproducción utilizando la pantalla LCD Notas referentes a la empuñadura o not film with the camera lens pointing directly at the sun rect sunlight can damage the CCD Charge Coupled Device o not position the camcorder so that the viewfinder points wards the sun rect sunlight can damage the ...

Страница 10: ...ue la pieza original Las sustituciones no autorizadas pueden resultar en incendios descarga eléctrica u otros peligros Notas e instrucciones de seguridad MANTENIMIENTO PIEZAS DE RECAMBIO GLISH tes and Safety Instructions GLISH ESPAÑOL cautions regarding the Lithium battery he lithium battery maintains the clock function and user settings en if the battery pack or AC adapter is removed he lithium b...

Страница 11: ...cámara incorpora un CCD de 2 11 mega píxeles En el Memory Stick se pueden grabar imágenes fijas de alta resolución Flash incorporado Puede realizar fotografías que tengan un aspecto natural con el flash incorporado y la iluminación adecuada Introducción a la videocámara tures ULTI OSD LANGUAGE u can select the desired OSD Language among English French anish Portuguese German and Italian gital data...

Страница 12: ...ra ESPAÑOL sure that the following basic accessories are supplied with your video camera c Accessories hium Ion Battery pack C Power Adapter A E7 TYPE C Cord ulti AV Cable UDIO VIDEO S VIDEO struction Book hium batteries for emote Control and Clock YPE CR2025 2 EA emote Control emory Stick SB cable oftware CD ns cover GLISH tting to Know Your Camcorder GLISH essories Supplied with camcorder 1 Lith...

Страница 13: ...página 64 7 Sensor para el mando a distancia 8 Micrófono incorporado 9 Visor ver página 34 10 Abrir pantalla LCD 11 Pantalla LCD TFT nction buttons PLAYER CAMERA M PLAY EASY Q MULTI DISP REW REC SEARCH REV FF REC SEARCH FWD PLAY STILL FADE MJPEG PLAY STILL STOP BLC MJPEG STOP PLAYER CAMERA M PLAY EASY Q MULTI DISP REW REC SEARCH REV FF REC SEARCH FWD PLAY STILL FADE MJPEG PLAY STILL STOP BLC MJPEG...

Страница 14: ...quierda Introducción a la videocámara GLISH tting to Know Your Camcorder GLISH ESPAÑOL Side View MENU button MENU Selector 6 Mode switch 7 FLASH PB ZOOM 8 MEMORY MIX S SHOW 10 DISPLAY 9 Speaker 11 MACRO DELETE External MIC in DC jack Charging indicatior ENU button ENU Selector MENU VOLUME xternal MIC in C jack harging indicatior ee page 24 ode switch MEMORY APE see page 29 7 FLASH CAMERA M REC see...

Страница 15: ...ha Introducción a la videocámara ht Top View tting to Know Your Camcorder 15 15 GLISH ESPAÑOL om lever see page 49 HOTO button see page 93 cus adjustment knob ee page 34 TART STOP button ower switch CAMERA LAYER see page 29 MART SHOE COVER ee page 109 7 MF AF see page 66 8 Slow shutter see page 64 9 Multi AV jack 10 DV jack see page 81 11 USB jack see page 85 12 Hook for handstrap see page 22 10 D...

Страница 16: ...27 Introducción a la videocámara Vistas posterior e inferior GLISH tting to Know Your Camcorder GLISH ESPAÑOL ar Bottom View THIUM Battery Cover see page 21 emory Stick slot see page 87 attery Release ipod receptacle APE EJECT see page 27 5 TAPE EJECT 4 Tripod receptacle 2 Memory Stick slot LITHIUM Battery Cover 3 Battery Release D907 USA ESP 01 27 3 16 05 9 43 AM Page 16 ...

Страница 17: ...a 16 X2 ver página 77 17 Zoom 18 DISPLAY presentación en pantalla Mando a distancia Introducción a la videocámara HOTO TART STOP ELF TIMER see page 20 ERO MEMORY ee page 78 HOTO Search ee page 72 DUB see page 70 FF REW PLAY 10 Direction see page 76 11 F ADV see page 77 12 STOP 13 STILL 14 SLOW see page 76 15 DATE TIME 16 X2 see page 77 17 Zoom 18 Display mote control 1 PHOTO 2 START STOP 3 SELF TI...

Страница 18: ...ver página 49 32 AV IN ver página 80 OSD presentación en pantalla en las modalidades de cámara CAMERA y reproductor de vídeo PLAYER Introducción a la videocámara GLISH tting to Know Your Camcorder GLISH ESPAÑOL D On Screen Display in CAMERA and PLAYER modes attery level see page 26 sy Q mode see pages 65 SE Digital Special Effects mode ee page 52 ogram AE see page 46 hite Balance mode see page 48 ...

Страница 19: ...der o apagar la presentación de fecha y hora ver página 61 Este menú sólo aparece en las modalidades CAMERA y M REC OSD visualización en pantalla en los modos M REC y M PLAY Memory Stick Introducción a la videocámara lder number file number see page 88 age counter otal number of recordable still images ARD MEMORY STICK indicator age recording and loading indicator oto Quality see page 89 ASE PROTE...

Страница 20: ...amente el botón START STOP cuando quiera detener la grabación Uso del mando a distancia Preparación ery Installation for the Remote Control You need to insert or replace the lithium battery when You purchase the camcorder The remote control doesn t work Ensure that you insert the lithium cell correctly following the and markings Be careful not to reverse the polarity of the battery Record using th...

Страница 21: ...ños En caso de que por accidente alguien se tragara una avise inmediatamente a un médico Instalación de la pila de litio Preparación e lithium battery maintains the clock function and preset ntents of the memory even if the battery pack or AC power apter is removed e lithium battery for the camcorder lasts about 6 months under rmal operation from the time of installation hen the lithium battery be...

Страница 22: ...itud c Vuelva a cerrar la cubierta de la correa de mano Sujeción de la cubierta del objetivo Preparación GLISH eparation GLISH ESPAÑOL usting the Hand Strap ry important to ensure that the Hand strap has been correctly ed before you begin your recording and strap enables you to old the camcorder in a stable comfortable position ess the Zoom and START STOP buttons without having to change e positio...

Страница 23: ...PE cinta Si desea utilizar este aparato como cámara fotográfica digital DSC ajuste el interruptor de modalidad en la posición MEMORY Preparación nnecting a Power Source are two types of power source that can be connected to your order e AC Power Adapter and AC cord used for indoor recording e Battery Pack used for outdoor recording se the AC Power adapter and DC Cable onnect the AC Power adapter t...

Страница 24: ...he type and capacity of the battery pack you are using How often the Zoom function is used It is recommended that you have several batteries available ging the Lithium Ion Battery Pack ach the battery pack to the camcorder onnect the AC Power adapter to an AC rd and connect the AC cord to a wall cket onnect the DC cable to the DC jack cket on the camcorder rn the power switch to off and the arging...

Страница 25: ... Pack of continuous recording time based on model and ry type If you close the LCD monitor it switches off and the viewfinder switches on automatically The continuous recording times given in the table above are approximations Actual recording time depends on usage otes e battery pack should be recharged in an environment of tween 32 F 0 C and 104 F 40 C e battery pack should never be charged in a...

Страница 26: ...stá completamente cargada y cuál que la batería está descargada Nota El valor de la marca de carga no afecta al estado de carga de la pila Preparación GLISH eparation GLISH ESPAÑOL ry level display e battery level display indicates the amount of power remaining the battery pack lly charged 40 used 80 used 95 used ompletely used flickers he camcorder will turn off soon change the battery soon as po...

Страница 27: ...edad o al polvo c Guarde las cintas en posición vertical y manténgalas alejadas de la acción directa del sol d No permita que las cintas se golpeen o se caigan al suelo Introducción y expulsión del casete Preparación erting and Ejecting a Cassette hen inserting a tape or closing a cassette holder not apply excessive force is may cause a malfunction not use any tape other than Mini DV cassettes nne...

Страница 28: ...ñal REC Para detener la grabación pulse de nuevo el botón START STOP En la pantalla LCD aparece la señal STBY Grabación básica GLISH ESPAÑOL sic Recording king your First Recording onnect a Power source to the mcorder see page 23 battery pack or a AC power apter Insert a cassette see page 27 emove the LENS COVER et the power switch to the AMERA position Open the LCD monitor Set the mode switch to ...

Страница 29: ...ptor de encendido en PLAYER Cómo seleccionar el modo CAMCORDER Para seleccionar el modo DSC Digital Still Camera Grabación básica GLISH ESPAÑOL 29 29 select the CAMCORDER mode you want to use this unit as a mcorder set the mode switch to PE position CAMERA mode TAPE record mode 1 Set the mode switch to TAPE 2 Set the power switch to CAMERA PLAYER mode TAPE playback mode 1 Set the mode switch to TA...

Страница 30: ...orma predeterminada GLISH ESPAÑOL sic Recording ecting the OSD LANGUAGE elect the appropriate OSD Language among English French panish Portuguese German and Italian he Language Function works in CAMERA PLAYER M REC PLAY modes ess the MENU button The menu list will appear ove the MENU SELECTOR to highlight INITIAL d push the MENU SELECTOR elect LANGUAGE from the sub menu and push the ENU SELECTOR T...

Страница 31: ... la posición original automáticamente Nota En la modalidad de búsqueda de grabación es posible que la imagen se distorsione y forme una especie de mosaico GLISH ESPAÑOL 31 31 sic Recording n a cassette is loaded and the camcorder is left in the STBY e for more than 5 minutes without being used it will switch off matically e it again push the START STOP button or set the Power h to OFF and then bac...

Страница 32: ...l visor como guía para determinar el plano horizontal 8 Utilice un trípode siempre que sea posible Consejos para la grabación estable de imágenes GLISH ESPAÑOL sic Recording hile recording it is very important to hold the camcorder correctly x the LENS cover firmly by clipping it to the hand strap ring ee page 22 rding with the LCD monitor old the camcorder firmly using the hand strap ace your rig...

Страница 33: ...ECT BRIGHT ADJUST COLOR ADJUST GLISH ESPAÑOL 33 33 sic Recording ur camcorder is equipped with a 2 5 inch color Liquid Crystal splay LCD monitor which enables you to view what you are cording or playing back directly epending on the conditions under which you are using the mcorder indoors or outdoors for example you can adjust BRIGHT SELECT BRIGHT ADJUST COLOR ADJUST t the POWER switch to CAMERA o...

Страница 34: ... Ajuste del foco Para enfocar una imagen emplee el botón de ajuste de foco del VISOR ver figura Utilización del VISOR GLISH ESPAÑOL sic Recording ush the MENU SELECTOR again The BRIGHT SELECT setting switches between NORMAL SUPER each time you push the MENU SELECTOR Use the MENU SELECTOR to adjust the value of BRIGHT ADJUST and COLOR ADJUST Available adjustment range for BRIGHT ADJUST and COLOR AD...

Страница 35: ...a un videograbador ver página 74 La modalidad de reproducción dispone de diversas funciones ver página 76 Reproducción en la pantalla LCD de una cinta grabada GLISH ESPAÑOL 35 35 sic Recording u can monitor the playback picture on the LCD monitor ake sure that the battery pack is in place t the mode switch to TAPE t the power switch to PLAYER mode A confirmation sound beeps sert the tape you wish ...

Страница 36: ...ctor Multi AV Control de sonido desde el altavoz GLISH ESPAÑOL peaker works in PLAYER and M PLAY mode hen you use the LCD monitor for playback you n hear recorded sound from the built in Speaker Follow the instructions below to decrease or mute speaker volume in the PLAYER or M PLAY mode et the power switch to PLAYER ess PLAY STILL to play the tape or oving picture hen you hear sounds once the tap...

Страница 37: ...ONNECTION Setting the MEMORY MIX effect 42 43 44 54 MENÚ SUBMENÚ Funciones Page Modalidad disponible M PLAY M REC PLA YER CAM ERA I N I T I A L CLOCK SET Ajuste de la hora 40 WL REMOTE Utilización del mando a distancia 41 LANGUAGE Selección del idioma OSD 30 C A M E R A AV D ZOOM Selección del zoom digital 50 EIS DSE SELECT Selección del estabilizador digital de la imagen 51 Ajustes de los efectos...

Страница 38: ...emory Stick 100 FORMAT Formatting the Memory Stick and Setting the file namming options 107 LCD ADJUST DATE TIME Setting the Brightness and color Tones of the LCD monitor 33 Setting the Date and Time 59 TV DISPLAY Selecting OSD on off of TV 60 PROTECT Preventing Accidental Erasure 104 DELETE Deleting Files 105 IMAGE SIZE Selecting Image Resolution 90 CONTINUOUS SHOT Recording images continuosly 92...

Страница 39: ...ed function will work in this operating mode ou can not change the requested mode he operating function will be released and the requested one ill work he operating function will be released and the requested one ill work he data during the operating mode will be backed up es hen a menu item on the LCD monitor marked with an at item cannot be activated hen you select an item that cannot be changed...

Страница 40: ...LISH ESPAÑOL vanced Recording LOCK SET CLOCK setup works in CAMERA PLAYER M REC and M PLAY modes The DATE TIME is automatically recorded onto a tape Before recording please set the DATE TIME ess the MENU button The menu list will appear ove the MENU SELECTOR to highlight INITIAL d push the MENU SELECTOR se the MENU SELECTOR to select CLOCK SET om the submenu ush the MENU SELECTOR to enter SETTING ...

Страница 41: ...recerá de la pantalla LCD GLISH ESPAÑOL 41 41 vanced Recording L REMOTE The WL REMOTE function works in CAMERA PLAYER M REC M PLAY modes The WL REMOTE option allows you to enable or disable the remote control for use with the camcorder ess the MENU button The menu list will appear ove the MENU SELECTOR to highlight INITIAL d push the MENU SELECTOR e the MENU SELECTOR to select WL REMOTE m the subm...

Страница 42: ...ta que se detiene la grabación GLISH ESPAÑOL vanced Recording EEP SOUND The BEEP SOUND function works in CAMERA PLAYER M REC M PLAY modes Use the MENU to setup the BEEP SOUND function Select whether or not you want to hear a beep sound whenever you change a setup value ess the MENU button The menu list will appear ove the MENU SELECTOR to highlight INITIAL d push the MENU SELECTOR se the MENU SELE...

Страница 43: ... el botón MENÚ GLISH ESPAÑOL 43 43 vanced Recording HUTTER SOUND You will only hear the SHUTTER SOUND when the PHOTO function is working Set the SHUTTER SOUND On Off when using the DSC feature t the camcorder to M REC or PLAYER mode ee page 29 ess the MENU button The menu list will appear ove the MENU SELECTOR to highlight INITIAL d push the MENU SELECTOR e the MENU SELECTOR to select SHUTTER OUND...

Страница 44: ...USB CONNECT está inhabilitada GLISH ESPAÑOL vanced Recording SB CONNECT Before connecting the camcorder to a PC or PRINTER with USB cable USB CONNECT setting is required The USB CONNECT function works in M PLAY mode only The USB CONNECT setting is automatically set to COMPUTER and can not be set to PRINTER in PLAYER and M REC mode et the mode switch to MEMORY et the power switch to PLAYER mode ess...

Страница 45: ...e activa ninguna otra función Grabación avanzada GLISH ESPAÑOL 45 45 vanced Recording EMONSTRATION Demonstration automatically shows you the major functions that are included with your camcorder so that you may use them more easily The DEMONSTRATION function may only be used in the CAMERA mode without a tape inserted in the camcorder The demonstration operates repeatedly until the DEMONSTRATION mo...

Страница 46: ...rograma AE sólo opera en las modalidades CAMERA La modalidad PROGRAM AE permite ajustar las velocidades del obturador y aperturas para adaptarse a distintas condiciones de grabación Con ella se puede controlar de manera creativa la profundidad de campo Modalidad AUTO Equilibrio automático entre el objeto y el fondo Se utiliza en condiciones normales La velocidad del obturador se ajusta automáticam...

Страница 47: ... 47 vanced Recording ng the PROGRAM AE t the camcorder to CAMERA mode see page 29 ess the MENU button The menu list will appear ove the MENU SELECTOR to highlight CAMERA d push the MENU SELECTOR lect PROGRAM AE from the bmenu sh the MENU SELECTOR to ter the sub menu ing the MENU SELECTOR lect the PROGRAM AE mode ee page 46 Push the MENU SELECTOR to confirm the PROGRAM AE mode exit press the MENU b...

Страница 48: ...ian ajústelo nuevamente Si el equilibrio del blanco se ajusta en AUTO en las grabaciones normales en exteriores se pueden obtener mejores resultados GLISH ESPAÑOL vanced Recording HT BALANCE WHITE BALANCE The WHITE BALANCE function works in CAMERA or M REC mode The WHITE BALANCE is a recording function that preserves the unique image color of the object in any recording condition You may select th...

Страница 49: ...ar en la modalidad TELE MACRO A medida que disminuya la distancia al objeto el área de enfoque se reducirá Cuando no sea posible obtener un enfoque adecuado utilice el botón del zoom Grabación avanzada GLISH ESPAÑOL 49 49 vanced Recording ing In and Out Zooming is a recording technique that lets you change the size of the subject in a scene For more professional looking recordings do not use the z...

Страница 50: ...nción 6 Para salir pulse el botón MENÚ GLISH ESPAÑOL vanced Recording ming In and Out with DIGITAL ZOOM Digital Zoom works in CAMERA mode only al Zoom Camera is capable of 10x optical zoom Zooming more than 10x is performed digitally The picture quality may deteriorate depending on how much you zoom in on the subject We recommend that you use the EIS feature with DIGITAL ZOOM for picture stability...

Страница 51: ...OBE función DSE no funcionará GLISH ESPAÑOL 51 51 vanced Recording S Electronic Image Stabilizer The EIS function works in CAMERA mode only EIS Electronic Image Stabilizer is a function that compensates for any shaking or hand movement while holding the camcorder within reasonable limits It provides more stable pictures when Recording with the zoom Recording a small object close up Recording and w...

Страница 52: ... reproducirlas en televisores de pantalla ancha h Modalidad STROBE estroboscopio Este efecto convierte la acción en pantalla en una serie de imágenes fijas que proporcionan un efecto parecido al de las imágenes a cámara lenta GLISH ESPAÑOL vanced Recording SE Digital Special Effects SELECT The DSE function works in CAMERA mode only The digital effects enable you to give a creative look to your rec...

Страница 53: ...H ESPAÑOL 53 53 vanced Recording cting an Digital Special Effect t the camcorder to CAMERA mode see page 29 ess the MENU button The menu list will appear ove the MENU SELECTOR to highlight CAMERA d push the MENU SELECTOR lect DSE SELECT from the submenu sh the MENU SELECTOR to enter the sub menu ing MENU SELECTOR select the DSE mode ee page 52 Push the MENU SELECTOR to confirm the DSE mode exit pr...

Страница 54: ...uminada de la imagen de vídeo se intercambiará por una imagen fija M OVERLAP Superposición de memoria Puede hacer que una imagen en movimiento se funda sobre una imagen fija grabada en la Memory Stick Grabación avanzada GLISH ESPAÑOL vanced Recording EMORY MIX The MEMORY MIX function works in CAMERA mode only You can superimpose a still image you have recorded on the Memory Stick on top of the mov...

Страница 55: ...L 55 55 vanced Recording rding Superimposed images on a tape Insert a tape for recording into your camcorder Insert a Memory Stick with still images recorded into your camcorder t the camcorder to CAMERA mode see page 29 ess the MENU button The menu list will appear ove the MENU SELECTOR to highlight CAMERA and sh the MENU SELECTOR lect MEMORY MIX from the submenu and push the ENU SELECTOR ove the...

Страница 56: ...s escenas Para obtener la mejor calidad de imagen y de sonido grabe en la modalidad SP GLISH ESPAÑOL vanced Recording EC MODE The REC MODE function works in both CAMERA and PLAYER modes This camcorder records and plays back in SP standard play and LP long play mode SP standard play This mode permits 60 minutes of recording time with a DVM60 tape LP long play This mode permits 90 minutes of recordi...

Страница 57: ... y 16 bits 5 Para salir pulse el botón MENÚ GLISH ESPAÑOL 57 57 vanced Recording UDIO MODE The AUDIO MODE function works in CAMERA and PLAYER modes This camcorder records sound in two ways 12bit 16bit 12bit You can record two 12bit stereo sound tracks The original stereo sound can be recorded onto the MAIN SOUND1 track Additional stereo sound can be dubbed onto the SUB SOUND2 track see page 70 16b...

Страница 58: ...ND CUT cuando grabe en lugares donde sople el viento como en la playa o cerca de edificios GLISH ESPAÑOL vanced Recording IND CUT The WIND CUT function works in CAMERA and PLAYER modes The WIND CUT function minimizes wind noise or other noise while recording When the wind cut is on it is possible other low sounds will be eliminated along with the sound of the wind et the camcorder to CAMERA or PLA...

Страница 59: ...te Antes de usar la función DATE TIME deberá ajustar el reloj Consulte la sección AJUSTE DEL RELOJ en la página 40 GLISH ESPAÑOL 59 59 vanced Recording ATE TIME The DATE TIME function works in CAMERA PLAYER M REC and M PLAY modes The date and time are automatically recorded on a special data area of the tape ess the MENU button The menu list will appear ove the MENU SELECTOR to highlight VIEWER an...

Страница 60: ... y OFF 4 Para salir pulse el botón MENÚ Nota Para conectar a un TV consulte la página 74 GLISH ESPAÑOL vanced Recording V DISPLAY The TV DISPLAY function works in CAMERA PLAYER M REC and M PLAY modes You can select the output path of the OSD On Screen Display OFF The OSD appears in the LCD monitor and Viewfinder ON The OSD appears in the LCD monitor Viewfinder and TV Use the DISPLAY button located...

Страница 61: ...de PROGRAM AE si dichos valores no se han establecido previamente en el menú Utilización del menú rápido GLISH ESPAÑOL 61 61 vanced Recording ick menu is available only in CAMERA and M REC mode ick menu is used to adjust camera functions by simply using the ENU SELECTOR is feature is useful for when you want to make simple adjustments hout having to access menus and submenus ATE TIME see page 59 E...

Страница 62: ...car los valores Nota La función de menú rápido no opera en la modalidad EASY Q GLISH ESPAÑOL vanced Recording HT BALANCE see page 48 Each time you select WHT BALANCE and push the MENU SELECTOR you can choose between preset WHT BALANCE values and AUTO As in PROGRAM AE you can t choose between Auto and WHT BALANCE values it they have not been preset HUTTER SPEED EXPOSURE You can set values for SHUTT...

Страница 63: ...dora vuelve a pasar en el modo de obturador automático y exposición automática Si graba con una velocidad del obturador de 1 1000 o superior asegúrese de que el sol no se refleje directamente en el objetivo Si graba imágenes con las funciones SHUTTER SPEED o EXPOSURE la función de flash no opera GLISH ESPAÑOL 63 63 vanced Recording TER SPEED EXPOSURE You can set SHUTTER SPEED and EXPOSURE in CAMER...

Страница 64: ...stencia indicador blanco puede utilizarse como luz de enfoque en el modo M REC OBTURADOR LENTO Velocidad del obturador baja SLOW SHUTTER Grabación avanzada GLISH ESPAÑOL vanced Recording e SLOW SHUTTER function works in CAMERA mode only e shutter speed can be controlled allowing you to record slow oving objects et the power switch to CAMERA mode see page 29 ess the SLOW SHUTTER button ach time you...

Страница 65: ...lidad EASY Q se borran cuando se quita la batería de la videocámara y por lo tanto deberán ajustarse de nuevo al reemplazarla Modalidad SENCILLA para principiantes GLISH ESPAÑOL 65 65 vanced Recording e EASY Q mode allows a beginner to easily make good quality deo recordings The EASY Q mode only operates in CAMERA mode t the power switch to CAMERA mode ee page 29 pressing the EASY Q button all fun...

Страница 66: ...por medio del zoom 5 Para volver a AF enfoque automático pulse de nuevo el botón MF AF Nota El enfoque manual no está disponible en el modo EASY Q Enfoque manual enfoque automático MF AF e MF AF function works in CAMERA M REC ode most situations it is better to use the automatic cus feature as it enables you to concentrate on e creative side of your recording anual focusing may be necessary under ...

Страница 67: ...gura reducción automática de ojos rojos el flash se dispara dos veces una para realizar la reducción de ojos rojos y otra para sacar la imagen principal Existe un desfase de aproximadamente 1 5 segundos entre los flashes Grabación avanzada GLISH 67 67 vanced Recording u can take natural looking flash pictures with appropriate illumination ng the built in flash or attaching the VL S1FL video Light ...

Страница 68: ...C Normal BLC Normal La compensación de la luz de fondo realza el objeto Nota La función BLC no opera en la modalidad EASY Q Compensación de la luz de fondo BLC GLISH vanced Recording LC works in CAMERA M REC mode ack lighting exists when the subject is rker than the background The subject is in front of a window The person to be recorded is wearing white or shiny clothes and is placed against a br...

Страница 69: ...TOP para detener la grabación a FADE OUT aprox 4 segundos b FADE IN aprox 4 segundos Grabación avanzada GLISH 69 69 vanced Recording e FADE function works in CAMERA mode only u can give your recordings a professional look by using special effects ch as fading in at the beginning of a sequence or fading out at the d of a sequence art Recording fore recording hold down the FADE button e picture and ...

Страница 70: ...se de que no ha conectado ningún cable a la videocámara No puede mezclar sonido en una cinta grabada en la modalidad LP o de 16 bits Audio dubbing Mezcla de audio GLISH vanced Recording e AUDIO DUBBING function only works in PLAYER Mode u can add sound to the original sound on a pre recorded tape recorded in SP de with 12bit sound e the internal and external microphones or other audio equipment e ...

Страница 71: ...dades SOUND 2 o MIX 1 2 es posible que se experimente una pérdida en la calidad del sonido GLISH 71 71 vanced Recording ed audio Playback sert the dubbed tape and press MENU button in AYER mode ove the MENU SELECTOR to highlight A V sh the MENU SELECTOR to enter the sub menu e the MENU SELECTOR to select AUDIO ELECT from the submenu sh the MENU SELECTOR to enter the sub menu ing the MENU SELECTOR ...

Страница 72: ...e imágenes fotográficas Grabación avanzada GLISH vanced Recording et the camcorder to CAMERA mode see page 29 ess the PHOTO button lightly about halfway wn and hold it The still picture appears on the LCD monitor If you do not wish to record release the button ess the PHOTO button fully down The still picture is recorded for about 6 7 seconds ter the PHOTO has been recorded the camcorder returns t...

Страница 73: ... el visor es de gran utilidad Técnicas diversas de grabación Grabación avanzada GLISH 73 73 vanced Recording certain situations different recording techniques may be quired for more dramatic results te e rotate the LCD monitor carefully as excessive rotation may damage to the inside of the hinge that connects the LCD or to the Camcorder eneral recording ownward recording aking a recording with a t...

Страница 74: ...ector de S VIDEO en el TV Si utiliza un cable S VIDEO tendrá que conectar un cable de audio Si conecta el cable al conector Multi AV no oirá el sonido por los altavoces GLISH ayback e Playback e playback function works in PLAYER mode only back on the LCD monitor It is practical to view a tape using the LCD monitor when in a car or outdoors back on a TV monitor To play back a tape the television mu...

Страница 75: ...inta llega al final mientras está en la modalidad de reproducción se rebobinará automáticamente Nota La modalidad de reproducción SP LP se selecciona de manera automática GLISH 75 75 yback ecting to a TV which has no Audio and Video input jacks You can connect your camcorder to a TV through a VCR onnect the camcorder and VCR with the ulti AV cable The yellow plug Video The white plug Audio L Mono ...

Страница 76: ...producción a cámara lenta hacia delante Para regresar a la reproducción a cámara lenta hacia delante pulse el botón Para regresar a la reproducción normal pulse el botón PLAY STILL Diferentes funciones en la modalidad PLAYER Reproducción GLISH ayback e PLAY STILL STOP FF REW buttons are located on the mcorder and the Remote Control e F ADV Frame advance X2 SLOW buttons are located on the emote Con...

Страница 77: ...de aparecer distorsión con forma de mosaico en la pantalla en algunos de los modos de reproducción si está utilizando una cinta grabada en LP El sonido sólo está activo durante la reproducción de cintas en SP y LP GLISH 77 77 yback e advance To play back frame by frame Press the F ADV button on the Remote Control while in Still mode The F ADV function works in still mode only To resume normal play...

Страница 78: ...ión de memoria cero no funcione de manera adecuada cuando haya un espacio entre grabaciones de la cinta M M MEMORIA CERO Reproducción GLISH ayback he MEMORY function works in both CAMERA and PLAYER odes u can mark a point on a tape that you want to return to following ayback ess the ZERO MEMORY button on the remote control during ayback or before recording at the point you wish to return to The ti...

Страница 79: ...e han cargado de una fuente de vídeo exterior Las imágenes con PB ZOOM no se pueden importar a un ordenador a través del conector DV o USB de la videocámara ESPAÑOL Reproducción GLISH 79 79 yback ZOOM e PB ZOOM function works in PLAYER mode e PB ZOOM function enables you to magnify playback or still ages t the camcorder to PLAYER mode see page 29 ess the PB ZOOM button in playback or still mode e ...

Страница 80: ...un TV configure el menú AV IN OUT en OUT y cambie la conexión Consulte la página 75 ESPAÑOL GLISH cording in PLAYER mode Grabación en la modalidad PLAYER u can use this camcorder as a recorder u can record a tape from VCR or TV onnect the camcorder and VCR or TV with e Multi AV cable et the camcorder to PLAYER mode ee page 29 rn on the VCR or TV sert the blank tape with protection tab osed into th...

Страница 81: ...njuntamente ya que la tarjeta IEEE 1394 se desconectaría No desconecte el cable DV mientras se están transfiriendo datos al ordenador Conexiones para la transferencia de datos estándar IEEE1394 i LINK DV ESPAÑOL Transferencia de datos IEEE 1394 GLISH 81 81 EE 1394 Data Transfer ecting to a DV device Connecting with other DV standard products A standard DV connection is quite simple If a product ha...

Страница 82: ...no afecta a las imágenes que se graban No se garantiza el funcionamiento en todos los entornos informáticos recomendados anteriormente DV ESPAÑOL Transferencia de datos IEEE 1394 GLISH EE 1394 Data Transfer rding with a DV connection cable et the mode switch to TAPE et the power switch to PLAYER mode onnect the DV cable not supplied from the DV OUT port of the camcorder to the V IN OUT port of the...

Страница 83: ... pertenecen a sus respectivos propietarios No se garantiza el funcionamiento en todos los entornos informáticos recomendados que se indican Interfaz USB GLISH 83 83 B interface ansferring a Digital Image through a USB Connection You can easily transfer still images movies from a MEMORY STICK to a PC without additional add on cards via a USB connection You can transfer an image to a PC via a USB co...

Страница 84: ...de Adobe Puede ver el manual del usuario con el software Acrobat Reader que también se incluye en el CD Acrobat Reader es un producto de software gratuito de Adobe Systems Inc Interfaz USB GLISH B interface alling DVC Media 7 0 Software not connect the camcorder to PC before installing the software another camera or scanner is connected please disconnect it in advance are installation sert the sof...

Страница 85: ...aratos USB y vuelva a conectar la videocámara Se recomienda la conexión DV IEEE1394 para conseguir una transmisión de imágenes de mayor calidad Interfaz USB GLISH 85 85 B interface ecting to a PC t the USB CONNECT to OMPUTER see page 44 onnect a USB cable to the USB port the PC onnect the other end of the USB ble into the proper terminal on the mcorder USB jack tes you disconnect the USB cable fro...

Страница 86: ...n en todos los casos en este manual Se puede utilizar Memory Stick PRO con esta unidad MEMORY STICK TM TM Modalidad de cámara fotográfica digital GLISH gital Still Camera mode he Memory Stick stores and manages still images or moving ages recorded by the camera ory Stick Functions ecording still images and MJPEG movie ewing still images and MJPEG movie Single Slide show Multi display otecting imag...

Страница 87: ...onectado a la videocámara los botones FWD REV STOP S SHOW MULTI DISP no funcionan en la modalidad M PLAY Modalidad de cámara fotográfica digital GLISH 87 87 gital Still Camera mode ting and ejecting the Memory Stick Inserting the Memory Stick Set the Power switch to OFF Insert the Memory Stick into the Memory Stick slot located beneath the camcorder in the direction of the arrow Ejecting the Memor...

Страница 88: ...Consulte la página 108 Modalidad de cámara fotográfica digital GLISH gital Still Camera mode cture of folders and files on the Memory Stick The still images that you recorded are saved in JPEG file format on the Memory Stick The moving images that you recorded are saved in MJPEG file format on the Memory Stick Each file has a file number and all files are assigned to a folder A file number from DC...

Страница 89: ...ub menu ove the MENU SELECTOR to ghlight PHOTO QUALITY in the bmenu sh the MENU SELECTOR ing the MENU SELECTOR lect the image quality Push the MENU SELECTOR to confirm the image quality If you exit the sub menu without pushing the MENU SELECTOR the quality mode is not changed exit press the MENU button umber of images on the Memory Stick e actual number that you can record varies depending on the ...

Страница 90: ...SH gital Still Camera mode cting the recording image size Select the image size of still image to be recorded et the mode switch to MEMORY et the power switch to the CAMERA mode ess the MENU button The menu list will appear se the MENU SELECTOR to highlight MEMORY d push the MENU SELECTOR elect IMAGE SIZE from the submenu and push the ENU SELECTOR The IMAGE SIZE toggles between 1600 1200 and 640 4...

Страница 91: ...tch to CAMERA mode ess the MENU button ove the MENU SELECTOR to highlight MEMORY sh the MENU SELECTOR to enter the sub menu ove the MENU SELECTOR to highlight MJPEG ZE sh the MENU SELECTOR The MJPEG SIZE toggles between 320 240 and 160 120 with each push aximum recordable time in MJPEG recording ote u can record MJPEG moving picture until MEMORY STICK is full M REC MODE INITIAL PRINT MARK PHOTO QU...

Страница 92: ...Stick Modalidad de cámara fotográfica digital GLISH gital Still Camera mode ding images continuously You can record still images continuously Select one of the three modes described below before recording NORMAL Your camcorder records up to 2 still images in 1600 1200 size or 12 still images in 640 480 size at about 0 7 sec intervals HIGH SPEED Your camcorder records up to 12 still images in 640 4...

Страница 93: ...tomático cuando utiliza la función PHOTO enfoque de manera manual Grabación de imágenes fijas en el Memory Stick en la modalidad M REC W Modalidad de cámara fotográfica digital GLISH 93 93 gital Still Camera mode dio cannot be recorded with still images onto the Memory Stick rding images to a Memory Stick t the mode switch to MEMORY t the power switch to CAMERA ess the PHOTO button lightly about h...

Страница 94: ...arece el símbolo Nota No se puede utilizar la función COPY con PB ZOOM Modalidad de cámara fotográfica digital GLISH gital Still Camera mode rding an image from a cassette as a still image You can record a still image from a cassette onto a Memory Stick If you want to record multiple still images from a cassette to a Memory Stick use the PHOTO COPY function see page 95 The still image s date time ...

Страница 95: ...ry Stick Modalidad de cámara fotográfica digital GLISH 95 95 gital Still Camera mode u can copy still images recorded with PHOTO function on a ssette onto a Memory Stick The still images date time will reflect the date and time the copies are made The image s size of a still image copied from tape to Memory Stick will be 640 480 Before operation Insert a recorded tape into your camcorder and rewin...

Страница 96: ...siguientes carpetas GRABACIÓN EN FORMATO MJPEG MJPEG RECORDING Modalidad de cámara fotográfica digital GLISH he moving picture and sound are recorded up to the full capacity the Memory Stick rding moving pictures onto a MEMORY STICK sert the MEMORY STICK into the slot on your mcorder et the mode switch to MEMORY et the power switch to CAMERA mode ess the START STOP button You can record a camera s...

Страница 97: ...l Memory Stick no puedan reproducirse en videocámaras de otros fabricantes Es posible que los archivos MJPEG grabados por otras videocámaras no puedan reproducirse en ésta Modalidad de cámara fotográfica digital GLISH 97 97 gital Still Camera mode e moving picture images on a Memory Stick are smaller and ve less definition than those recorded on Tape ere may be broken or mosaic pictures while play...

Страница 98: ... 7 0 viene incluido en el CD que acompaña al producto Visionado de imágenes fijas y de vídeo Modalidad de cámara fotográfica digital GLISH gital Still Camera mode can playback and view still images moving pictures orded on the Memory Stick re are 3 ways to view recorded images Single images Moving pictures Slide show To view all images automatically and in consecutive order Multi display To view 6...

Страница 99: ...modalidad de reproducción una a una pulse de nuevo el botón MULTI DISP La imagen que ha marcado aparece a pantalla completa GLISH 99 99 gital Still Camera mode ew a slide show t the camcorder to M PLAY mode see page 29 The last recorded still image moving picture appears ess the S SHOW button All images will be played back consecutively for 3 4 seconds each stop the slide show press the S SHOW but...

Страница 100: ...as Modalidad de cámara fotográfica digital GLISH gital Still Camera mode his camcorder supports the DPOF Digital Print Order Format nt format u can automatically print still images recorded on a Memory ick with a printer supporting DPOF here are 2 ways to make a PRINT MARK THIS FILE You can set a print mark on the photo image displayed on the LCD monitor ALL FILES To print 1 copy each of all of th...

Страница 101: ...alidad de cámara fotográfica digital GLISH 101 101 gital Still Camera mode connecting the camcorder to printers with PictBridge support sold parately you can send images from the MEMORY STICK directly to e printer th the PictBridge support you can control the printer directly through ur camcorder in order to print out stored images For direct printing of ur stored images using the PictBridge funct...

Страница 102: ...a impresora ESPAÑOL GLISH gital Still Camera mode Modalidad de cámara fotográfica digital sing the FWD and REV buttons select e still image that you want to print ove the MENU SELECTOR to highlight PRINT HIS PHOTO and push the MENU SELECTOR The print setting menu appear If you do not want to print photo press the MENU button ove the MENU SELECTOR to select the number copies You can select a maximu...

Страница 103: ... impriman correctamente No se pueden imprimir imágenes en movimiento MJPEG ESPAÑOL GLISH 103 103 gital Still Camera mode Modalidad de cámara fotográfica digital ing the MENU SELECTOR select the DATE mode at submenu DIRECT PRINT MODE and push the MENU SELECTOR You can choose to print the OFF DATE DATE TIME The default setting is OFF DATE or TIME appears only in the printed picture tes me printer mo...

Страница 104: ... images moving pictures from cidental erasure If you execute FORMAT all still images moving pictures including protected images will be erased et the mode switch to MEMORY et the power switch to PLAYER mode The last recorded still image moving picture appears If there are no recorded still images moving pictures on the Memory Stick NO STORED IMAGE and will display on the screen sing the FWD and RE...

Страница 105: ...moving pictures recorded on the emory Stick you want to delete protected still images moving pictures you ust first deactivate the image protection image which has been deleted cannot be recovered u can delete still images moving pictures in the menu list or ing DELETE button ing images in the menu t the camcorder to M PLAY mode see page 29 ing the FWD and REV buttons search the still image moving...

Страница 106: ...s con el botón DELETE 1 Ponga la cámara en el modo M PLAY Consulte la página 29 2 Seleccione mediante los botones FWD y REV la imagen fija o en movimiento que desea eliminar 3 Pulse el botón DEL eliminar 4 En la pantalla aparece el mensaje DELETE REALLY Está seguro de que desea borrar 5 Seleccione la opción mediante el MENU SELECTOR NO para cancelar la eliminación YES para proceder a la eliminació...

Страница 107: ...onfigurar el número de archivo GLISH 107 107 gital Still Camera mode atting the Memory Stick You can use the MEMORY FORMAT functions to completely delete all still images moving pictures and options on the Memory Stick including protected still images moving pictures The format function restores the Memory Stick to its initial state The Memory Stick supplied with this camcorder has been formatted ...

Страница 108: ...el botón MENU ESPAÑOL GLISH gital Still Camera mode Modalidad de cámara fotográfica digital ng the File Number The images you take are automatically assigned file numbers from 0001 to 9999 Set the image file numbers so that they reset each time a Memory Stick is formatted or so that they count up continuously SERIES Numbering remains in order between Memory Sticks so that the first file number ass...

Страница 109: ...using the Video Light Flash or un Zoom Mic Uso del Smart Shoe La Smart Shoe sirve para colocar un accesorio opcional en la videocámara La fuente de alimentación de accesorio es la misma de la videocámara Antes de colocar o quitar el accesorio apague la videocámara Tipos de accesorios opcionales para la Smart Shoe VL S1FL Lámpara de vídeo Flash ZM EC1 Micrófono gun zoom Ejemplo empleo de la lámpara...

Страница 110: ...ibilidad y puede funcionar como micrófono direccional modalidad gun o como micrófono variable modalidad zoom ESPAÑOL GLISH mart Shoe Smart Shoe 1FL Video Light Flash h the Video Light Flash to a camcorder when ding in dark places recording a PHOTO you can take natural g flash pictures with appropriate illumination the Flash C1 Gun Zoom Mic s a highly sensitive microphone that can be hed between fu...

Страница 111: ...batería de ion de litio Mantenga pulsado el botón BATTERY RELEASE y deslice la batería en la dirección que indica la flecha Después de haber finalizado una grabación GLISH 111 111 intenance the end of a recording you must remove the power source aving the Lithium Ion Battery pack on the camcorder can reduce e life span of the battery de the TAPE EJECT switch in the direction the arrow Opening the ...

Страница 112: ...entro de servicio autorizado Limpie los cabezales de vídeo con una cinta limpiadora de tipo seco Limpieza y mantenimiento de la videocámara Mantenimiento GLISH intenance ning the Video Heads sure normal recording and clear pictures clean the video heads the playback pictures display square block shaped noise or ion or a blue screen appears et the power switch to PLAYER mode sert the cleaning tape ...

Страница 113: ...etc Nota Puede hacer grabaciones con la cámara y ver las imágenes en la pantalla LCD en cualquier lugar del mundo Utilización de la videocámara en el extranjero Mantenimiento GLISH 113 113 intenance ch country or region has its own electric and color systems fore using your camcorder abroad check the following items er sources You can use your camcorder in any country or area with the supplied AC ...

Страница 114: ...batería 4 Ponga de nuevo la batería Si no puede resolver el problema póngase en contacto con el TAPE END TAPE END TAPE PROTECTION D L C R Pantalla Parpadeo Indica que Solución Problemas y soluciones GLISH oubleshooting efore contacting a Samsung authorized service center perform e following simple checks hey may save you the time and expense of an unnecessary call Diagnosis Display ture Condensati...

Страница 115: ...The camera can not playback The camera can not record The Memory Stick needs to format When progressing FILE DELETE When progressing MEMORY FORMAT When progressing FILE COPY Memory Stick format operation is failed Insert a Memory Stick Change to a new Memory Stick Erase recorded image Record new images Release the write protect tab on the Memory Stick Cancel the protect of image Release the Memory...

Страница 116: ...e enfoque manual Compruebe el interruptor Ajústelo en la posición PLAYER Se ha llegado al principio o al final del casete Esta circunstancia es normal Síntoma Explicación Solución GLISH oubleshooting hese instructions do not solve your problem contact your arest Samsung authorized service center annot switch the order on T STOP button not operate recording amcorder goes tomatically attery pack is ...

Страница 117: ...50 60Hz 5 7W LCD 4 5W visor electrónico 0 40 C 32 F 104 F 20 C 60 C 4 F 140 F Longitud 120 mm altura 101 5 mm ancho 58 mm 480 g sin batería y sin cinta Micrófono estéreo omnidireccional de condensador En interiores más de 15 m en línea recta en exteriores 5 m aproximadamente en línea recta GLISH 117 117 ecifications se technical specifications and design may be changed without ce em signal ecordin...

Страница 118: ...ento WIND CUT 58 Empuñadura 22 Enfoque 66 Exposición EXPOSURE 63 Equilibrio del blanco WHT BALANCE 48 Fecha y hora DATE TIME 59 Flash 67 Formateado del Memory Stick 107 Fundido 69 Grabación de imágenes en el Memory Stick 93 GRABACIÓN EN FORMATO MJPEG MJPEG RECORDING 96 ÍNDICE ALFABÉTICO A D E B C F G sories 12 light 64 dubbing 70 O MODE 57 O SELECT 71 OUT 80 y Pack 24 SOUND 42 68 tte 27 ng the Lit...

Страница 119: ...4 Selector de audio AUDIO SELECT 71 Señal acústica BEEP SOUND 42 Smart shoe 109 Sonido 36 Sonido del obturador SHUTTER SOUND 43 Tamaño de la imagen 90 Tamaño de la imagen en formato MJPEG MJPEG SIZE 91 Temporizador Self Timer 20 USB 83 Velocidad del obturador SHUTTER SPEED 63 Visionado de imágenes fijas y de vídeo 98 Visionado simultáneo o de varias imágenes 99 Visor 32 34 Zoom digital 50 I L M U ...

Страница 120: ...tp www samsungcanada com ma http www samsung panama com http www samsung it http www samsung es Página Web en Internet de Samsung Electronics United States http www samsungusa com United Kingdom http www samsungelectronics co uk France http www samsung fr Australia http www samsung com au Germany http www samsung de Sweden http www samsung se Poland http www samsung com pl Canada http www samsungc...

Отзывы: