7-11
Chapter 7. Recovering the Computer
Display Related
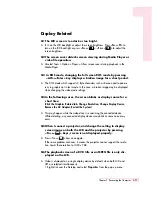
Q1 The LCD screen is too dark or too bright.
A Turn on the LCD backlight or adjust the screen brightness. Press <
Fn
>+<
F5
> to
turn on the LCD backlight or press <
Fn
>+<
>, <
Fn
>+<
> to adjust the
screen brightness.
Q2 The screen saver disturbs screen viewing during Media Player or
video file operation.
A Unselect Tools > Option > Player > Allow screen saver during playback in the
Media Player.
Q3 In DOS mode, changing the full screen DOS mode by pressing
<ALT>+<Enter> key displays a broken image for a short period.
A The DOS mode which supports 2 Byte characters such as Korean and Japanese
runs in graphic not in text mode. In this case, a broken image may be displayed
while changing the video mode settings.
Q4 In the following cases, the screen blinks or displays noise for a
short time:
(Click the Graphics Related tab, Change Resolution, Change Display Device,
Remove the AC Adapter, Restart the System.)
A This may happen while the video driver is examining the connected device.
While detecting, any connected display devices may blink or some noise may
occur.
Q5 When I connect a projector, and change the setting to display
screen image on both the LCD and the projector by pressing
<Fn>+<
> keys, screen is not displayed properly.
A Press <Fn>+<
> keys once again.
If the same problem continues, it means the projector cannot support the resolu-
tion. Lower the resolution to 1024 x 768.
Q6 The playback screen of a DVD title or an MPEG file is only dis-
played on the LCD.
A Video is displayed on a single display device by default, when both LCD and
CRT are selected simultaneously.
1. Right-click over the Desktop and select
Properties
from the pop-up menu.
Содержание R40
Страница 5: ......
Страница 97: ...4 36 Manual ...
Страница 98: ...System Management This chapter provides information on efficient computer management Chapter 5 Chapter 5 ...
Страница 109: ...5 12 Manual ...
Страница 121: ...6 12 Manual ...
Страница 150: ...Appendix System specifications software types and safety instructions are provided here Appendix Appendix ...

