


105
Effects and 31-band GEQ
Effects and 31-band GEQ
Use the GEQ INSERT SELECT popup to select the destination into
which you want to insert a 31-band GEQ.
1.
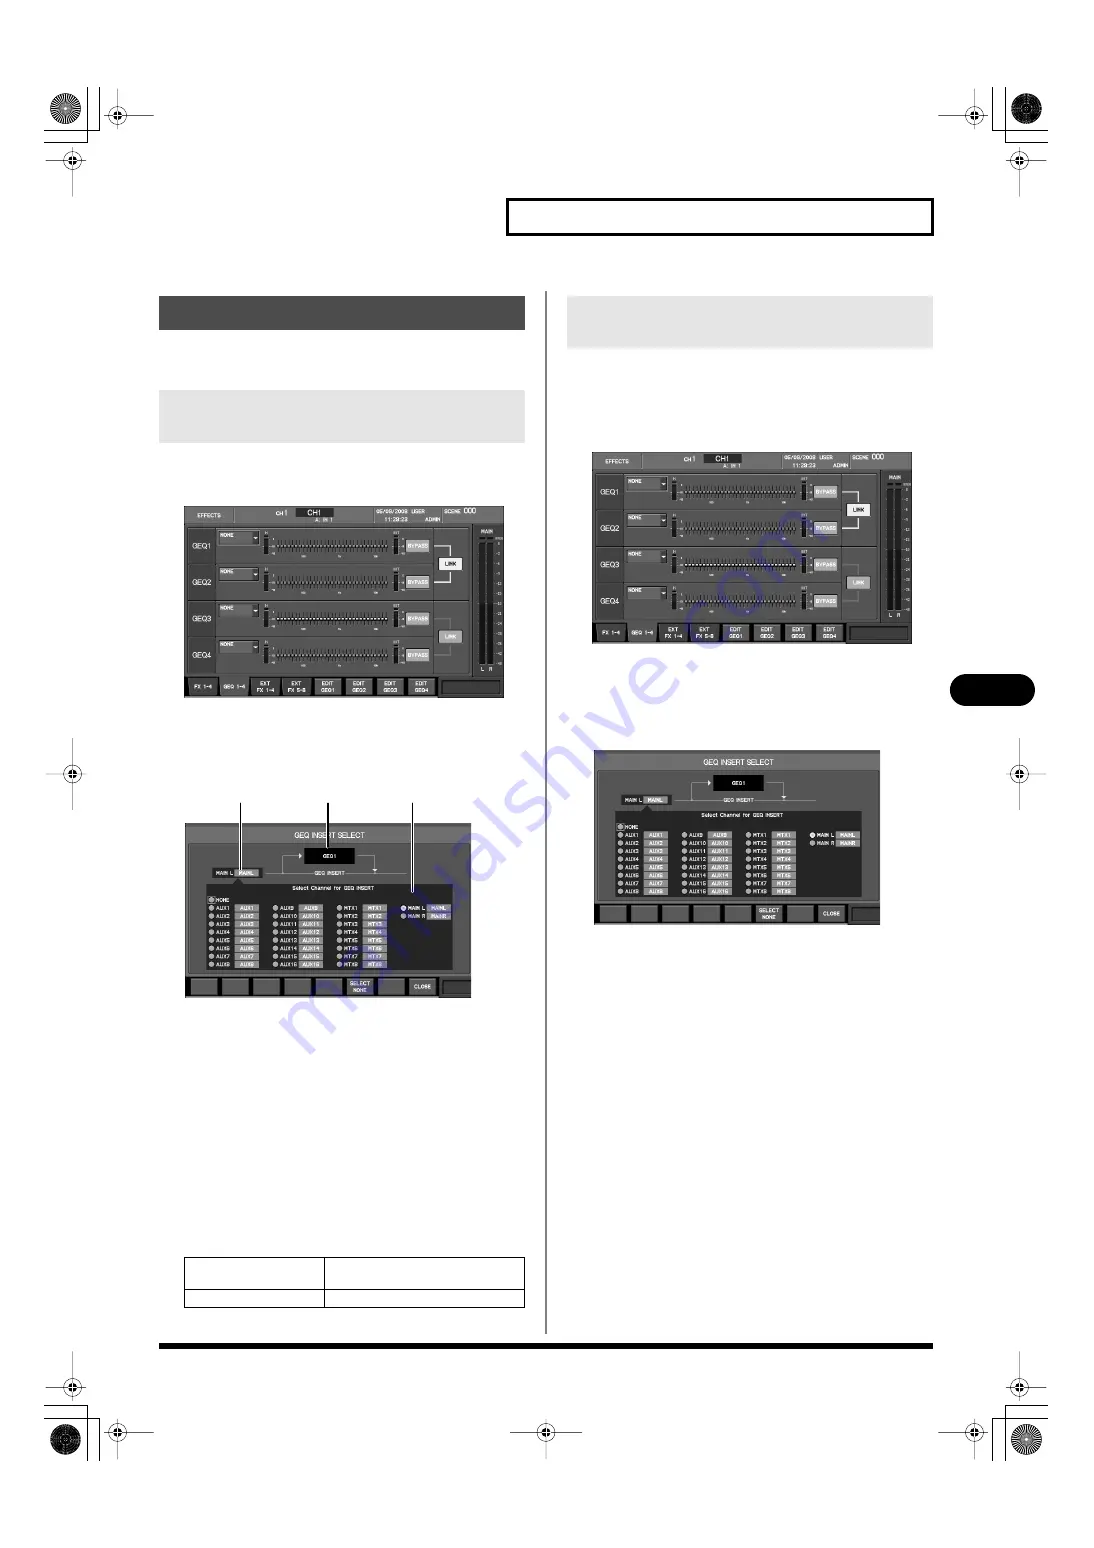
Access the EFFECTS screen, and press [F2 (GEQ 1–4)] to
display the GEQ 1–4 tab.
fig.ScrGEQRack.eps
2.
Move the cursor to the GEQ INSERT SELECT popup button
for the desired GEQ, and press [ENTER].
The GEQ INSERT SELECT popup will appear.
fig.ScrGEQInsSelGuide.eps
A.
Applicable GEQ indication
This indicates the GEQ to which the GEQ INSERT SELECT
popup applies.
B.
Insert-destination channel select buttons
These buttons select the channel into which the GEQ will be
inserted.
C.
Current insert destination indication
This indicates the current insert destination.
In the GEQ INSERT SELECT popup, the function buttons
perform the following operations.
This section describes the procedure for inserting linked GEQ1 and
GEQ2 into the MAIN L/R channels.
1.
Access the EFFECTS screen, and press [F2 (GEQ 1–4)] to
display the GEQ 1–4 tab.
fig.ScrGEQRack.eps
2.
Move the cursor to the LINK button located at the right of
GEQ1 and GEQ2, and press [ENTER] to turn the button on.
3.
Move the cursor to the GEQ INSERT SELECT popup button
for GEQ1, and press [ENTER].
fig.ScrGEQInsSel.eps
The GEQ INSERT SELECT popup will appear.
4.
Move the cursor to the MAIN L insert-destination channel
select button, and press [ENTER] to select it.
5.
Press [F8 (CLOSE)] to close the popup.
6.
In the same way as you did in steps 1 through 5, select
MAIN R as the insert destination for GEQ2.
Inserting a 31-band GEQ
Accessing the GEQ INSERT SELECT
popup
[F6 (SELECT NONE)]
Clears the insert-destination selec-
tion.
[F8 (CLOSE)]
Closes the popup.
A
B
C
Inserting the 31-band GEQ to
MAIN L/R
M-380_e1.book 105 ページ 2010年6月30日 水曜日 午前10時31分


