41
5.
Save/print
: Depending on the selected function, action key (5) is labeled "Save" (Function
Scan
) or "Print" (Function
Copy
). In both cases, output is initiated by pressing the key –
either in a file or on a printer. You need this key when you want to
edit the image and/or settings after the scan (prescan, edit, output) and/or
perform the output again, perhaps with different settings.
5.8
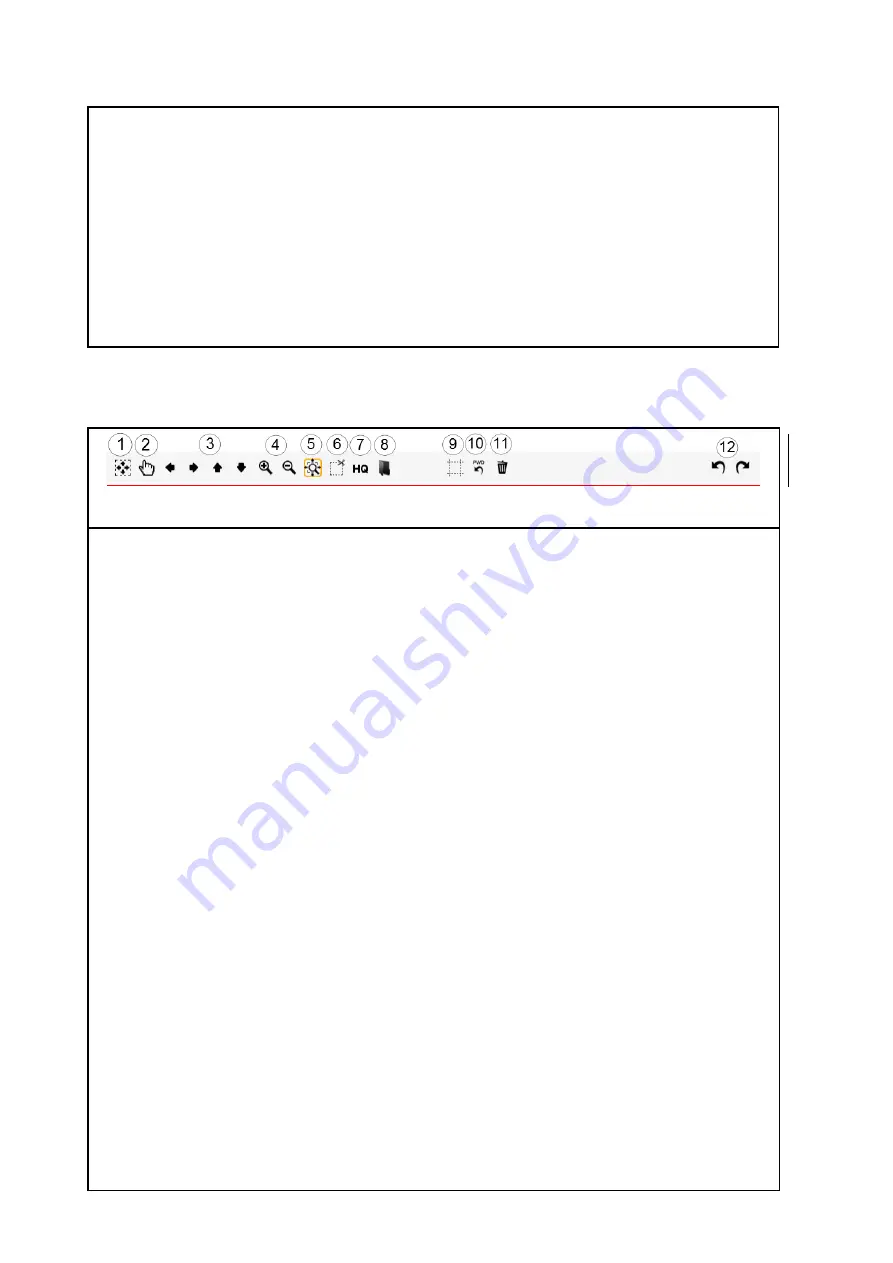
Toolbar of Main Viewer
Figure 5.7: Toolbar above Main Viewer
The toolbar above the Main Viewer includes the following buttons:
1.
General view
: Shows complete image in Viewer. This button is particularly useful if you
selected a section for being zoomed before and now want to return to the general view.
2.
Manual shift
: The currently displayed detail can be shifted in all directions by means of
the mouse; however, a section needs to be zoomed in before. Manual shift does not
work if the
Enhanced cutting function
is active.
3.
Arrow keys
: The currently displayed detail can be shifted in the respective direction if a
section has been zoomed in before.
4.
Zoom +/-
: Zooming a detail shown in the Viewer in or out.
5.
Expanding detail
: By means of this button you define the behavior of the display of a
detail when you expand a detail by means of the mouse: If the button is active (orange
frame)
at least
the selected detail is always displayed in the Viewer so that the area of
the Viewer is filled best. If you want only the selected area to be displayed, activate 5.
6.
Cut detail
: Similar to 4., but
exactly
the selected detail is displayed in the Viewer. The
detail is then enlarged in a way that either the entire width
or
the entire height of the
Viewer is used.
7.
High Quality Modus
(HQ)
ON/OFF: You can select whether the image shall be displayed
in a higher quality in the Viewer. In particular, when processing drawings with very fine
structures, they are possibly not displayed completely in the Viewer (in particular in the
General View) as the image has to be scaled down to "fit" into the Viewer. The HQ mode
reduces this effect considerably but results in the fact that it takes a little bit longer until
the picture is fully displayed.
Содержание Scan 450i 24 inch KIT 40
Страница 1: ...R O T H W E B E R G m b H APP CENTER ecoPrint Scan 450i O PE RA TIN G M AN UAL RE VI SION 1 5 3...
Страница 102: ...101 output device Parameter range you want to make the changes...
Страница 130: ...129 9 Trouble Shooting This chapter describes the actions to be taken if a problem occurs when using the scanner...
Страница 141: ...140 D About this System Copyright 2003 2014 ROTH WEBER GmbH All rights reserved...


