Cascade Installation Guide
13
Network connections
After the Profiler is mounted, configured, and has been powered on for more than
two minutes, connect the network cable and verify the connections as follows:
1.
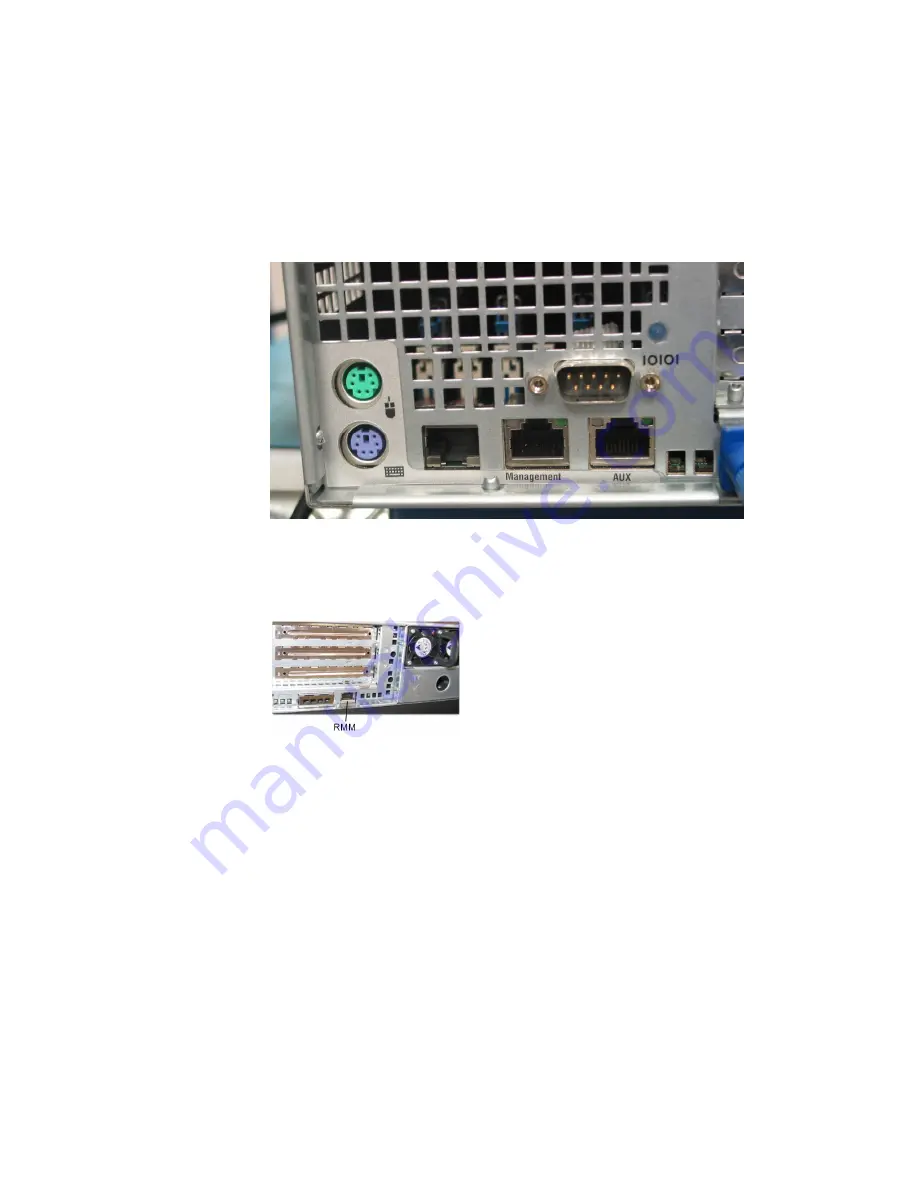
Connect a cable from your management network to the
Management
connector on the left rear of the Profiler. This is the same connector that
you used to configure the Profiler.
2.
Connect a cable from the network to the RMM connector on the right rear
of the Profiler. The RMM connection and the Profiler management
connection can be on different subnets, but these must correspond to the
addresses you assigned for each interface on the
Setup
page.
3.
Point your browser to the Profiler IP address that you specified on the
Setup
page during the configuration task. This displays the login page.
4.
Log in to the
admin
account with the password you specified at the end of
the configuration task.
5.
Navigate to the
System
Devices/Interfaces
page and check the status
of the Sensor or other data source devices on the
Devices
tab. When a data
source comes on line, the Profiler begins collecting data. At least one data
source must be listed with a green status indicator before you can
complete the Profiler installation verification step.
Содержание Cascade Express
Страница 1: ...Cascade Installation Guide Version 9 0 February 2011 ...
Страница 4: ...iv 712 00058 07 ...
Страница 8: ...viii ...
Страница 10: ...x ...
Страница 21: ...Cascade Installation Guide 11 ...
Страница 32: ...Cascade Installation Guide 22 3 Fill in all the required fields marked with an asterisk on the Setup page ...
Страница 48: ...Cascade Installation Guide 38 ...
Страница 91: ......
Страница 92: ......


