Chapter 3 - Setup and Installation
Completing the Installation
51
completely, and the release latch resets.
12
Re-install the power supplies. Slide each power supply into its open bay and
ensure it seats completely, and the release latch resets.
13
Continue now with “Completing the Installation” on page 51.
Completing the Installation
1
Install the disk drives.
a
Remove each drive from its anti-static protective packaging. Inspect for
obvious damage.
b
Install each disk drive into a drive slot by aligning the drive carrier rails with
the grooves in the drive bay wall. Repeat this step to populate all the
required drive slots.
NOTE:
The drive carrier has tension clips in the rail to ensure a snug fit, so it
requires some force to seat the drive.
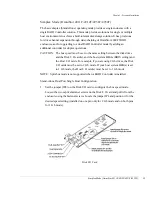
Installing Disk Drives
c
Install the front bezel. The bezel mounts to the two front post stud, one on
each mounting ear, and the bezel lip fits under the chassis top.
Содержание OmniStor 4900F Series
Страница 1: ......
Страница 2: ......
Страница 4: ......
Страница 38: ...Chapter 1 Getting Started Audible Alarm 24...
Страница 58: ...Chapter 2 Topologies and Operating Modes Application of Availability 44...
Страница 128: ...Chapter 3 Setup and Installation Powering Off the Storage System 114...
Страница 156: ...Chapter 5 Troubleshooting Problems During Bootup 142...
Страница 178: ...Chapter 6 Maintenance Replacing the Enclosure 164...
Страница 182: ...Appendix A Technical Information Specifications 168...
Страница 196: ...Index 182...


