


120
How-To Topics
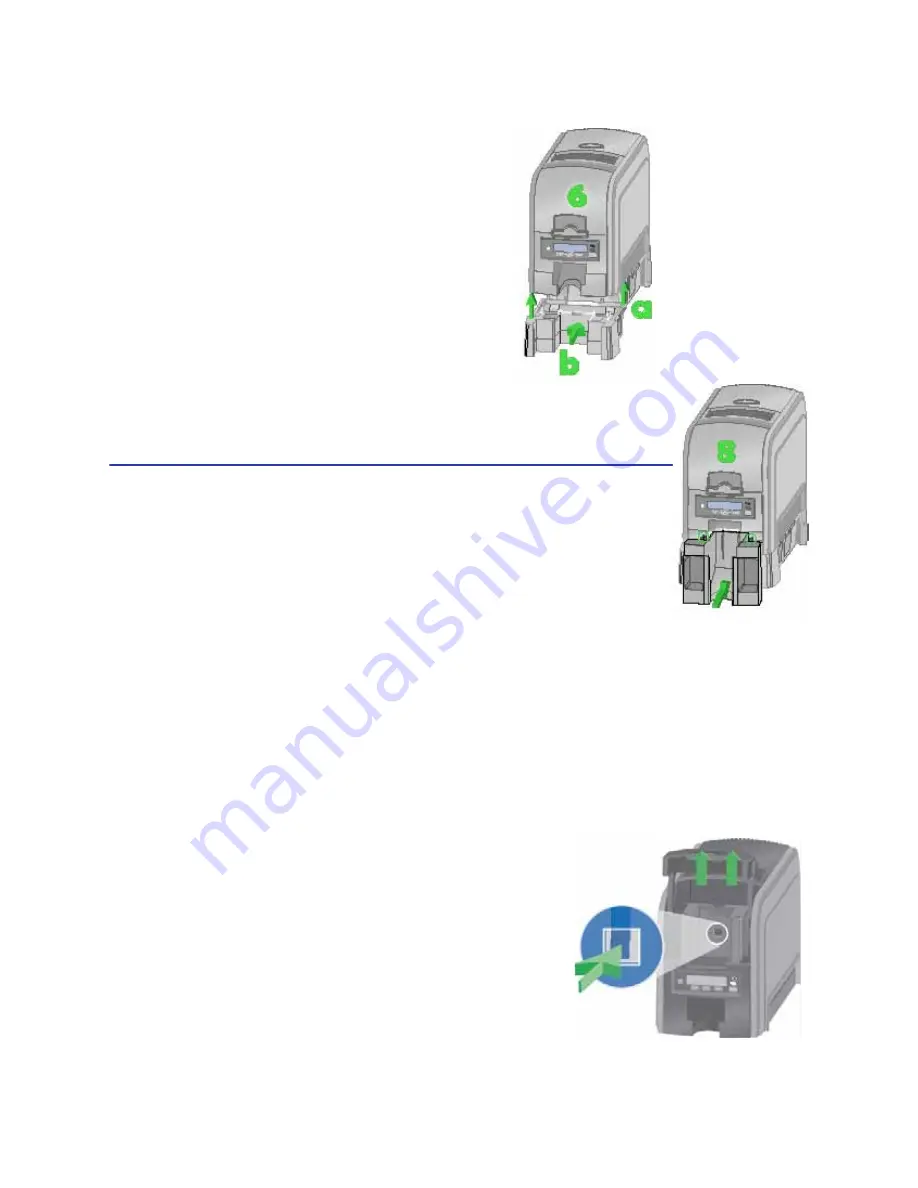
6.
Push up (a) to insert the four tabs
in the slots and then push the base
back (b) to lock it to the printer.
7.
Remove the 25-card output hopper
from the printer. Slide it out,
similar to a drawer.
8.
Slide the 100-card output hopper
into the assembled base and printer. Make sure the tabs
(in circles) secure the hopper to the printer.
Hints & Tips
•
The base sections contain drawers, useful for holding
cards, cleaning pen, or other frequently-used items. The
drawers can be opened from the left or right side of the
printer.
•
The base and large output hopper remain attached when
the printer is moved or carried.
How to Install the 200-Card Input Hopper Option
The standard input hopper can hold about 100 cards. Some printers can be
upgraded to use a 200-card input hopper.
The 200-card input hopper kit includes the larger hopper with cover attached.
The standard hopper is easily removed and the 200-card hopper can be installed
without using tools.
1.
Open the input hopper.
2.
Press the release tab located on the back
wall of the hopper while lifting the hopper
up and off the printer.
3.
Install the 200-Card input hopper by
aligning the tabs with the slots on the
printer.
4.
Push the hopper down until it clicks into
place.
Содержание 539957-020 Rev. A
Страница 1: ...Polaroid XPS Card Printer Installation and User Guide June 2011 Part No 539957 020 Rev A ...
Страница 10: ...8 ...
Страница 13: ...3 Inside a printer Printer with Duplex Option ...
Страница 15: ...5 ...
Страница 18: ...8 Welcome to Card Printer Information ...
Страница 51: ...41 ...
Страница 52: ...42 Printing Cards ...
Страница 92: ...82 Printer Driver ...
Страница 95: ...85 ...
Страница 96: ...86 Updates Upgrades and More ...
Страница 100: ...90 Removing a Printer from a Windows PC ...
Страница 118: ...108 Troubleshooting ...
Страница 183: ...173 ...
Страница 184: ...174 Legal Notices ...


