


Factory Line - Wireless LAN
3-6
PHOENIX CONTACT
7190_en_02
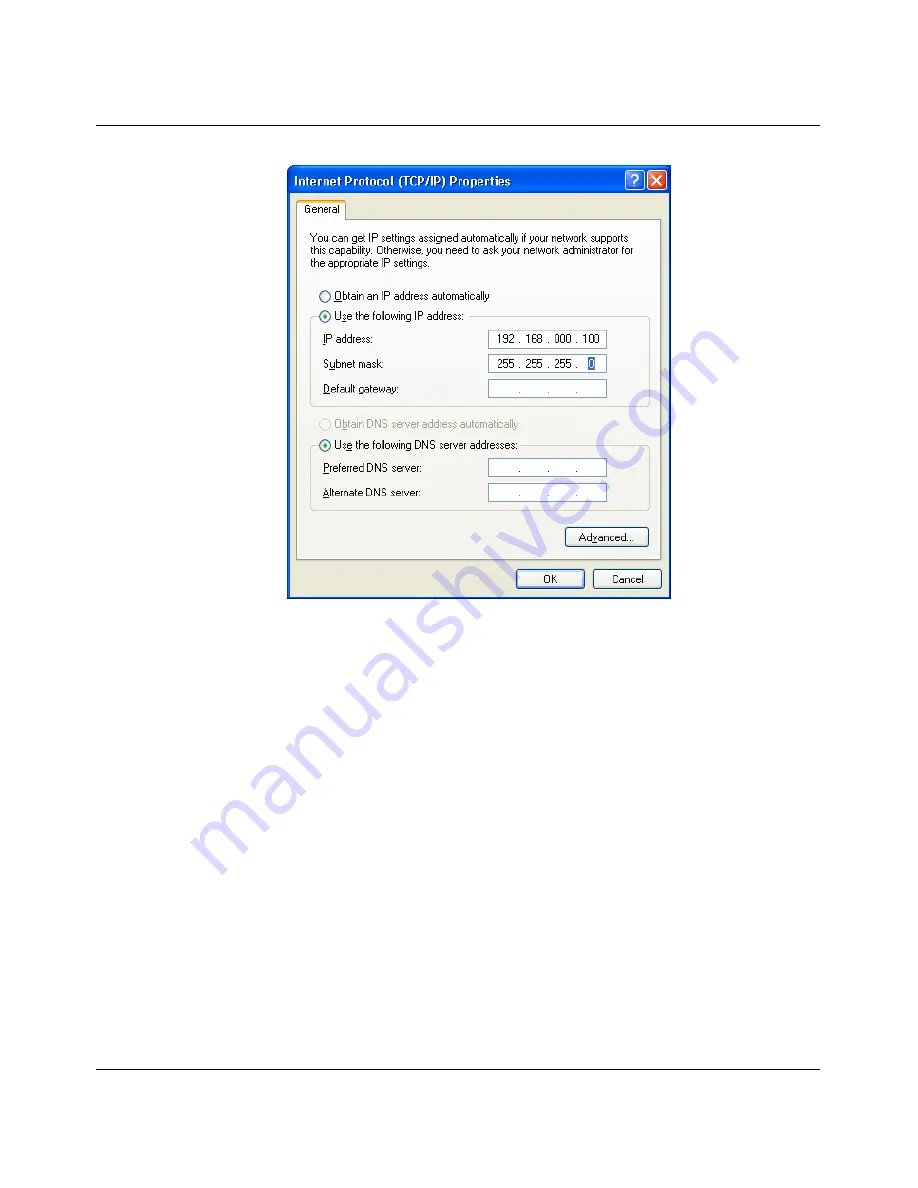
Figure 3-4
Internet Protocol Properties dialog box
Enter the desired IP address in the "IP address" field. The first three bytes of the address
must be "192.168.0.". The last byte must contain a number between 1 and 253, the value
"100" is selected in the example. See also 3.5.2.1 "Assigning IP parameters".
"255.255.255.0" must be set as the subnet mask, close the dialog boxes with "OK".
The device can now be accessed via a web browser. Enter the following address in the
address line:
http://192.168.0.254
After the correct user name and password have been entered, the device configuration
pages are loaded.
Содержание FL WLAN 24 AP 802-11
Страница 2: ......
Страница 66: ...Factory Line Wireless LAN 3 32 PHOENIX CONTACT 7190_en_02 Figure 3 32 Status WLAN menu...
Страница 100: ...Factory Line Wireless LAN 4 4 PHOENIX CONTACT 7190_en_02...
Страница 122: ...Factory Line Wireless LAN 5 22 PHOENIX CONTACT 7190_en_02 plDevWlanIf2VisibleAccessPointEntry 8 END...


