Directions For Use
EN 7
3.
3.
Directions For Use
2
CHANNEL
r
Previous
programme
number
N
Briefly
press
the
button
during
playback:
Previous
chapter
or
previous
title
Hold
down
the
button:
Search
backwards
Hold
down
the
button
during
the
still
picture:
slow
motion
backwards
STOP
h
Stop
playback/recording,
except
with
programmed
recordings
(TIMER)
Hold
down
button,
opens
and
closes
the
disc
tray.
PAUSE
9
If
this
button
is
pressed
during
playback,
the
DVD
recorder
switches
to
pause.
You
will
see
a
still
picture.
If
this
button
is
pressed
during
recording,
the
DVD
recorder
will
also
switch
to
pause.
O
Briefly
press
the
button
during
playback:
Next
chapter
o
r
next
title
Hold
down
the
button:
Search
forwards
Hold
down
button
during
still
picture,
slow
motion
forwards
0..9
For
entering
numbers
or
characters
at
the
corresponding
entry
fields.
CLEAR
To
delete
last
entry
or
clear
programmed
recording
(TIMER)
TV/MUTE
y
Switch
T
V
sound
on/off
Additional
TV
functions
This
w
ill
only
work
with
TV
sets
w
ith
the
same
remote
control
code
*RC5)
(e.g.
Philips
T
V
sets)
TV
VOLUME
q
Increase
TV
volume
TV
VOLUME
r
Reduce
T
V
volume
TV/MUTE
y
Switch
T
V
sound
on/off
For
the
following
functions
you
need
to
hold
down
the
•T
V
button
(on
the
left
side)
and
then
select
the
function
you
need
with
the
appropriate
button.
STANDBY
m
Switch
on/off
T
V
set
0..9
Number
buttons
0
-
9
CHANNEL
q
To
select
a
higher
programme
number
CHANNEL
r
To
select
a
lower
programme
number
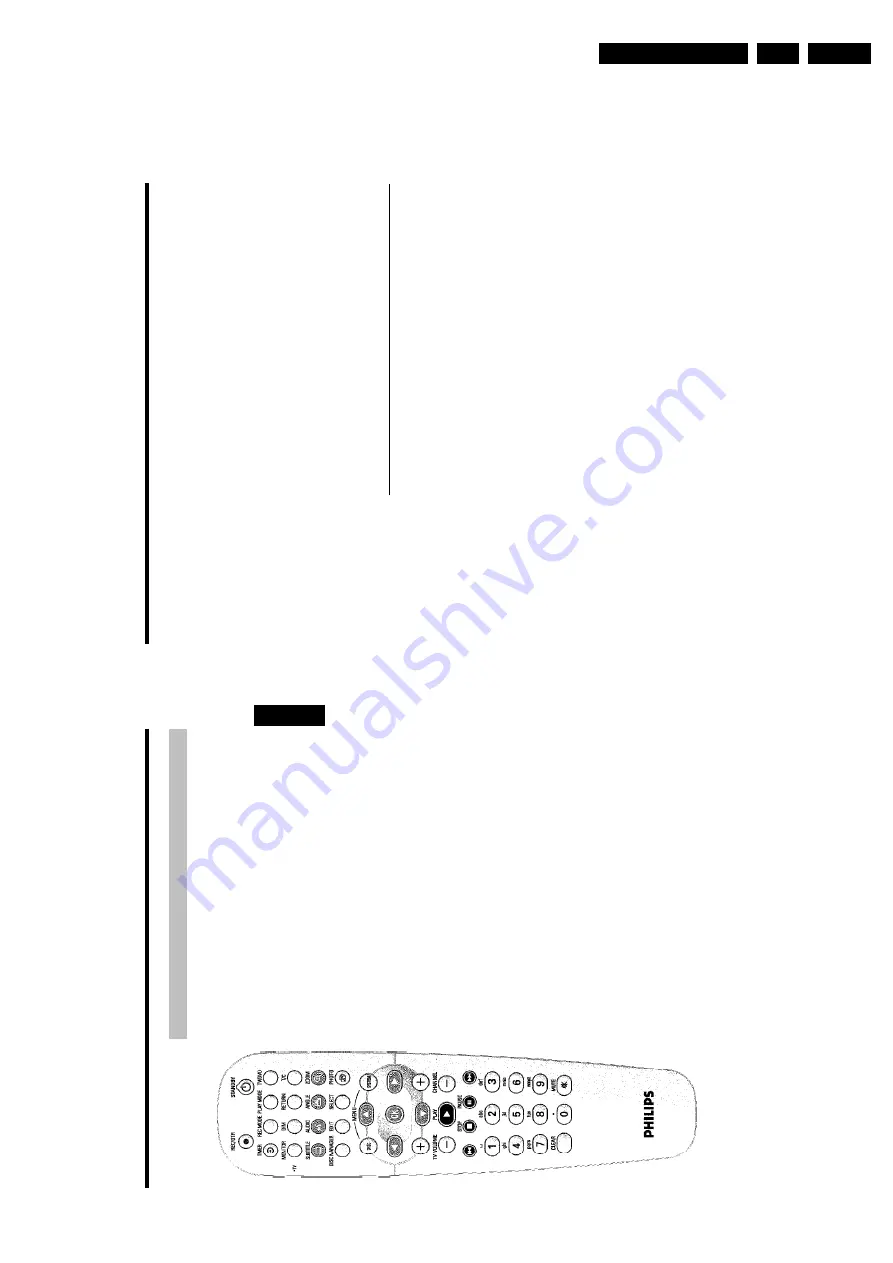
Overview
of
functions
1
The
remote
control
REC/OTR
n
Record
the
current
TV
channel
STANDBY
m
To
switch
set
on
or
off,
interrupt
menu
function,
interrupt
a
programmed
recording
(TIMER)
TIMER
s
To
make
a
T
IMER
programming
with/without
ShowView
®
system
o
r
to
alter/clear
programmed
recordings.
REC
MODE
To
select
the
picture
quality/
maximum
possible
record
time/
PLAY
MODE
Choose
between
repeat,
shuffle
play
and
intro-scan
TV/DVD
Switches
the
scart
socket
EXT2
AUX-I/O
of
the
DVD
recorder
directly
to
the
T
V
set.
This
lets
you
watch
the
picture
from
any
unit
connected
to
this
scart
socket
(set-top
box',
video
recorder
or
satellite
receiver)
and
at
the
same
time
record
from
another
source.
If
you
have
not
connected
a
device
to
the
EXT2
AUX-I/O
socket
or
the
device
is
switched
off,
you
can
use
this
button
to
switch
between
TV
reception
and
the
signal
o
f
the
DVD
recorder.
But
this
only
works
if
you
use
a
scart
cable
to
connect
the
TV
set
to
your
DVD
recorder
(
EXT1
TO
TV-I/O
socket)
and
your
TV
set
responds
to
this
switch-over.
MONITOR
This
button
lets
you
switch
between
disc
playback
or
the
picture
of
the
internal
tuner
(TV
channel).
DIM
This
button
lets
you
change
the
brightness
o
f
the
display
to
one
of
two
levels
o
r
switch
it
o
ff.
RETURN
Return
to
previous
menu
on
a
video
CD
(VCD).
This
also
works
with
some
DVDs.
T/C
Choose
the
'
B
'(Title)/'
C
'(Chapter)
directly
from
the
menu
bar
using
B
,
A
.
If
'
INFO
'appears
in
the
display,
the
index
menu
from
a
recorded
disc
or
an
introductory
film
will
be
shown.
In
this
case,
this
function
is
not
available.
SUBTITLE
Select
the
subtitle
language
AUDIO
Selecting
the
audio
language.
For
recording
or
during
playback
using
the
internal
tuner
(
MONITOR
key),
select
language
1
o
r
2.
ANGLE
Select
the
camera
angle
ZOOM
Enlarge
the
picture
EDIT
For
displaying
the
edit
menu
for
DVD+RW/+R
discs,
for
setting
chapter
markers,
for
editing
the
photos
in
the
'Digital
Photo
Manager'
SELECT
Select
function/value/photos
PHOTO
Open
the
'Digital
Photo
Manager'
DISC
MENU
To
show
the
DVD
menu
or
the
index
screen,
to
leave
the
'Digital
Photo
Mamger'
SYSTEM
MENU
Call
up/cancel
the
main
menu
(menu
bar
at
the
top
o
f
the
screen)
AB
In
den
Menüs
Cursortasten
nach
oben,
unten.
DC
Cursor
buttons
left,
right
in
the
menus.
OK
Confirming
o
f
functions
PLAY
G
Play
back
a
recorded
disc.
CHANNEL
q
Next
programme
number
ENGLISH
Overview
of
functions
Содержание DVDR730/0x
Страница 40: ...Mechanical Instructions EN 40 DVDR730 0x 4 Figure 4 14 Figure 4 15 5 5 6 7 ...
Страница 98: ...EN 98 DVDR730 0x 7 Circuit Diagrams and PWB Layouts Layout Analog Board Part 2 Bottom View 17025b_001 230204 ...
Страница 101: ...Circuit Diagrams and PWB Layouts EN 101 DVDR730 0x 7 Layout UP Sub Board Top View TR 06012_001 040203 ...
Страница 104: ...EN 104 DVDR730 0x 7 Circuit Diagrams and PWB Layouts Layout In Out Extension Board TR 06037_00 1 06020 3 ...
Страница 116: ...EN 116 DVDR730 0x 7 Circuit Diagrams and PWB Layouts ...
Страница 129: ...Circuit IC descriptions and list of abbreviations EN 129 DVDR730 0x 9 9 4 4 Video routing Figure 9 3 Video IO Nafta ...
Страница 135: ...Circuit IC descriptions and list of abbreviations EN 135 DVDR730 0x 9 Figure 9 9 ...
Страница 136: ...Circuit IC descriptions and list of abbreviations EN 136 DVDR730 0x 9 Figure 9 10 ...
Страница 140: ...Circuit IC descriptions and list of abbreviations EN 140 DVDR730 0x 9 IC7411 NJM2285 Analog Board Video Switch ...
Страница 150: ...Spare Parts List EN 150 DVDR730 0x 10 10 Spare Parts List 10 1 Exploded View of the Set Figure 10 1 TR 13012_001 220803 ...
Страница 151: ...Spare Parts List EN 151 DVDR730 0x 10 10 2 Exploded View of the Front Panel Complete Figure 10 2 TR 13013_001 220803 ...
Страница 152: ...Spare Parts List EN 152 DVDR730 0x 10 10 3 Exploded View of the Front without PWBs Figure 10 3 TR 13014_001 220803 ...


