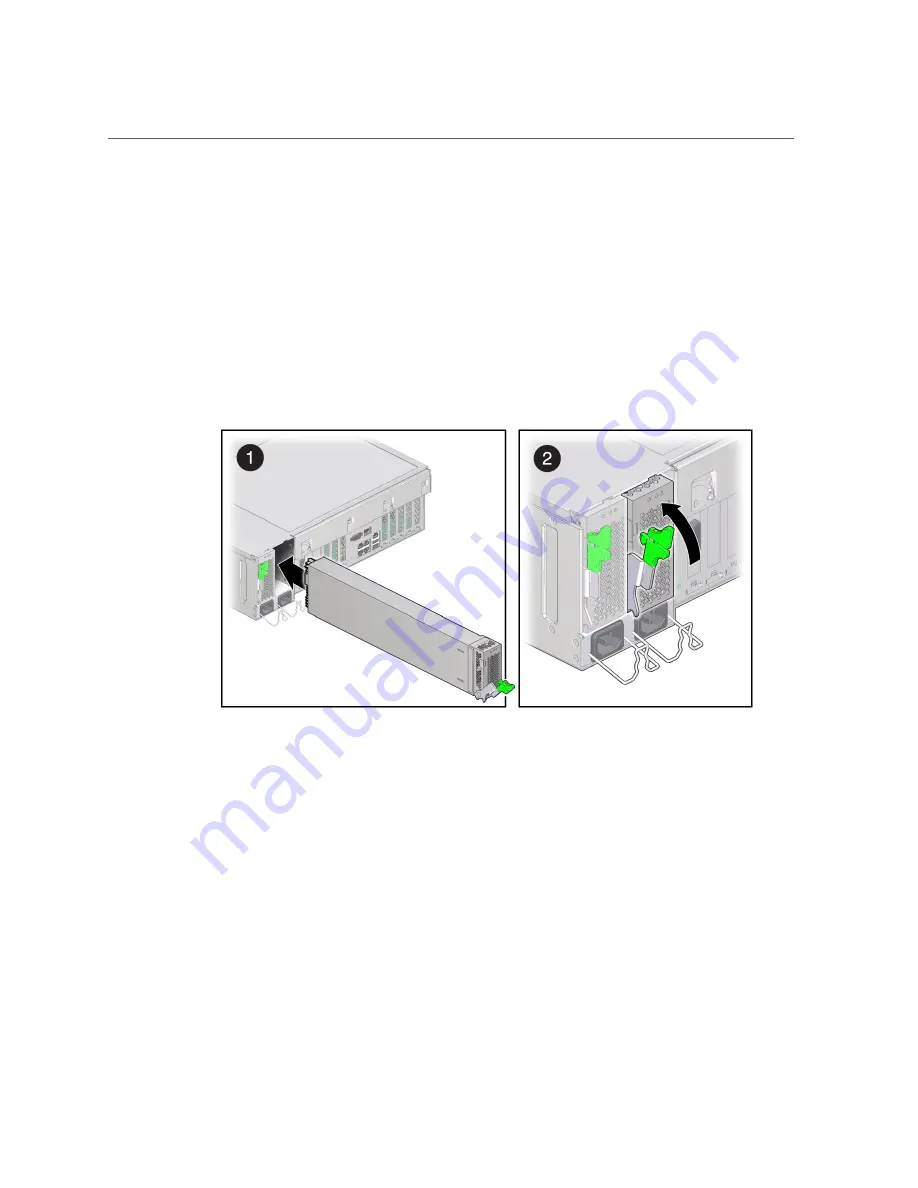
Install a Power Supply
1.
If necessary, release the cable management arm to access the power supplies.
Do not allow the CMA to hang unsupported while it is unattached.
2.
Align the power supply with the empty power supply chassis bay.
3.
Slide the power supply into the bay until it is fully seated.
4.
Move the release latch up to secure the power supply in place.
5.
Reconnect the power cord to the power supply.
6.
Verify power supply functionality.
“Verify a Power Supply” on page 88
.
Related Information
■
“Remove a Power Supply” on page 85
■
“Verify a Power Supply” on page 88
Servicing Power Supplies
87
Содержание SPARC T8-2
Страница 1: ...SPARC T8 2 Server Service Manual Part No E80511 04 June 2019 ...
Страница 2: ......
Страница 10: ...10 SPARC T8 2 Server Service Manual June 2019 ...
Страница 12: ...12 SPARC T8 2 Server Service Manual June 2019 ...
Страница 24: ...Server Block Diagram 24 SPARC T8 2 Server Service Manual June 2019 ...
Страница 26: ...26 SPARC T8 2 Server Service Manual June 2019 ...
Страница 62: ...62 SPARC T8 2 Server Service Manual June 2019 ...
Страница 82: ...82 SPARC T8 2 Server Service Manual June 2019 ...
Страница 110: ...110 SPARC T8 2 Server Service Manual June 2019 ...
Страница 114: ...114 SPARC T8 2 Server Service Manual June 2019 ...
Страница 128: ...128 SPARC T8 2 Server Service Manual June 2019 ...
Страница 135: ...Verify the SPM Related Information Oracle ILOM documentation Install the SPM on page 131 Servicing the SPM 135 ...
Страница 136: ...136 SPARC T8 2 Server Service Manual June 2019 ...
Страница 146: ...146 SPARC T8 2 Server Service Manual June 2019 ...
Страница 164: ...164 SPARC T8 2 Server Service Manual June 2019 ...
Страница 170: ...170 SPARC T8 2 Server Service Manual June 2019 ...
Страница 176: ...176 SPARC T8 2 Server Service Manual June 2019 ...
Страница 182: ...182 SPARC T8 2 Server Service Manual June 2019 ...
Страница 188: ...188 SPARC T8 2 Server Service Manual June 2019 ...


