Chapter 2: The User Interface
Now that your Omnia-3 is rack-mounted, connected to a program audio source, and turned on, you’re ready to
learn how to operate it! This chapter covers the Graphical User Interface, your window into the Omnia-3
processor.
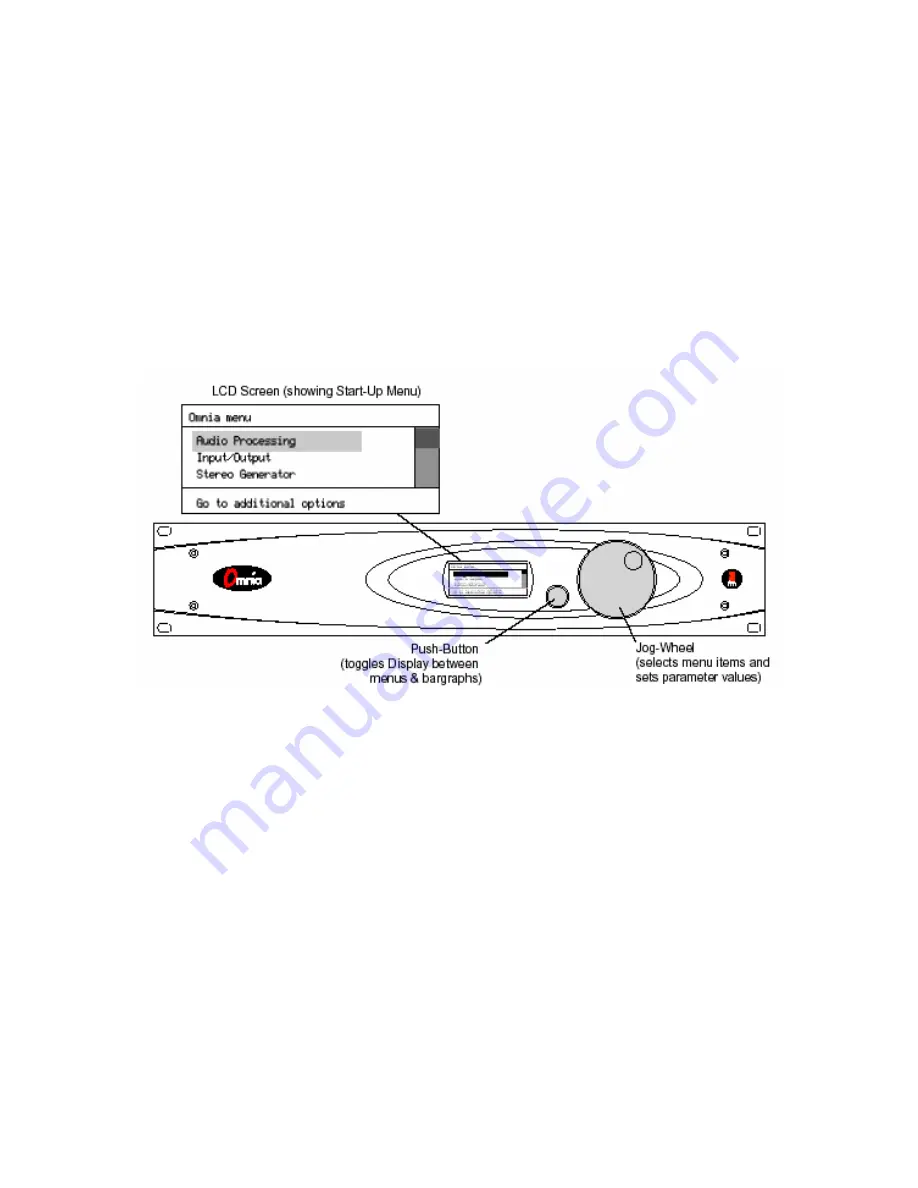
The user interface consists of a front panel-mounted jog-wheel with push-switch, a push-button and an LCD
screen. The LCD screen displays menus, parameter settings and bargraphs (Level Meters and Processing
activity). The push-button toggles between the two display modes: the menus/parameters mode and the
bargraph mode. The menus are used during initial setup and for adjusting the processing parameters. In normal
day-to-day operation, one of the bargraphs is typically displayed to dynamically indicate the real-time signal
processing.
Using the Jog Wheel
The main user control for the Omnia-3 is the large, easy to use jog wheel with its integral push-switch. We
believe that you will quickly become comfortable with how it works, and appreciate its simplicity.
Rotating the Jog-Wheel moves a highlighting bar up or down through menus and parameter choices. Pressing
the jog-wheel (called “clicking”) selects the highlighted menu item or parameter choice. When editing the
parameter values, rotating the jog-wheel adjusts the parameter’s value up (by rotating CW) or down (CCW).
Once the desired value is reached, clicking the jog-wheel saves the value and returns the display to the previous
menu or sub-menu.
The behavior of the Omnia-3's menu system is consistent across pages and is easy to learn. The following
procedure is used for all parameter selection and editing:
1. Use the jog-wheel to highlight a menu item or sub-menu item.
2. Click the jog-wheel to open up that item.
3. Once a parameter is displayed, highlight and click the name to open up the parameter value edit box.
4. Use the jog-wheel to adjust the value of the parameter.
5. Click to accept the value and return to the last sub-menu.
18


