


2.3.1 SD card bootup
For platforms that can be booted up from an SD card, following are the steps to program the sdcard.img.into an SD card:
1. Insert one SD card (at least 2G size) into any Linux host machine.
2. Run the below commands:
$ sudo dd if=./sdcard.img of=/dev/sdx
# or in some other host machine:
$ sudo dd if=./sdcard.img of=/dev/mmcblkx
# find the right SD Card device name in your host machine and replace the “sdx” or “mmcblkx”.
3. Now, insert the SD card into the target board (switch the board boot from SD card first) and power on.
2.3.2 QSPI/FlexSPI bootup
For platforms that can be booted up from QSPI (for example, LS1012ARDB), following are the steps to program the qspi.img into
QSPI flash.
Set the board boot from QSPI, then power on, and enter the U-Boot command environment.
FlexSPI (XSPI, image name is xspi.cpio.img) boot has the same commands to make the flash.
=>i2c mw 0x24 0x7 0xfc; i2c mw 0x24 0x3 0xf5
=>tftp 0x80000000 qspi.cpio.img
=>sf probe 0:0
=>sf erase 0x0 +$filesize
=>sf write 0x80000000 0x0 $filesize
=>reset
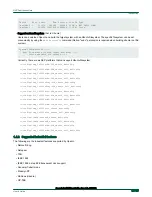
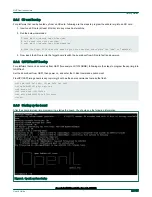
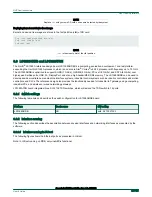
2.3.3 Starting up the board
After the sdcard.img/qspi.img programming, startup the board. You should see the following information.
Figure 2. OpenIL system startup
NXP Semiconductors
Getting started
Open Industrial User Guide, Rev. 1.8, 05/2020
User's Guide
22 / 199